Introduction to Browkies: The Perfect Fusion of Brownies and Cookies
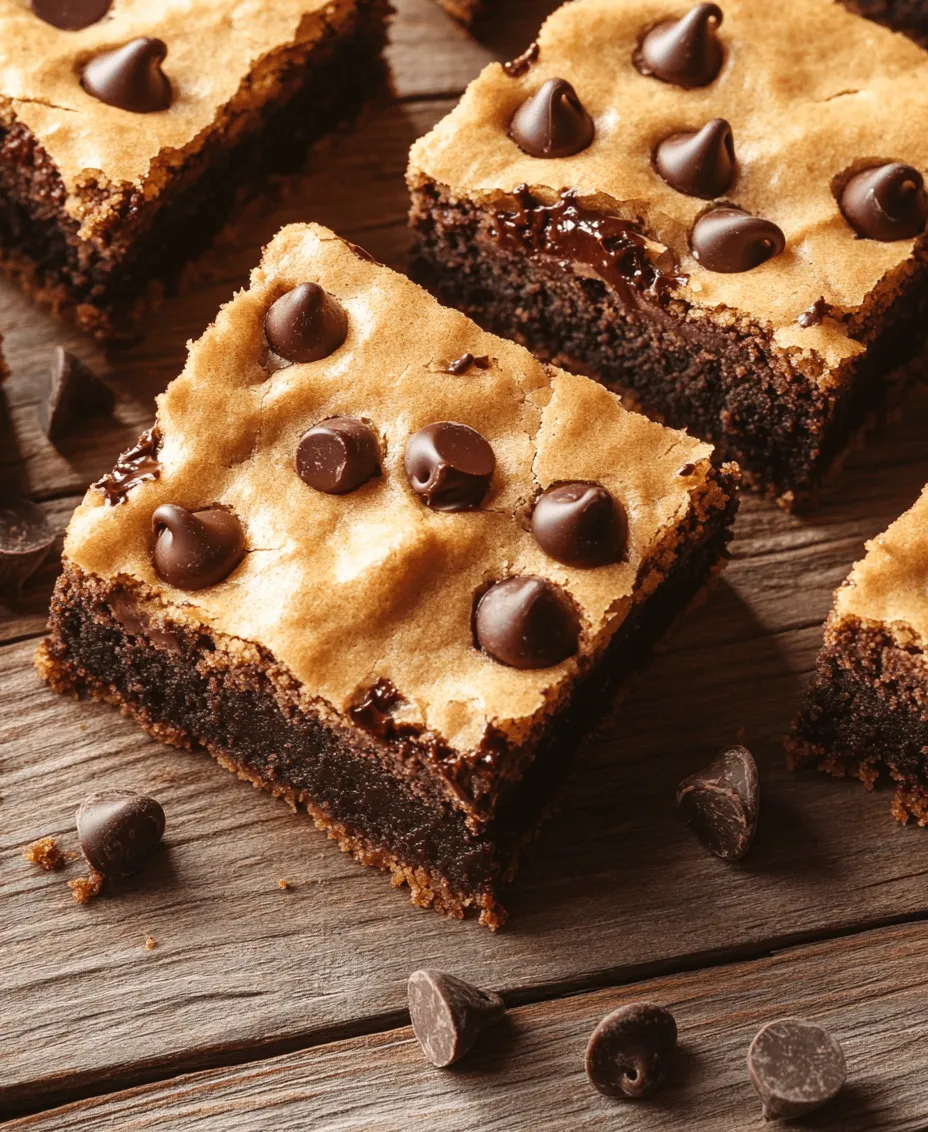
In the realm of desserts, few creations capture the imagination quite like browkies. This delightful hybrid treats aficionados of both brownies and cookies, offering an irresistible combination that satisfies the cravings of dessert lovers everywhere. The browkie, a portmanteau of “brownie” and “cookie,” is celebrated for its distinct layers that seamlessly blend the rich fudginess of brownies with the chewy, comforting texture of cookies.
The magic of browkies lies in their duality: the brownie layer brings an intense chocolate flavor and a dense, fudgy texture, while the cookie layer introduces a delightful chewiness that elevates the overall experience. This unique fusion not only delivers a heavenly taste but also creates a visually appealing dessert that is perfect for various occasions—from casual family gatherings to extravagant holiday celebrations. Whether you enjoy them warm from the oven or chilled, browkies are a guaranteed crowd-pleaser that will keep your friends and family coming back for more.
Browkies have gained popularity in recent years, becoming a go-to dessert for those who can’t decide between a brownie and a cookie. They are versatile, making them suitable for birthday parties, potlucks, or simply a cozy night in with a glass of milk. This recipe for the best fudgy chewy browkies promises to deliver on both flavor and texture, making it a must-try for anyone who appreciates a delicious dessert.
Ingredients Breakdown: Understanding What Goes Into Your Browkies
Before diving into the baking process, it’s essential to understand the ingredients that create these decadent browkies. Each component plays a pivotal role in achieving that perfect balance of flavors and textures that make browkies so irresistible.
Brownie Layer Ingredients
1. Unsalted Butter: The foundation of any great brownie, unsalted butter is crucial for flavor control. It allows you to manage the salt content in the recipe, ensuring that your browkies have a perfectly balanced taste. Using unsalted butter also guarantees that you can incorporate the right amount of salt later in the recipe, enhancing the sweetness and chocolate flavor.
2. Sugars: A combination of granulated sugar and brown sugar is used to create the right texture and sweetness in the brownie layer. Granulated sugar helps with structure, while brown sugar adds moisture and a hint of caramel flavor, resulting in a rich and fudgy brownie.
3. Cocoa Powder: This ingredient is vital for delivering that intense chocolate flavor that brownies are known for. Using high-quality unsweetened cocoa powder will ensure that your browkies are deeply chocolatey and satisfyingly rich.
4. Chocolate Chips: The addition of semi-sweet or dark chocolate chips enhances the fudginess of the brownie layer, creating pockets of molten chocolate that melt in your mouth. They add an extra layer of texture and flavor, making each bite a little piece of heaven.
Cookie Layer Ingredients
1. Softened Butter: For the cookie layer, softened butter is essential. It should be at room temperature, which allows for better incorporation with the sugars, creating a light and fluffy texture. This is key to achieving that classic chewy cookie consistency.
2. Granulated and Brown Sugar: Just like in the brownie layer, a mix of these two sugars is used for the cookie layer. The granulated sugar helps create a crisp edge, while the brown sugar adds moisture and chewiness, balancing the overall texture perfectly.
3. Baking Soda: This leavening agent is crucial for the cookie layer, as it helps the cookies rise, resulting in a lighter texture. It also contributes to the browning process, giving the cookies their appealing color.
4. Salt: A pinch of salt is essential in cookie recipes, as it enhances the flavor of the sugars and chocolate. It helps to balance the sweetness and brings out the depth of flavor in the cookies.
5. Chocolate Chips: Similar to the brownie layer, chocolate chips are included in the cookie layer as well. The variety of chocolate chips you choose can significantly affect the flavor profile of your browkies. Whether you prefer semi-sweet, milk, or even white chocolate chips, they all contribute to the overall indulgence of this dessert.
With a clear understanding of the ingredients that make up these delectable browkies, you can appreciate how each component plays a crucial role in creating the ultimate dessert experience.
Step-by-Step Instructions: Creating the Ultimate Browkies
Now that you have a grasp on the ingredients, it’s time to dive into the preparation of your fudgy chewy browkies. Following these detailed steps will ensure that you achieve the best possible results.
Preheating and Preparing Your Baking Dish
Before you start mixing ingredients, preheat your oven to 350°F (175°C). Preheating is a critical step in the baking process, as it ensures that your browkies bake evenly and thoroughly. An oven that is not hot enough can lead to undercooked centers or uneven textures.
Next, prepare your baking dish. For this recipe, a 9×13-inch baking pan is ideal. To make removal easier after baking, grease the pan generously with butter or non-stick cooking spray. For added security against sticking, you can also line the bottom of the pan with parchment paper, allowing for easy lifting once your browkies are finished baking.
Crafting the Brownie Layer
The first step in creating your browkies is to prepare the brownie layer, which will form the base of your dessert.
1. Melt the Butter: Begin by melting the unsalted butter in a medium saucepan over low heat. It’s important to melt the butter slowly to avoid burning it, which can impart a bitter flavor to your brownies. Stirring constantly will help achieve the perfect consistency.
2. Adding Sugars: Once the butter is melted, remove the saucepan from the heat and whisk in the granulated sugar and brown sugar until well combined. The residual heat from the butter will help dissolve the sugars, ensuring a smooth mixture.
3. Mixing in Cocoa Powder: Next, sift in the cocoa powder and stir until fully incorporated. This step is crucial for reducing clumps and ensuring an even distribution of chocolate flavor throughout the brownie layer.
4. Incorporating Eggs and Vanilla: Allow the mixture to cool slightly before adding the eggs and vanilla extract. This is important because adding cold eggs to a hot mixture can cause them to cook, resulting in an undesirable texture. Whisk the eggs in one at a time, making sure to combine thoroughly after each addition, then stir in the vanilla extract for added flavor.
5. Combining Dry Ingredients: In a separate bowl, whisk together the flour and salt. Gradually fold this dry mixture into the wet ingredients, being careful not to overmix. This will help to maintain the fudgy texture that browkies are known for.
6. Adding Chocolate Chips: Finally, gently fold in the chocolate chips, ensuring they are evenly distributed throughout the brownie batter. This will create pockets of gooey chocolate in your finished browkies.
With the brownie layer complete, it’s time to move on to the cookie layer, which will top off this decadent dessert and create the perfect contrast in texture.
Crafting the Cookie Layer
1. Creaming the Butter and Sugars: In a large mixing bowl, begin by creaming the softened butter with the granulated and brown sugars. Use an electric mixer on medium speed to beat the mixture until it becomes light and fluffy, which typically takes about 2–3 minutes. This step incorporates air into the dough, resulting in a chewy cookie texture.
2. Adding Eggs and Vanilla: Once the butter and sugars are well combined, add the eggs and vanilla extract. Mix until fully incorporated, scraping down the sides of the bowl as needed to ensure everything is well blended.
3. Combining Dry Ingredients: In another bowl, whisk together the flour, baking soda, and salt. Gradually add this dry mixture to the wet ingredients, mixing on low speed until just combined. Be careful not to overmix, as this can lead to tough cookies.
4. Incorporating Chocolate Chips: Just like the brownie layer, fold in your choice of chocolate chips to the cookie dough. This will enhance the overall flavor and create a delightful mixture of textures.
Now that both layers are prepared, it’s time to assemble your browkies and get them ready for the oven.
Stay tuned for the next part, where we will go through the final steps of layering, baking, and enjoying your delicious fudgy chewy browkies!

The Process of Whisking Sugars and Eggs: Why It Matters
Whisking sugars and eggs is a crucial step in preparing the batter for your fudgy chewy browkies. This process not only combines the ingredients but also helps to incorporate air into the mixture, resulting in a lighter texture. When whisking, aim for a mixture that is pale in color and slightly thickened. This indicates that you have adequately aerated the eggs, which contributes to the overall chewiness of the browkies. Incorporating granulated sugar at this stage helps dissolve it effectively, while brown sugar adds moisture and enhances the rich flavor profile of your browkies.
Incorporating Dry Ingredients: The Art of Mixing Without Overdoing It
Once you’ve whisked the sugars and eggs to perfection, it’s time to incorporate your dry ingredients. This is where the art of mixing comes into play. Gently sift together the flour, cocoa powder, baking powder, and salt. When adding the dry ingredients to the wet mixture, do so in batches. Use a spatula or wooden spoon and fold the dry mixture into the wet ingredients until just combined. Overmixing can develop gluten, leading to a tougher texture rather than the desired fudgy consistency. Aim for a batter that is slightly lumpy; a few flour streaks are perfectly fine.
Folding in Chocolate Chips: Techniques for Even Distribution
Incorporating chocolate chips into your batter adds delightful pockets of melty chocolate goodness throughout your browkies. To ensure even distribution, sprinkle the chocolate chips over the surface of the batter and use a folding technique. Gently lift the batter from the bottom of the bowl and fold it over the chocolate chips. Rotate the bowl as you fold, ensuring that all the chips are evenly coated and mixed in without overworking the batter. This method helps maintain the fudgy texture while ensuring a chocolatey bite in every piece.
Assembling the Cookie Layer
Creating the cookie layer is a vital part of achieving the perfect browkie. Start by preparing your cookie dough using softened butter and sugars. In a separate bowl, cream the butter with both granulated and brown sugars until the mixture is light and fluffy. This typically takes about 3 to 5 minutes of mixing. You’re looking for a texture that is airy and pale, which means the sugars have been properly incorporated into the butter.
Next, add the eggs and vanilla extract to the creamed mixture, mixing just until combined. In another bowl, combine the dry ingredients for the cookie layer: flour, baking soda, and a pinch of salt. Gradually add this mixture to the wet ingredients, mixing until just combined. As with the brownies, be careful not to overmix; a few flour streaks are acceptable.
The Critical Role of Mixing Wet and Dry Ingredients Properly
Mixing wet and dry ingredients properly is essential for achieving the ideal texture in your browkies. Once the dry ingredients are added to the wet mixture, fold them together gently. Overmixing can lead to dense browkies that lack the desired fudginess. The key is to mix just until you no longer see any flour; this ensures that the gluten doesn’t develop too much, keeping your browkies soft and chewy.
Creating the Marbled Effect: Tips for Gentle Mixing
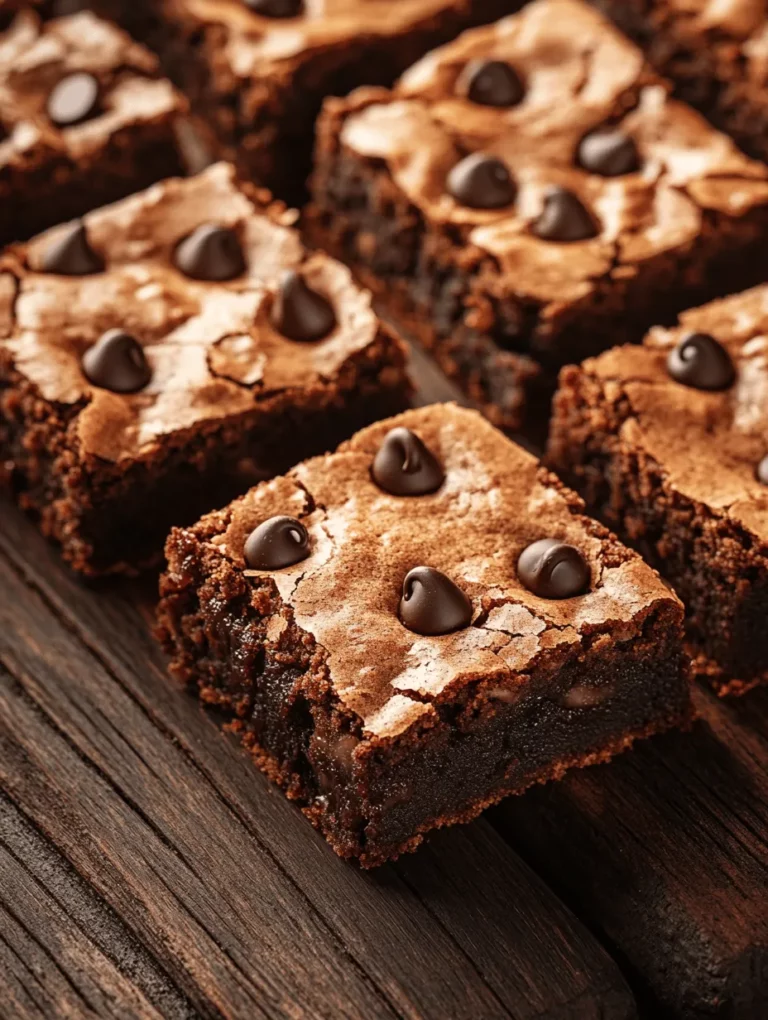
To achieve the signature marbled effect of browkies, carefully layer the brownie batter and cookie dough in the baking pan. Start with a layer of brownie batter, followed by dollops of cookie dough placed evenly on top. Use a knife or a skewer to gently swirl the two batters together, creating a beautiful marbled pattern. Be cautious not to overmix; the goal is to create swirls without completely combining the two layers. This technique not only enhances the aesthetics of your browkies but also ensures that each bite offers a delightful blend of flavors.
Baking the Browkies
With your batter beautifully assembled, it’s time to bake your browkies. Preheat your oven to 350°F (175°C) and line a baking dish with parchment paper. Pour the marbled batter into the prepared dish, spreading it evenly into the corners. Bake for 25 to 30 minutes, keeping a close eye on them as they near the end of the baking time.
Indicators for Doneness: How to Know When They’re Ready
To determine if your browkies are done, perform the toothpick test. Insert a toothpick into the center of the browkies; it should come out with a few moist crumbs attached but not wet batter. The edges should appear set and slightly puffed, while the center remains soft. Remember, browkies continue to cook slightly after being removed from the oven, so it’s better to err on the side of underbaking for that chewy texture.
Importance of Cooling Time Before Cutting
Once your browkies are baked to perfection, it’s crucial to let them cool in the pan for about 10-15 minutes. This cooling period allows the edges to set while the center remains gooey. After cooling slightly, transfer the browkies to a wire rack to cool completely. Cutting them while they are still warm can result in a messy, gooey texture that’s difficult to handle, while completely cooling yields clean, beautiful squares.
Serving Suggestions: Enjoying Your Browkies to the Fullest
Browkies can be enjoyed in a variety of ways, making them an excellent choice for any dessert table. For the best experience, serve them warm, allowing the chocolate chips to maintain that melty texture. Alternatively, they are also delightful at room temperature, with a slightly firmer texture that still retains its chewiness.
Pairing suggestions are endless. A scoop of vanilla ice cream adds a creamy contrast to the rich chocolate flavor. Whipped cream can elevate the indulgence, or a drizzle of chocolate or caramel sauce can take your browkies to the next level. For a fun twist at gatherings, consider creating a browkie sundae bar where guests can build their own dessert creations with toppings like nuts, sprinkles, and various ice cream flavors.
Storage and Shelf Life: Keeping Your Browkies Fresh
To keep your browkies fresh, proper storage is key. Store them in an airtight container at room temperature for up to a week. They should retain their soft, chewy texture, making them perfect for enjoying throughout the week.
For longer storage, browkies freeze exceptionally well. To freeze, cut them into squares and layer them with parchment paper in an airtight container or freezer bag. Browkies can last in the freezer for up to three months. When you’re ready to indulge, simply thaw them at room temperature or warm them slightly in the microwave for a few seconds.
Conclusion: Embracing the Joy of Browkies
The unique combination of fudgy brownie and chewy cookie makes browkies an irresistible treat that satisfies every sweet tooth. Their rich chocolate flavor, combined with the delightful texture, makes them a perfect dessert choice for any occasion, from casual family dinners to festive gatherings.
Don’t hesitate to try this browkie recipe and experience the joy of baking these delicious treats. With simple ingredients and easy steps, you can create a dessert that’s sure to impress. Whether enjoyed warm with a scoop of ice cream or served at room temperature, browkies are versatile enough to be enjoyed any way you like. Indulge in the delightful world of browkies, and share them with friends and family for a sweet experience everyone will love.

