Introduction
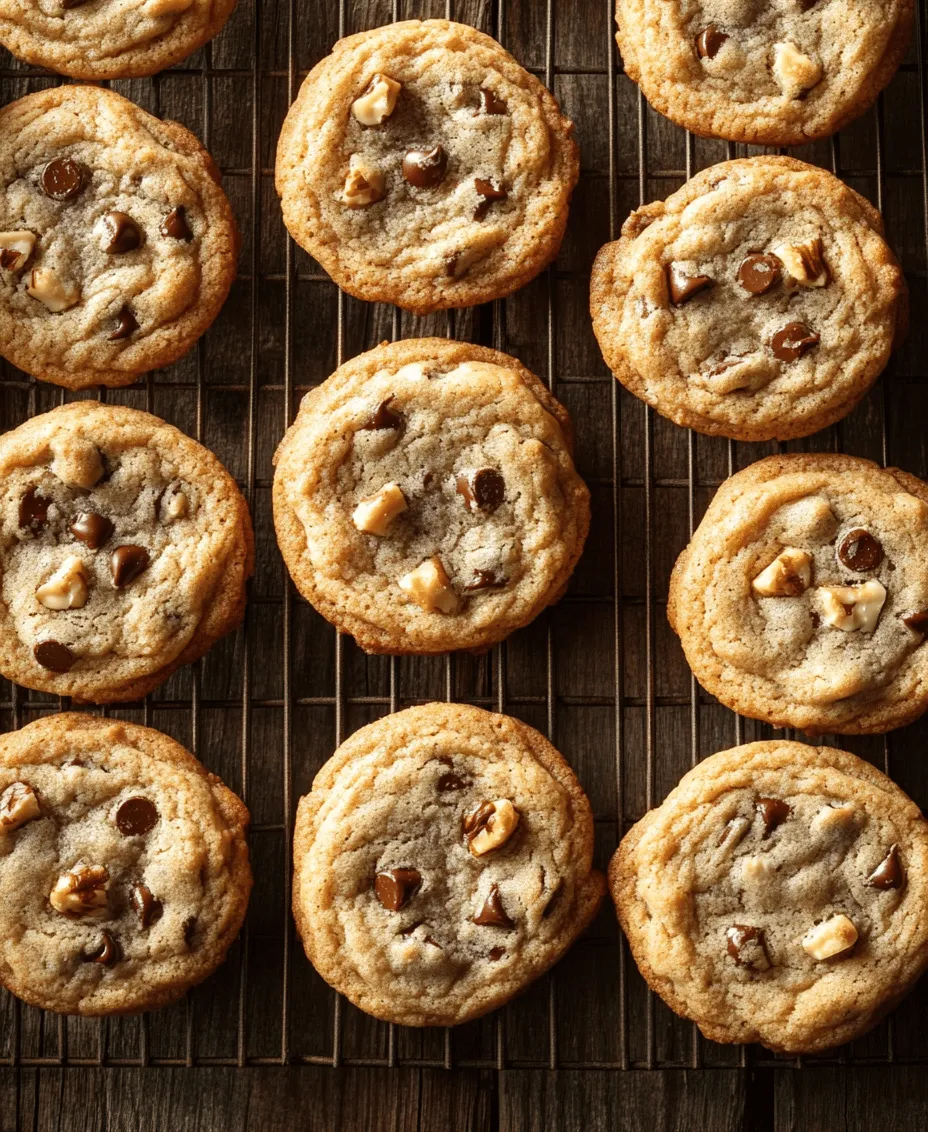
There are few things in life that evoke as much joy and nostalgia as the aroma of freshly baked chocolate chip cookies wafting through the kitchen. For many, the act of baking cookies is more than just a culinary endeavor; it’s a cherished tradition that brings back memories of childhood, family gatherings, and the simple pleasures of life. The chocolate chip cookie, in particular, stands out as a timeless classic that has been loved and perfected over generations. Whether enjoyed warm from the oven or savored days later, a chocolate chip cookie has the remarkable ability to brighten even the dullest of days.
When it comes to baking the perfect chocolate chip cookie, the importance of quality ingredients cannot be overstated. Each component plays a critical role in achieving that ideal balance of chewy and crispy textures, buttery richness, and a depth of flavor that delights the palate. This recipe stands out among others not only for its simplicity but also for the attention to detail that ensures a cookie that is consistently delicious. With a few well-chosen ingredients and a straightforward process, you’ll be well on your way to creating a batch of cookies that will impress friends and family alike.
In this article, we will take a closer look at the essential ingredients that make up the best chocolate chip cookie recipe and delve into the preparation steps that guarantee delicious results every time. By understanding the roles of each ingredient and following the outlined steps, you’ll be equipped to whip up cookies that are not just good but truly exceptional.
Understanding the Ingredients
To create the best chocolate chip cookies, it’s crucial to understand the role each ingredient plays in the overall outcome. Here’s a detailed breakdown of the key components that contribute to the perfect cookie:
All-Purpose Flour
All-purpose flour serves as the foundation of your cookie dough. It provides the structure and stability necessary for the cookies to hold their shape while baking. The amount of flour used can significantly affect the texture of your cookies; too much flour can lead to a dry, crumbly cookie, while too little can result in an overly flat and greasy one. The ideal balance of flour creates a cookie that is chewy in the center with a slight crisp on the edges.
Baking Soda
Baking soda is a vital ingredient in cookie recipes, acting as a leavening agent that helps the cookies rise. When combined with the acidity of brown sugar, baking soda produces carbon dioxide bubbles that contribute to a light and airy texture. This reaction occurs during baking, giving your cookies the perfect lift. It’s essential to measure baking soda accurately, as too much can lead to an unpleasant metallic taste, while too little can result in dense cookies.
Unsalted Butter
Using unsalted butter is crucial for flavor control in your cookies. Salted butter contains varying levels of salt, which can affect the overall taste of your cookies and make it challenging to achieve the desired flavor profile. Unsalted butter allows you to manage the amount of salt added to the recipe, ensuring a balanced sweetness. Additionally, butter contributes to the rich flavor and chewy texture of the cookies, so using high-quality butter is paramount in achieving delicious results.
Sugars
The combination of granulated and brown sugar in this recipe is what gives these cookies their signature flavor and texture. Granulated sugar helps the cookies spread, creating a thin and crisp edge, while brown sugar adds moisture and a slight chewiness due to its molasses content. The balance between these two types of sugar is key; a higher ratio of brown sugar will yield a softer, chewier cookie, while more granulated sugar will create a crisper texture.
Salt
While it may seem counterintuitive to add salt to a sweet recipe, salt plays an important role in enhancing the overall flavor profile of chocolate chip cookies. It balances the sweetness of the sugars and brings out the richness of the butter and chocolate. A pinch of salt can make a significant difference in the final taste, elevating the flavors and creating a more complex and satisfying cookie.
Vanilla Extract
No chocolate chip cookie recipe would be complete without vanilla extract. This essential flavor booster adds warmth and depth to the cookies, enhancing the overall taste. When choosing a vanilla extract, opt for pure vanilla rather than imitation vanilla for a more authentic and robust flavor. A little goes a long way; just a teaspoon is enough to make a noticeable impact.
Eggs
Eggs serve several purposes in cookie recipes. They act as a binding agent, helping to hold the ingredients together while providing moisture to the dough. The fat in egg yolks contributes to a richer flavor and a more tender texture. Additionally, eggs help the cookies rise and create a soft, chewy interior. For best results, use room temperature eggs, as they incorporate more easily into the dough.
Chocolate Chips
The star of any chocolate chip cookie is, of course, the chocolate chips. When selecting chocolate chips, you have options—semisweet, milk chocolate, or even dark chocolate. Semisweet chocolate chips are the classic choice, offering a perfect balance of sweetness and richness. However, you can customize your cookies by mixing different types of chocolate or even adding chunks of chocolate for a more decadent treat. The quality of chocolate you use can greatly affect the final flavor, so choose a brand you love.
Nuts (Optional)
While not essential, nuts can add an extra layer of texture and flavor to your chocolate chip cookies. Chopped walnuts or pecans are popular choices that complement the sweetness of the chocolate. If you decide to include nuts, be sure to chop them coarsely to ensure they mix well into the dough without overpowering the cookie.
Preparation Steps for Perfect Cookies
Now that we’ve covered the essential ingredients, let’s dive into the preparation steps that will guide you in making the best chocolate chip cookies. Following these steps carefully will help you achieve the perfect dough consistency and ultimately delicious cookies.
Preheat the Oven
Before you begin mixing your ingredients, it’s important to preheat your oven. Preheating ensures that your cookies bake evenly and at the correct temperature from the start. Set your oven to 350°F (175°C) and allow it to heat up fully while you prepare your cookie dough.
Mixing Dry Ingredients
Start by whisking together the dry ingredients in a separate bowl. Combine the all-purpose flour, baking soda, and salt, mixing well to ensure the baking soda is evenly distributed. This step is crucial as it prevents clumps of baking soda from forming in the dough, which can lead to uneven rising and flavor.
The Creaming Method
The creaming method is a fundamental technique in cookie baking that significantly impacts texture. In a large mixing bowl, beat the unsalted butter and both sugars together until the mixture is light and fluffy. This process incorporates air into the butter, which helps the cookies rise during baking and contributes to a tender texture.
Use an electric mixer on medium speed for about 2-3 minutes, pausing to scrape down the sides of the bowl as needed. It’s essential not to rush this step; properly creamed butter and sugar will result in a better final product.
Incorporating Eggs and Vanilla
Once the butter and sugar mixture is fluffy, it’s time to add the eggs and vanilla extract. Add the eggs one at a time, mixing well after each addition. This ensures that the eggs are fully incorporated, which helps create a uniform dough. After adding the eggs, pour in the vanilla extract and mix until combined.
The Balance of Wet and Dry Ingredients
Now that your wet ingredients are ready, it’s time to add the dry mixture to the bowl. Gradually incorporate the dry ingredients into the wet mixture, mixing gently until just combined. Avoid overmixing at this stage; overworking the dough can lead to tough cookies. The goal is to achieve a soft, slightly sticky dough that can hold its shape while baking.
In the next part of this article, we will continue with the final steps of the preparation, including how to portion the dough, bake the cookies, and tips to achieve the best possible results. Stay tuned as we explore how to ensure your chocolate chip cookies come out perfectly every time!

Folding in Chocolate Chips and Nuts
Once you have your cookie dough ready, it’s time to fold in the chocolate chips and nuts. This step is crucial for achieving an even distribution throughout the cookie dough, ensuring that every bite is filled with a delightful combination of flavors and textures.
To perfectly fold in your chocolate chips and nuts, follow these techniques:
1. Use a Spatula: A rubber spatula is ideal for this task. It allows you to gently lift and turn the dough without overworking it.
2. Divide and Conquer: If your dough is particularly large, consider dividing it into halves or quarters. This will make it easier to mix in the chocolate chips and nuts evenly.
3. Gentle Motion: Use a folding technique rather than stirring vigorously. This means gently bringing the dough from the bottom to the top, rotating the bowl as you go. This ensures that the chocolate chips and nuts are distributed without breaking them or overmixing the dough.
Baking the Cookies
Now that your dough is ready, it’s time to bake your cookies. The baking process is where your cookie dreams come to life, transforming the raw dough into the mouthwatering treats you envision.
Proper Spacing on the Baking Sheet
When placing your cookie dough onto the baking sheet, proper spacing is key to achieving that perfect cookie. Leave at least 2 inches between each mound of dough. This spacing allows the cookies to spread evenly as they bake, preventing them from merging into one giant cookie. If you’re using a standard baking sheet, you can typically fit about 12 cookies per sheet.
Understanding the Baking Time
Baking time can vary depending on your oven and the size of your cookies. Generally, a baking time of 10 to 12 minutes at 350°F (175°C) is ideal. For the perfect balance between chewy and crispy, look for the following signs during baking:
– Chewy Cookies: Remove the cookies from the oven when the edges are lightly golden, but the center still looks slightly underbaked. They will continue to cook as they cool on the baking sheet.
– Crispy Cookies: If you prefer a crunchier texture, allow the cookies to bake until they are golden brown all over.
Signs to Look for When Cookies Are Done
Knowing when your cookies are perfectly baked is essential for avoiding undercooked or overcooked results. Here are the signs to watch out for:
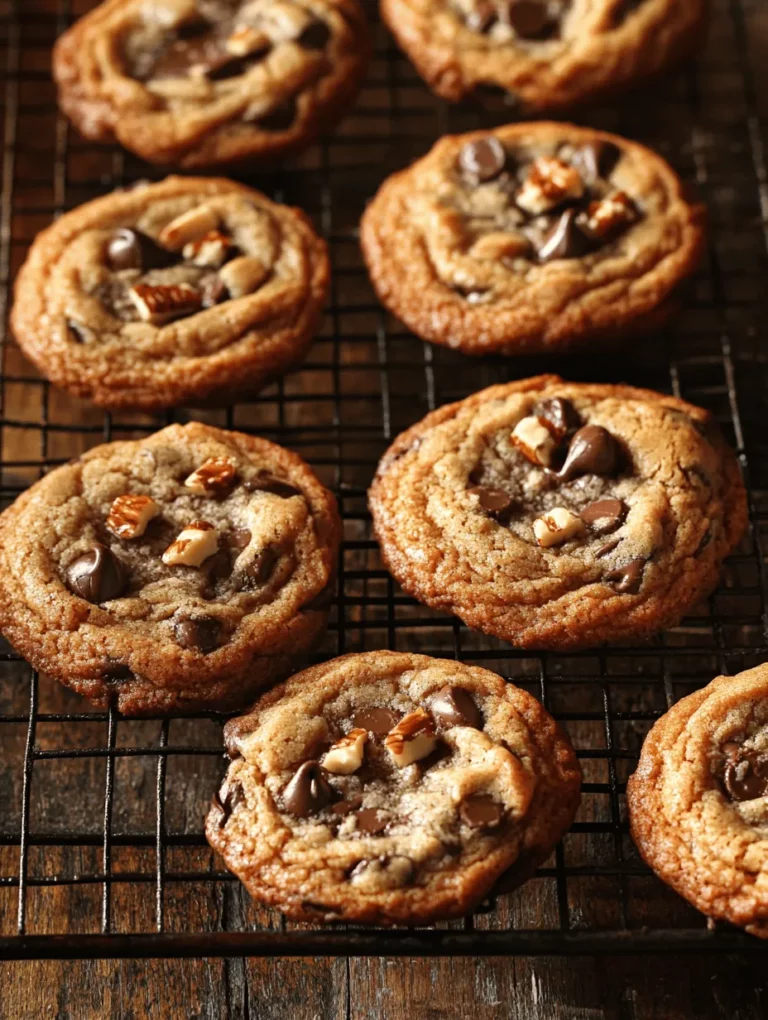
– Color: The cookies should be golden brown around the edges, with a slightly softer, paler center.
– Texture: Gently press the center of a cookie; it should spring back but still feel soft to the touch. If it leaves an indention, they may need a minute or two more.
– Smell: The aroma of freshly baked cookies wafting through your kitchen is a sure sign that they are nearing completion.
Cooling Techniques
After removing your cookies from the oven, let them rest on the baking sheet for about 5 minutes. This resting period allows the cookies to firm up, making them easier to transfer to a cooling rack without falling apart. Cool them completely on the rack to allow steam to escape, which helps maintain their texture and prevents sogginess.
Letting cookies rest also enhances their flavor. As they cool, the ingredients settle, and the taste develops further, leading to a more satisfying cookie experience.
Storage and Serving Suggestions
Once you’ve baked and cooled your cookies, proper storage is essential to maintain their freshness and flavor.
Best Practices for Storing Cookies
– Room Temperature: Store your cookies in an airtight container at room temperature for up to one week. This will keep them soft and delicious.
– Freezing: For long-term storage, freeze your cookies in a single layer on a baking sheet until solid, then transfer them to a freezer-safe bag. They can last for up to three months. When you’re ready to enjoy, simply thaw them at room temperature or pop them in the microwave for a few seconds.
Creative Ideas for Serving
Enhance your chocolate chip cookie experience with these creative serving suggestions:
– Milk Pairing: A classic pairing, serve your cookies with a glass of cold milk. The creaminess of the milk complements the chocolate, creating a delightful taste sensation.
– Ice Cream Sandwiches: For a fun twist, sandwich a scoop of your favorite ice cream between two cookies. This makes for a perfect summer treat!
– Coffee Companion: Enjoy your cookies with a warm cup of coffee or tea. The bitterness of the beverage balances the sweetness of the cookies, making them an ideal match.
Suggestions for Personalizing the Recipe
Don’t hesitate to make this recipe your own! Here are some ideas for personalization:
– Add Oats: Incorporate rolled oats for a chewy texture and added nutrition.
– Different Chocolate Types: Experiment with white chocolate, dark chocolate, or even butterscotch chips for a different flavor profile.
– Nuts and Seeds: Customize your cookies with walnuts, pecans, or even sunflower seeds for added crunch and nutrition.
Variations of the Classic Recipe
The beauty of chocolate chip cookies lies in their versatility. Here are some variations to consider:
Exploring Alternative Ingredients
For those with dietary restrictions, there are plenty of ways to enjoy chocolate chip cookies without compromising on taste:
– Gluten-Free Options: Substitute regular flour with a gluten-free flour blend. Ensure you also check that your chocolate chips are gluten-free.
– Vegan Options: Replace the butter with coconut oil or vegan butter, and use a flaxseed or chia seed egg as a binder instead of a regular egg.
Flavor Variations
Get creative by adding unique flavors to your cookies:
– Spices: Incorporate a pinch of cinnamon or nutmeg for a warm, spiced cookie.
– Chocolate Types: Use a mix of dark, milk, and white chocolate chips for a multi-dimensional chocolate experience.
Seasonal Twists
Make your cookies festive by adding seasonal ingredients:
– Pumpkin Spice: For fall, incorporate pumpkin puree and spices like cinnamon and nutmeg for a pumpkin chocolate chip cookie.
– Peppermint: Around the holidays, add crushed peppermint candies for a refreshing twist.
The Science Behind the Cookie
Understanding the science behind baking can elevate your cookie-making skills.
The Maillard Reaction
The Maillard reaction is a chemical reaction that occurs between amino acids and sugars when food is heated. This reaction is responsible for the browning of your cookies, enhancing their flavor. The more complex the flavors, the more enjoyable the cookie!
How Ingredient Ratios Affect Taste and Texture
The balance of ingredients plays a crucial role in determining the final taste and texture of your cookies. For instance:
– Fat Content: More butter leads to a softer cookie, while less can yield a crisper texture.
– Sugar Types: Brown sugar adds moisture and chewiness, while granulated sugar contributes to a crisper cookie.
The Importance of Resting the Dough
Resting cookie dough allows the flour to fully hydrate and the flavors to meld. Ideally, let your dough rest in the fridge for at least 30 minutes before baking. This not only enhances the flavor but also affects the texture by allowing the cookies to spread less during baking.
Conclusion
In summary, achieving the best chocolate chip cookies requires attention to detail, from choosing the right ingredients to perfecting your baking technique. Remember to fold in your chocolate chips and nuts gently, space them appropriately on the baking sheet, and monitor the baking time for optimal results.
Storing your cookies properly and experimenting with variations can enhance your cookie-baking experience. Whether you prefer classic flavors or seasonal twists, the joy of baking and sharing delicious cookies with loved ones is unmatched.
So, gather your ingredients, fire up the oven, and embark on a delightful baking adventure. Happy baking!

