Introduction
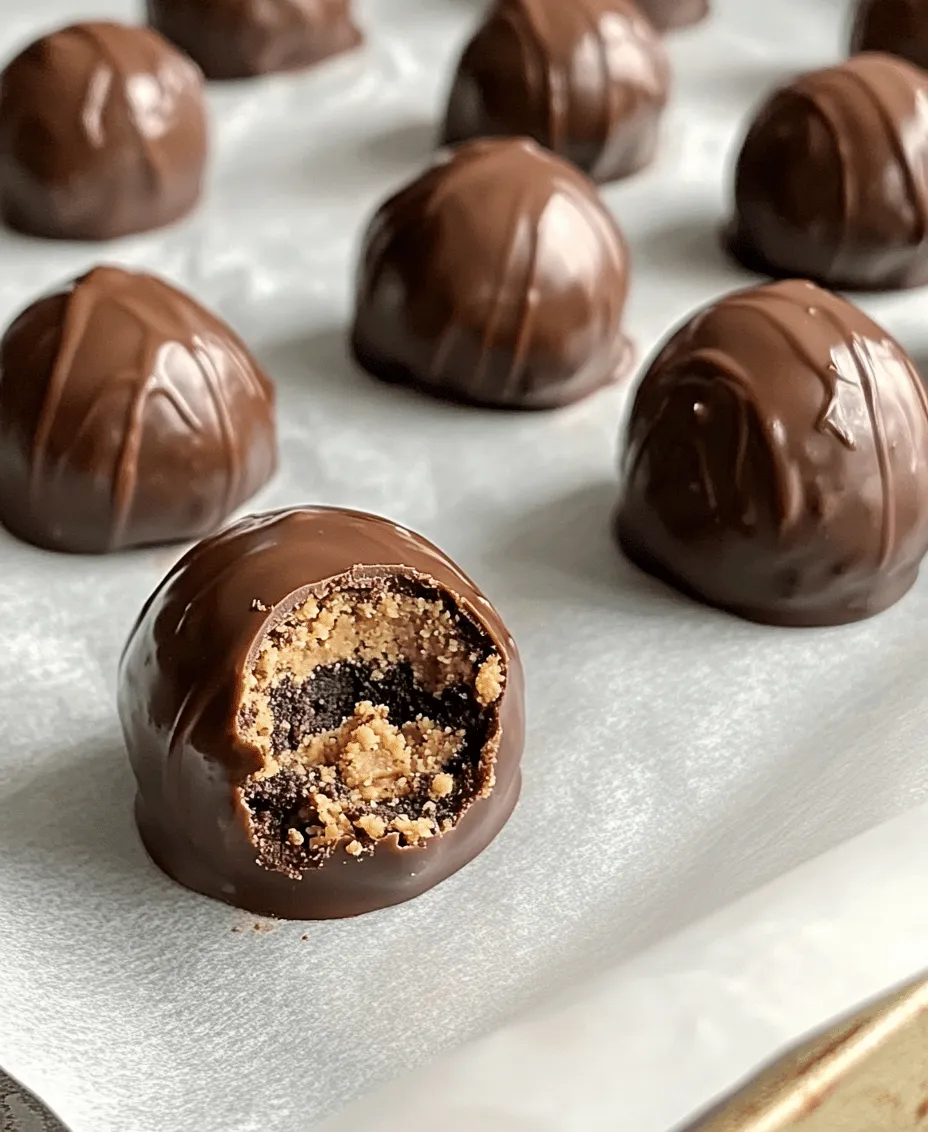
In the ever-evolving world of desserts, no-bake recipes have taken center stage, captivating dessert lovers with their convenience and delightful taste. Among these easy-to-make treats, Peanut Butter Bliss Oreo Balls stand out as a crowd favorite. This recipe combines the irresistible flavors of creamy peanut butter, crunchy Oreo cookies, and rich chocolate to create a dessert that is both indulgent and satisfying. Whether you’re planning a special gathering, a holiday celebration, or just a casual get-together with friends, these Oreo balls are sure to impress.
What makes Peanut Butter Bliss Oreo Balls particularly appealing is their simplicity. With just a few ingredients and minimal preparation time, anyone can whip up this delectable treat in no time. This recipe is perfect for novice bakers or anyone looking to satisfy their sweet tooth without the fuss of traditional baking. The delightful combination of flavors and textures make these Oreo balls a sweet sensation that can be enjoyed by all.
The Delight of No-Bake Desserts
No-bake desserts are a category of treats that don’t require an oven, making them an excellent option for those who may not have access to one or prefer an easier cooking method. They typically involve mixing ingredients together, chilling them in the refrigerator, and then serving them cold or at room temperature. The primary advantage of no-bake desserts is their convenience. Many people lead busy lives and appreciate recipes that save time while still delivering delicious results.
In addition to their ease of preparation, no-bake desserts are incredibly versatile and can accommodate various dietary preferences. For instance, they can easily be made vegetarian, and many recipes can be adapted to be gluten-free or dairy-free with a few simple ingredient swaps. This adaptability allows dessert enthusiasts to enjoy sweet treats without compromising their dietary restrictions.
No-bake desserts also offer a perfect solution for hot summer months when turning on the oven can make a kitchen unbearably warm. Instead, these recipes allow you to delight in a sweet creation while keeping your kitchen cool and comfortable.
Ingredients Breakdown
To create the perfect Peanut Butter Bliss Oreo Balls, it’s essential to use high-quality ingredients that will enhance the overall flavor and texture of the dessert. Here’s a detailed breakdown of each ingredient used in this recipe:
1. Oreos
The classic chocolate sandwich cookies serve as the foundation of this recipe. Their rich cocoa flavor and crunchy texture create a delightful contrast to the creamy peanut butter filling. For those with dietary restrictions, gluten-free Oreos are available and can be used without compromising taste.
2. Creamy Peanut Butter
Peanut butter is the star of this recipe, contributing a smooth, creamy texture and a nutty flavor that pairs perfectly with the chocolate and cookie components. Opt for a high-quality, natural peanut butter without added sugars or oils for the best taste. If you have nut allergies, alternatives like sun butter or soy nut butter can provide a similar creamy consistency.
3. Cream Cheese
Adding cream cheese not only enhances the creaminess of the filling but also adds a slight tanginess that balances the sweetness of the Oreos. For a lower-fat option, you can use reduced-fat cream cheese without sacrificing flavor.
4. Chocolate Coating
A rich chocolate coating envelops the Oreo balls, adding a glossy finish and an extra layer of decadence. You can use melting chocolate, chocolate chips, or even white chocolate for a different flavor profile. Be sure to choose high-quality chocolate for the best results.
5. Optional Toppings
For those who want to elevate their Peanut Butter Bliss Oreo Balls, consider adding toppings such as crushed nuts, sprinkles, or a drizzle of melted chocolate. These options not only enhance the visual appeal but also contribute additional flavors and textures.
Nutritional Information
Understanding the nutritional content of the key ingredients can help you make informed choices. For instance, peanut butter is a good source of protein and healthy fats, while Oreos provide a delightful sweetness but are lower in nutritional value. Balancing indulgence with health is essential, so consider portion sizes when enjoying these treats.
Step-by-Step Instructions for Peanut Butter Bliss Oreo Balls
Creating Peanut Butter Bliss Oreo Balls is straightforward and enjoyable. Here’s a clear and concise breakdown of the preparation process to help you achieve these delicious treats:
Step 1: Gather Your Ingredients
Before you start, gather all the ingredients listed above. Having everything on hand will make the preparation process smoother and more efficient.
Step 2: Crush the Oreos
Using a food processor, crush the Oreos into fine crumbs. If you don’t have a food processor, you can place the cookies in a resealable plastic bag and crush them using a rolling pin. Aim for a crumb consistency that resembles sand for the best texture.
Step 3: Mix the Filling
In a mixing bowl, combine the crushed Oreos with creamy peanut butter and softened cream cheese. Using a spatula or a hand mixer, blend the ingredients until they form a smooth, cohesive mixture. This step is crucial, as it ensures that the flavors meld together perfectly.
Step 4: Form the Balls
Once the mixture is well combined, use your hands to scoop out small portions and roll them into balls, approximately one inch in diameter. Place the formed balls on a baking sheet lined with parchment paper. This will prevent them from sticking and make cleanup easier.
Step 5: Chill the Balls
To help the balls firm up, place the baking sheet in the refrigerator for about 30 minutes. This chilling time allows the flavors to develop and makes them easier to coat in chocolate later.
Step 6: Prepare the Chocolate Coating
While the Oreo balls chill, melt your chocolate of choice in a microwave-safe bowl. Heat in 30-second intervals, stirring in between, until the chocolate is completely melted and smooth. If you prefer a thinner coating, you can add a teaspoon of vegetable oil to the melted chocolate to achieve the desired consistency.
Step 7: Coat the Balls
Once the Oreo balls have chilled, remove them from the refrigerator. Using a fork or a toothpick, dip each ball into the melted chocolate, ensuring it’s completely coated. Let any excess chocolate drip off before placing the coated balls back onto the parchment-lined baking sheet.
Step 8: Optional Toppings
If you wish to add toppings, now is the perfect time. While the chocolate coating is still wet, sprinkle crushed nuts, sprinkles, or drizzle additional melted chocolate over the top for an added touch.
Step 9: Final Chill
To set the chocolate coating, return the Oreo balls to the refrigerator for another 15-20 minutes until the chocolate is firm.
By following these simple steps, you’ll have a delicious batch of Peanut Butter Bliss Oreo Balls ready to enjoy in no time. The combination of creamy peanut butter, crunchy Oreos, and rich chocolate creates a treat that is sure to be a hit with friends and family alike.


