Introduction
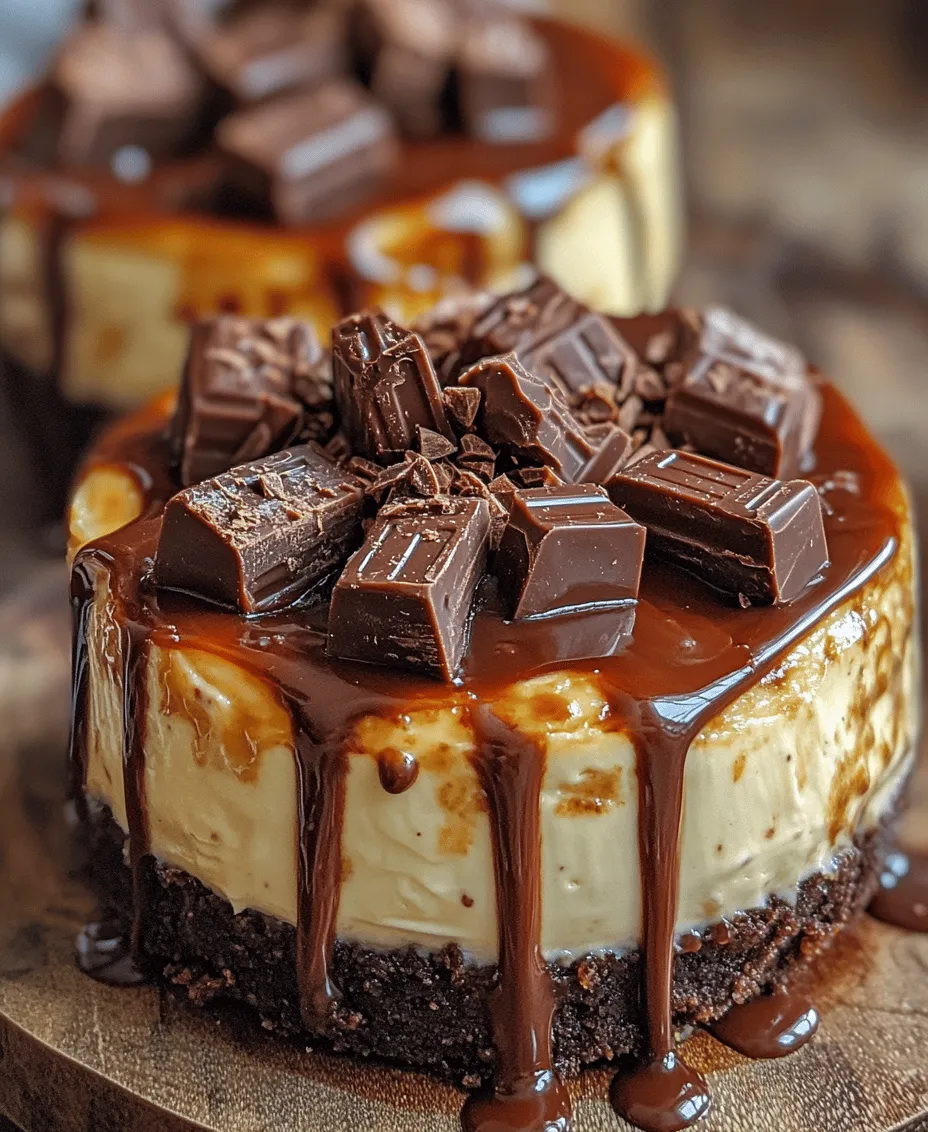
No-bake desserts have become a culinary trend that offers a sweet escape for those who crave indulgence without the complexity of traditional baking. One standout recipe in this delightful category is the No-Bake Kit Kat Cheesecakes. This delectable treat combines the rich, creamy texture of cheesecake with the satisfying crunch of Kit Kat bars, creating a dessert that is sure to please any crowd. Whether you’re planning a festive gathering, celebrating a special milestone, or simply seeking to satisfy a sweet tooth, these cheesecakes deliver both flavor and nostalgia, making them an ideal choice for any occasion.
The concept of no-bake cheesecakes has gained immense popularity in recent years, appealing to both novice bakers and seasoned chefs alike. They require minimal effort while providing maximum satisfaction, making them a go-to dessert for those who want to impress without the stress of an oven. In this article, we will guide you through the process of creating these irresistible No-Bake Kit Kat Cheesecakes, covering everything from the essential ingredients to the final presentation that will leave your guests in awe.
Understanding No-Bake Cheesecakes
No-bake cheesecakes are a delightful fusion of simplicity and flavor. Unlike traditional cheesecakes that require hours of baking and cooling, no-bake versions utilize the magic of refrigeration to set the cheesecake filling, resulting in a creamy texture that is both airy and rich. The origins of no-bake cheesecakes can be traced back to the early 20th century, when cooks began experimenting with gelatin and whipped cream to create desserts that didn’t require baking. This innovation has since evolved into a beloved dessert category, with countless variations and flavors to explore.
One of the primary benefits of no-bake desserts is their ease of preparation. The mixing process is straightforward, often involving just a few steps to combine the ingredients. This makes them an excellent option for busy individuals or those who may not feel confident in their baking skills. The resulting desserts are typically rich and creamy, thanks to the combination of cream cheese and heavy cream, which creates a luscious mouthfeel that pairs perfectly with various toppings and mix-ins.
Ingredient Breakdown
To create the perfect No-Bake Kit Kat Cheesecakes, understanding the role of each ingredient is crucial. Here’s a closer look at what you’ll need for this delightful dessert.
Crust
The crust serves as the foundation of the cheesecake, and for this recipe, we will utilize chocolate cookie crumbs to add a rich flavor that complements the sweetness of the filling. Chocolate cookies, such as Oreos or any similar brand, are crushed into fine crumbs and combined with melted butter to create a sturdy base. The crust not only provides structure to the cheesecake but also enhances the overall flavor profile, contributing a hint of chocolatey goodness that pairs seamlessly with the creamy filling.
Cheesecake Filling
The filling is the star of the show in any cheesecake, and the No-Bake Kit Kat Cheesecakes are no exception. The key components of the filling include:
– Cream Cheese: This is the primary ingredient that gives the cheesecake its characteristic creaminess and tanginess. Softened cream cheese blends beautifully with the other ingredients, ensuring a smooth texture.
– Powdered Sugar: This sweetener dissolves easily and adds a delicate sweetness to the filling. It balances the tang of the cream cheese while also contributing to the overall creamy texture.
– Vanilla Extract: A splash of vanilla extract enhances the flavor profile, adding depth and a hint of warmth that complements the chocolate and cream cheese.
– Lemon Juice: The acidity from lemon juice brightens the cheesecake filling and helps to balance the sweetness. It also contributes to the overall creamy texture by preventing the filling from becoming too dense.
– Heavy Cream: Whipped heavy cream adds lightness to the filling, making it airy and indulgent. The incorporation of whipped cream is key to achieving that luxurious mouthfeel that everyone loves in a cheesecake.
Chocolate Ganache
Ganache is a decadent mixture of chocolate and cream that adds a rich, glossy finish to the No-Bake Kit Kat Cheesecakes. In this recipe, the chocolate ganache serves as both a topping and a layer of flavor.
To create the ganache, you’ll need high-quality chocolate—dark, milk, or a combination of both works best. The cream is heated and then poured over the chopped chocolate, allowing it to melt and fuse into a smooth, luscious mixture. The ganache not only enhances the aesthetics of the cheesecake but also elevates the overall flavor, adding a deep chocolaty richness that pairs beautifully with the other components.
Kit Kat Bars
No discussion of No-Bake Kit Kat Cheesecakes would be complete without mentioning the iconic Kit Kat bars. These crispy chocolate-covered wafers add a delightful crunch and unique flavor to the cheesecake, making them an essential ingredient in this recipe. The combination of the creamy filling and the crunchy Kit Kat pieces creates a satisfying contrast that will keep everyone coming back for more.
Kit Kat bars are versatile and can be substituted with other chocolate bars if desired; however, the original flavor remains a classic favorite. The addition of chopped Kit Kats to the filling and as a garnish not only enhances the flavor but also adds visual appeal, inviting your guests to dig in.
Step-by-Step Preparation Guide
Now that we have a solid understanding of the ingredients involved in creating No-Bake Kit Kat Cheesecakes, let’s dive into the step-by-step preparation process. Follow these detailed instructions to ensure your cheesecakes turn out perfectly every time.
Step 1: Prepare the Crust
1. Gather Your Ingredients: Start by gathering your chocolate cookie crumbs and melted butter. You will need about 2 cups of chocolate cookie crumbs and ½ cup of unsalted butter, melted.
2. Mix the Crust: In a mixing bowl, combine the chocolate cookie crumbs and melted butter. Stir until the crumbs are evenly coated, and the mixture resembles wet sand.
3. Press into the Pan: Next, take a 9-inch springform pan or individual dessert cups and firmly press the crumb mixture into the bottom. Use the back of a measuring cup or your fingers to ensure an even layer. The crust should be compact enough to hold its shape once set.
4. Chill the Crust: Place the pan in the refrigerator for about 15-20 minutes to allow the crust to firm up while you prepare the cheesecake filling.
Step 2: Make the Cheesecake Filling
1. Prepare the Cream Cheese: In a mixing bowl, add 16 ounces of softened cream cheese. Use a hand mixer or stand mixer to beat the cream cheese until it’s smooth and creamy, with no lumps remaining.
2. Add the Sweeteners: Gradually add 1 cup of powdered sugar, 1 teaspoon of vanilla extract, and 1 tablespoon of lemon juice to the cream cheese. Blend until all the ingredients are well incorporated and the mixture is smooth.
3. Whip the Heavy Cream: In a separate bowl, add 1 cup of heavy cream and whip until stiff peaks form. This step is crucial for achieving a light and airy cheesecake filling.
4. Combine the Mixtures: Gently fold the whipped cream into the cream cheese mixture, being careful not to deflate the whipped cream. This will keep the filling fluffy.
5. Add Kit Kat Bars: Finally, fold in 1-1.5 cups of chopped Kit Kat bars into the filling, distributing them evenly throughout the mixture.
Step 3: Assemble the Cheesecakes
1. Fill the Crust: Take the chilled crust from the refrigerator and spoon the cheesecake filling onto it. Spread it evenly, smoothing the top with a spatula.
2. Refrigerate to Set: Cover the springform pan with plastic wrap or a lid and place it back in the refrigerator. Allow the cheesecakes to chill for at least 4 hours, or preferably overnight, to set properly.
3. Prepare the Ganache: While the cheesecakes are setting, prepare the chocolate ganache. Heat ½ cup of heavy cream in a small saucepan until it just begins to simmer. Remove from heat and pour over 1 cup of chopped chocolate. Let it sit for 2-3 minutes, then stir until smooth.
Step 4: Finishing Touches
Once the cheesecakes have set, it’s time to add the ganache and any additional toppings. You can drizzle the ganache over the top of the cheesecakes or spread it evenly for a glossy finish. Garnish with extra Kit Kat pieces for visual appeal.
Step 5: Serve and Enjoy
When ready to serve, carefully remove the sides of the springform pan. Slice the cheesecake into individual portions and serve chilled. The combination of creamy cheesecake, crunchy Kit Kat bars, and rich chocolate ganache will undoubtedly impress your guests and keep them coming back for seconds.
In this first part of our guide to No-Bake Kit Kat Cheesecakes, we explored the history and benefits of no-bake desserts, broke down the essential ingredients, and took you through the initial steps of preparation. Stay tuned for the next part, where we will delve deeper into presentation tips and common questions to ensure your cheesecakes are a smashing success.

Preparing the Crust
To create the perfect base for your No-Bake Kit Kat Cheesecakes, start by gathering your ingredients: crushed Kit Kat bars, graham cracker crumbs, melted butter, and a touch of sugar for enhanced sweetness. The combination of graham crackers and Kit Kat bars not only provides a delightful crunch but also infuses the crust with a chocolatey flavor that complements the cheesecake filling.
1. Mix the Ingredients: In a mixing bowl, combine 1 cup of finely crushed graham cracker crumbs with 1 cup of crushed Kit Kat bars. Add 1/4 cup of granulated sugar and 1/2 cup of melted butter. Stir the mixture until all the crumbs are evenly coated with butter and the texture resembles wet sand.
2. Press into the Pan: Transfer the mixture into a 9-inch springform pan or individual serving cups. Use the back of a measuring cup or your fingers to press the mixture firmly and evenly across the bottom. This step is crucial, as a well-compressed crust will hold together and provide a sturdy base for your cheesecake.
3. Chill the Crust: Once the crust is pressed down, place it in the refrigerator to chill for at least 30 minutes. Chilling allows the butter to solidify, which helps the crust firm up. A well-chilled crust will prevent the filling from seeping through and ensures a clean slice when you’re ready to serve.
Making the Cheesecake Filling
The cheesecake filling is where the magic really happens. For a velvety and rich texture, it’s important to use room temperature cream cheese. This allows for easy mixing without lumps. Here’s how to achieve the perfect cheesecake filling:
1. Blend the Cream Cheese: In a large mixing bowl, beat 16 ounces of softened cream cheese with an electric mixer on medium speed until smooth and creamy. This should take about 2-3 minutes. Scrape down the sides of the bowl to ensure all the cream cheese is incorporated.
2. Add Sugar and Vanilla: Gradually add 1 cup of powdered sugar and 1 teaspoon of vanilla extract to the cream cheese. Continue mixing until fully combined. The powdered sugar will give the filling sweetness without the graininess that granulated sugar can sometimes impart.
3. Incorporate Whipped Cream: In a separate bowl, whip 1 cup of heavy cream until stiff peaks form. This step is vital in creating a light and airy texture for your cheesecake. Gently fold the whipped cream into the cream cheese mixture using a spatula. It’s important to fold rather than stir to maintain the volume of the whipped cream. The goal is to achieve a light, fluffy filling that will set beautifully.
4. Add Chopped Kit Kat Bars: For extra flavor and texture, fold in an additional 1/2 cup of chopped Kit Kat bars into the filling mixture. This will give your cheesecakes delightful pockets of chocolatey goodness.
Assembling the Cheesecakes
With your crust and filling ready, it’s time to assemble the No-Bake Kit Kat Cheesecakes. Follow these steps for a seamless process:
1. Pour the Filling: Once the crust has chilled, carefully spoon the cheesecake filling over the crust. Use a spatula to spread it evenly, ensuring that the filling reaches the edges of the pan.
2. Smooth the Surface: After pouring the filling, gently tap the pan on the countertop to remove any air bubbles. This will also help the filling settle evenly. Then, use the spatula to smooth the top for a polished finish.
3. Chill Again: Place the assembled cheesecakes back into the refrigerator for at least 4-6 hours, or preferably overnight. This chilling time allows the cheesecake to set properly, making it easier to slice and serve.
Creating the Chocolate Ganache
A rich chocolate ganache is the perfect finishing touch for your No-Bake Kit Kat Cheesecakes. This glossy layer adds elegance and enhances the chocolate flavor of the dessert.
1. Heat the Cream: In a small saucepan, heat 1 cup of heavy cream over medium heat until it just begins to simmer. Do not let it boil, as this can affect the texture of the ganache.
2. Add the Chocolate: Once the cream is hot, remove it from the heat and add 8 ounces of chopped semi-sweet chocolate or chocolate chips. Allow the chocolate to sit in the warm cream for about 5 minutes.
3. Stir until Smooth: After 5 minutes, whisk the mixture until the chocolate is fully melted and the ganache is smooth and glossy. If it’s too thick, you can add a little more warm cream to reach your desired consistency.
4. Cool Before Pouring: Let the ganache cool slightly before pouring it over the chilled cheesecakes. This will prevent it from melting the filling. Aim for a pourable yet thick consistency.
Final Assembly and Serving
With your cheesecakes set and the ganache ready, it’s time for the final assembly:
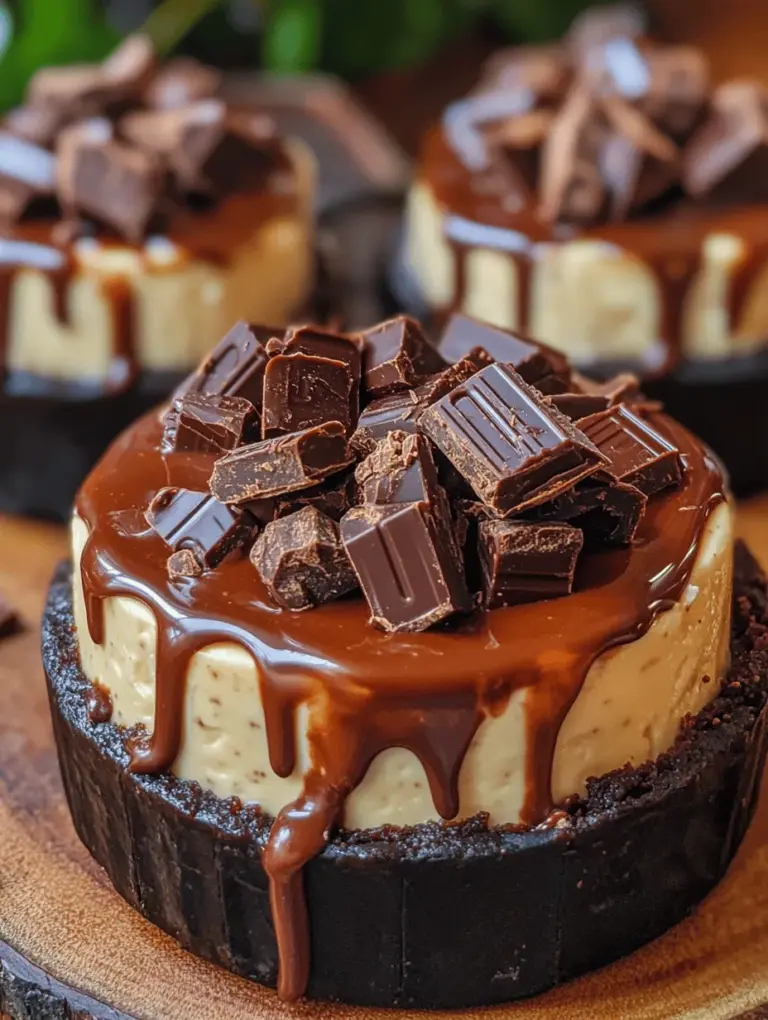
1. Top with Ganache: Pour the cooled ganache over the cheesecake layer, using a spatula to spread it evenly. Allow it to drip over the edges slightly for a beautiful, indulgent look.
2. Garnish: For an added touch, sprinkle additional chopped Kit Kat pieces on top of the ganache. This not only adds a nice crunch but also enhances the visual appeal of your dessert.
3. Chill Again: Return the cheesecakes to the refrigerator for an additional 30 minutes to allow the ganache to set.
4. Serve: When ready to serve, carefully release the sides of the springform pan or simply spoon out portions from individual cups. You can add a dollop of whipped cream or fresh berries on the side for a contrasting flavor and color.
Presentation Ideas
Presentation plays a significant role in making your No-Bake Kit Kat Cheesecakes even more enticing. Here are some creative ideas to elevate your dessert:
– Use Decorative Dishes: Consider serving your cheesecakes in clear glass jars or elegant dessert dishes. This allows guests to see the beautiful layers of crust, cheesecake, and ganache.
– Plating Techniques: For a refined look, plate individual servings on dessert plates with a drizzle of chocolate sauce or caramel. A sprig of mint or a dusting of cocoa powder can add a pop of color.
– Complementary Sides: Pair your cheesecakes with sides such as fresh fruit, which can provide a refreshing contrast to the rich chocolate flavors. Berries like raspberries or strawberries work particularly well.
Storage and Shelf Life
Proper storage is essential to keep your No-Bake Kit Kat Cheesecakes fresh and delicious. Here’s what you need to know:
– Refrigeration: Store the cheesecakes in an airtight container in the refrigerator. They can last for up to 5 days, although they are best enjoyed within the first few days for optimal freshness.
– Freezing: If you want to make them ahead of time, these cheesecakes can also be frozen. Wrap them tightly in plastic wrap and then in foil to prevent freezer burn. They can be frozen for up to 3 months. When ready to enjoy, thaw them in the refrigerator overnight before serving.
– Signs of Spoilage: Always check for signs of spoilage, such as an off smell or unusual texture. If the cheesecakes develop any mold or an overly sour smell, it’s best to discard them.
Nutritional Information
While No-Bake Kit Kat Cheesecakes are undoubtedly a treat, it’s important to be mindful of their nutritional content. Here’s a general overview per serving (assuming 12 servings):
– Calories: Approximately 350
– Fat: 24g
– Saturated Fat: 14g
– Cholesterol: 70mg
– Sodium: 170mg
– Carbohydrates: 30g
– Fiber: 1g
– Sugars: 20g
– Protein: 5g
These cheesecakes are rich in calories and sugar, so moderation is key when indulging in this delightful dessert. They can be a special treat on occasions like birthdays, holidays, or any gathering where you want to impress your guests.
Conclusion
No-Bake Kit Kat Cheesecakes are an irresistible dessert that combines simplicity with a luxurious taste experience. With a creamy filling, a crunchy crust, and a glossy chocolate ganache, they are perfect for any occasion. This recipe not only satisfies the sweet tooth but also allows for creativity in presentation and serving. Whether you are a seasoned baker or a novice in the kitchen, this cheesecake recipe is sure to become a favorite in your dessert repertoire. Enjoy making and sharing these delightful treats with friends and family!

