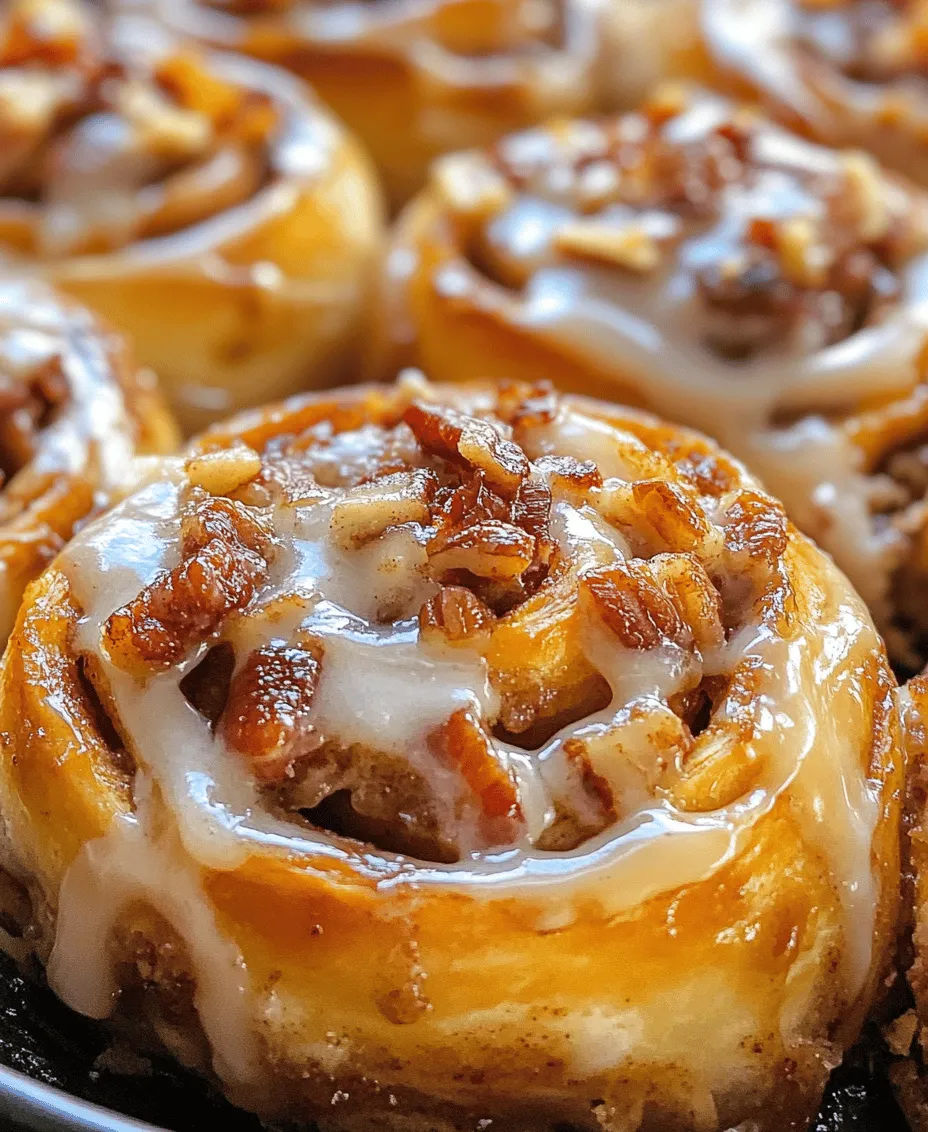
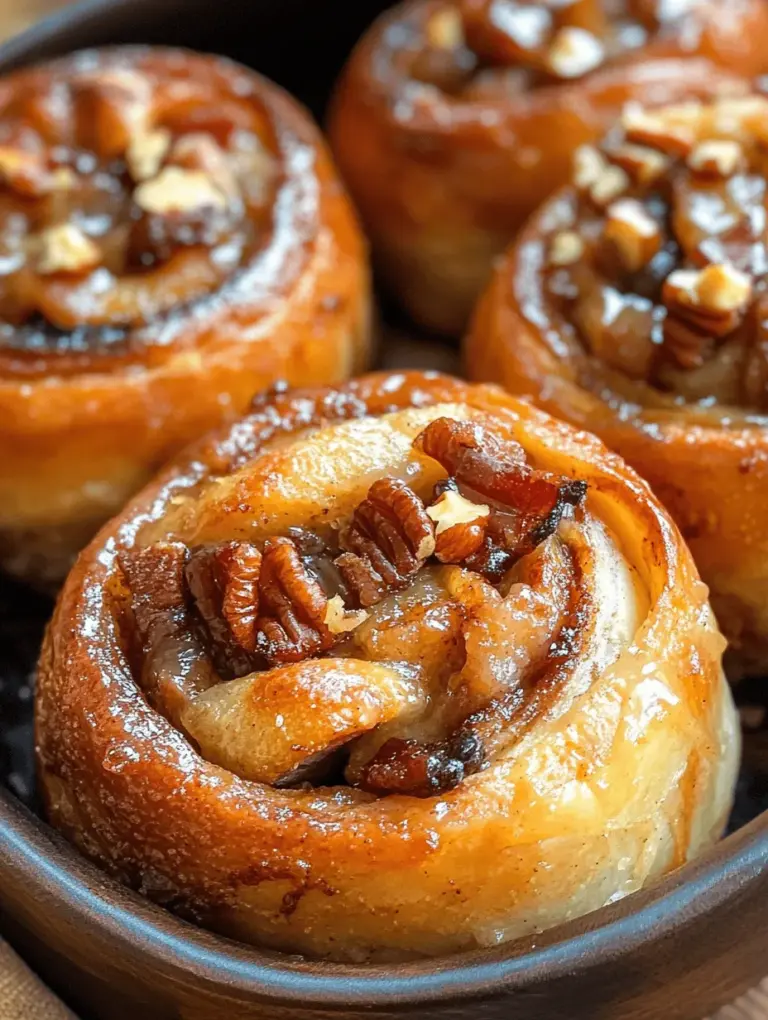
When it comes to decadent breakfast treats, few things can rival the comforting allure of cinnamon rolls. Now, imagine infusing that classic recipe with an irresistible twist: crispy bacon and rich maple glaze. Welcome to the world of melt-in-your-mouth maple bacon cinnamon rolls—a delightful fusion that elevates the traditional sweet roll to new savory heights. Perfect for brunch gatherings, holiday celebrations, or simply a cozy weekend morning at home, these rolls promise to be a hit with everyone who takes a bite.
What makes these cinnamon rolls truly special is the harmonious blend of flavors. The sweetness of maple syrup dances beautifully with the salty crunch of bacon, while the warm, aromatic notes of cinnamon provide a comforting background. It’s a combination that feels both indulgent and familiar, making these rolls the ultimate treat for any occasion. Whether you’re hosting a brunch party or looking for a special way to start a Sunday, this recipe is sure to impress.
Understanding the Ingredients
To create the perfect melt-in-your-mouth maple bacon cinnamon rolls, it’s essential to start with high-quality ingredients. Each component plays a critical role in achieving the ideal flavor and texture. Let’s break down the ingredients for both the dough and the filling.
Dough Ingredients
The dough for these cinnamon rolls serves as the foundation for our delicious creation. Here’s what you’ll need:
– All-Purpose Flour: This is the main structure of your dough. Choosing a high-quality flour ensures a good rise and fluffy texture.
– Granulated Sugar: This ingredient adds sweetness to the dough and helps activate the yeast, contributing to the rolls’ overall flavor.
– Active Dry Yeast: Yeast is essential for the dough to rise. Opt for fresh yeast for the best results.
– Salt: A crucial ingredient that enhances flavor and strengthens the dough’s structure.
– Milk: Warm milk is vital for activating the yeast and provides moisture to the dough. Whole milk works best, but you can use alternatives if desired.
– Butter: Melted butter adds richness and flavor to the dough. It’s best to use unsalted butter to control the saltiness of your rolls.
– Eggs: Eggs contribute to the dough’s richness and help bind the ingredients together.
Tips for Choosing High-Quality Ingredients
1. Flour: Look for unbleached all-purpose flour, which offers a better texture and flavor.
2. Yeast: Always check the expiration date on the yeast package to ensure freshness.
3. Dairy: Use full-fat milk for a richer dough that rises beautifully.
4. Butter: Opt for organic or grass-fed butter for enhanced flavor and quality.
Filling Ingredients
The filling is where the magic happens, turning simple dough into a delectable treat. Here’s what you’ll need for the filling:
– Butter: Softened butter is spread over the rolled dough to create a rich base for the filling.
– Brown Sugar: The deep, caramel-like flavor of brown sugar pairs perfectly with cinnamon and adds moisture to the filling.
– Ground Cinnamon: This aromatic spice is the heart of any cinnamon roll, providing warmth and sweetness.
– Bacon: Cooked and crumbled bacon introduces a savory element that beautifully contrasts the sweetness of the rolls.
– Optional Nuts: Chopped pecans or walnuts can be added for extra crunch and flavor.
Overview of the Maple Glaze
No cinnamon roll is complete without a luscious glaze. In this recipe, a maple glaze takes center stage, enhancing the overall flavor profile of the rolls. The glaze is made from powdered sugar, maple syrup, and a touch of milk, resulting in a smooth and creamy topping that perfectly complements the sweet and savory elements of the rolls. The glaze not only adds sweetness but also creates an appealing shiny finish that makes each roll irresistible.
Step-by-Step Guide to Making Maple Bacon Cinnamon Rolls
Preparing the Dough
The first step in crafting your melt-in-your-mouth maple bacon cinnamon rolls is to prepare the dough. It’s a straightforward process that requires a bit of patience but results in a fluffy and delicious base for your filling.
Mixing Dry and Wet Ingredients
Start by gathering all your dry ingredients. In a large mixing bowl, combine the all-purpose flour, granulated sugar, salt, and active dry yeast. It’s essential to mix these dry ingredients thoroughly to ensure even distribution of the yeast and salt.
Next, in a separate bowl, warm the milk until it reaches a temperature of about 110°F (43°C). It should feel warm to the touch but not hot. Hot milk can kill the yeast, so be cautious. Once warmed, add the melted butter and eggs to the milk, whisking until well combined.
Now, slowly pour the wet mixture into the dry ingredients. Using a wooden spoon or a spatula, stir until the dough begins to come together. This dough will be sticky, but don’t worry—this is normal.
Importance of Warm Milk and Melted Butter in Activating Yeast
The warmth of the milk is crucial for activating the yeast, allowing it to ferment and create carbon dioxide bubbles that will help the dough rise. Melted butter adds flavor and richness, creating a tender crumb in the finished rolls.
Kneading the Dough
Once the ingredients are combined, it’s time to knead the dough. Turn it out onto a floured surface and begin folding and pressing the dough. Kneading is essential for developing gluten, which gives the dough its structure and elasticity.
Explanation of the Kneading Process and Desired Texture
Knead the dough for about 5-7 minutes until it becomes smooth and elastic. You’ll know the dough is ready when it springs back when poked gently and doesn’t stick excessively to your hands. If the dough feels too sticky, sprinkle a little more flour as needed, but be careful not to over-flour, as this can lead to dense rolls.
Rolling Out the Dough
After kneading, shape the dough into a ball and place it in a lightly greased bowl, covering it with a clean kitchen towel or plastic wrap. Allow the dough to rise in a warm, draft-free location until it has doubled in size—this usually takes about 1 to 1.5 hours.
Once the dough has risen, it’s time to roll it out. Lightly flour your work surface and carefully turn the dough out onto it. Using a rolling pin, roll the dough into a rectangle about ¼ inch thick. Aim for a size of approximately 12×18 inches, but don’t stress about perfection—just try to maintain an even thickness.
Techniques for Achieving the Right Thickness and Shape
To achieve the right thickness, start from the center of the dough and roll outward, applying even pressure. Rotate the dough occasionally to maintain a rectangular shape. If the dough springs back, let it rest for a few minutes before continuing to roll.
Creating the Filling
Now that your dough is perfectly rolled out, it’s time to create the filling that will make these cinnamon rolls truly unforgettable.
Start by spreading a generous amount of softened butter over the surface of the rolled-out dough. This butter will not only add flavor but will also help the sugars adhere during baking. Next, sprinkle an even layer of brown sugar over the butter, followed by a generous dusting of ground cinnamon. Finally, add the crumbled bacon over the top, ensuring an even distribution across the dough. If you’re using nuts, sprinkle those on as well for an added crunch.
With the filling in place, it’s time to roll up the dough tightly, starting from one of the long edges. Use a gentle but firm motion to create a log, being careful not to compress the filling too much. Once rolled, pinch the seam to seal and ensure the filling stays put during baking.
Now, slice the log into equal pieces—about 1 to 1.5 inches thick. Place the rolls in a greased baking dish, leaving some space between each one to allow for expansion during the second rise.
Let the rolls rise again for about 30-45 minutes, or until they puff up nicely. Once they’re ready, you can bake them to golden perfection before drizzling them with the maple glaze that ties everything together.
Stay tuned for the next part of our recipe, where we’ll dive into the baking process and the final touches that will make your melt-in-your-mouth maple bacon cinnamon rolls truly unforgettable.

Spreading the Butter
The first step in crafting your melt-in-your-mouth maple bacon cinnamon rolls is to spread the buttery goodness across your rolled-out dough. Start with room-temperature unsalted butter, which is crucial for easy spreading. Using a spatula, dollop the butter onto the dough and gently spread it out evenly, leaving a small border around the edges. This butter serves as the base for the filling, ensuring that every bite of your cinnamon roll is rich and moist.
Mixing and Applying the Filling Ingredients
Now it’s time to create the filling that will elevate your cinnamon rolls to another level. In a medium bowl, combine brown sugar, ground cinnamon, and crispy crumbled bacon. The brown sugar will add a deep, caramel-like flavor that complements the maple syrup and smoky bacon, while the cinnamon provides a warm aroma. Mix these ingredients thoroughly to ensure that the bacon is evenly distributed throughout the sugar and cinnamon.
Once mixed, sprinkle the filling generously over the buttered dough. Use your hands or a spoon to distribute it evenly, making sure that every part of the dough is coated. This will ensure a sweet, savory flavor in every bite. Be cautious, though; too much filling can cause the rolls to overflow when baking, so a moderate layer is best.
Tips for Even Distribution of Sugar and Bacon
To achieve the perfect cinnamon roll, even distribution of the filling is key. Here are a few tips to help you:
1. Use a Sifting Method: If you have a fine mesh sieve, consider sifting the brown sugar and spices over the dough. This creates an even layer and helps prevent clumps.
2. Pat the Filling: After sprinkling the filling, lightly press it into the dough using your hands. This will help it adhere better and prevent it from spilling out when rolling.
3. Bacon Placement: Distribute the crumbled bacon evenly across the filling. If you spot any clumps, break them up to ensure that each roll contains some bacon goodness.
Rolling and Cutting the Dough
Once your filling is evenly spread, it’s time to roll up the dough. Starting from the edge closest to you, carefully lift the dough and begin to roll it away from you, keeping it tight but not overly so that it tears. Aim for a consistent thickness; a well-rolled dough will lead to uniform cinnamon rolls.
After rolling the dough tightly, use a sharp knife or dental floss (unflavored) to cut the dough into even pieces. For best results, cut the rolled dough into 1.5-inch thick slices. If you use a knife, a gentle sawing motion will help prevent squishing the rolls. If using dental floss, slide it under the rolled dough, cross the ends over the top, and pull to create a clean cut.
Best Practices for a Tight Roll and Uniform Pieces
A tight roll is crucial for preventing your filling from oozing out during baking. Here are some best practices:
– Keep the Dough Taut: As you roll, ensure the dough remains taut. This tension helps keep the filling inside.
– Work Slowly: Take your time while rolling. Rushing can lead to uneven rolls or tears in the dough.
– Use a Ruler: If you’re aiming for precision, consider using a ruler to measure your cuts. This guarantees uniformity in size, which helps with even baking.
The Rising Process
Once you’ve cut your cinnamon rolls, the next critical step is allowing the dough to rise. This process is essential as it creates the airy texture that makes cinnamon rolls so delightful.
Importance of Allowing Dough to Rise
Allowing your dough to rise gives the yeast time to ferment and produce carbon dioxide. This fermentation process is what causes the dough to expand and develop that fluffy texture we all love. If you skip this step, your rolls will be dense and chewy rather than light and tender.
Explanation of Yeast Fermentation and How it Affects Texture
Yeast is a living organism that feeds on sugars in the dough. As it consumes these sugars, it produces carbon dioxide and alcohol. The carbon dioxide gas gets trapped in the dough, causing it to expand and rise. This fermentation not only contributes to the bread’s texture but also enhances its flavor, bringing out a subtle sweetness.
Tips for Creating an Ideal Rising Environment
To create a perfect rising environment for your dough, consider these tips:
– Warm Space: Yeast thrives in warm conditions. Place your dough in a warm spot in your kitchen, away from drafts. An oven that is turned off but with the light on can provide a cozy environment.
– Cover the Dough: Use a clean kitchen towel or plastic wrap to cover the dough. This prevents it from drying out and creates a humid environment, which yeast loves.
– Timing: Allow the rolls to rise until they have doubled in size. This usually takes about 30-60 minutes, depending on the ambient temperature.
The Baking Process
Once your rolls have risen, it’s time to bake them to golden perfection.
Preheating the Oven
Preheat your oven to 350°F (175°C) before placing your rolls inside. This ensures they begin baking immediately and helps create that desirable golden crust. An adequately preheated oven is key to even cooking and achieving the perfect texture.
Baking Times and Signs of Readiness
Bake your cinnamon rolls for about 25-30 minutes. Keep an eye on them during the last few minutes of baking. You’ll know they’re ready when they have puffed up and turned a beautiful golden brown color. If you’re unsure, you can insert a toothpick into the center of one roll; it should come out clean or with a few moist crumbs attached.
How to Achieve a Golden Brown Finish
To achieve that perfect golden-brown finish, you can brush a little melted butter on top of the rolls during the last 5-10 minutes of baking. This not only enhances the color but also adds richness. Additionally, rotating the baking tray halfway through can ensure even baking.
Preparing the Maple Glaze
While your rolls are baking, it’s time to prepare the maple glaze that will take these cinnamon rolls to the next level.
Whisking Techniques for a Smooth Glaze
In a small bowl, combine powdered sugar, maple syrup, and a splash of milk or heavy cream. Using a whisk, mix until smooth. To ensure the glaze is lump-free, whisk vigorously, or use a sifter for the powdered sugar before adding it to the bowl. The goal is a velvety glaze that drizzles easily over the warm rolls.
Adjusting Consistency for the Perfect Drizzle
If your glaze is too thick, add a bit more milk, one teaspoon at a time, until you reach your desired consistency. For a thicker glaze that holds its shape, reduce the amount of milk. Conversely, if it’s too thin, simply add more powdered sugar to achieve that luscious drizzle.
Serving Suggestions
Now that your cinnamon rolls are baked to perfection and drizzled with maple glaze, it’s time to think about serving them.
Best Practices for Serving Warm Cinnamon Rolls
Cinnamon rolls are best enjoyed warm. For the optimal experience, serve them straight from the oven. If you need to hold them for a while, cover them with a clean kitchen towel to keep them warm and moist.
Ideas for Pairing with Coffee or Tea
These maple bacon cinnamon rolls pair beautifully with a cup of coffee or tea. Consider serving them with a rich, dark roast coffee or a spiced chai tea, which will complement the sweet and savory flavors of the rolls.
Presentation Tips to Enhance Visual Appeal
Presentation can elevate the dining experience. Arrange the rolls on a beautiful platter and drizzle the maple glaze artistically over the top. You can even sprinkle some extra crumbled bacon or chopped nuts for added texture. A few sprigs of mint or edible flowers can add a pop of color and freshness to the presentation.
Conclusion
Making melt-in-your-mouth maple bacon cinnamon rolls is not just about following a recipe; it’s about creating an experience filled with delight and warmth. From the moment you mix the dough to the final drizzle of maple glaze, each step brings you closer to a delicious treat that can brighten anyone’s day.
These rolls are perfect for a weekend brunch, a special gathering, or simply a cozy morning at home. Sharing them with loved ones will create memorable moments that celebrate the joy of homemade baking. The satisfaction of pulling freshly baked rolls from the oven, enveloped in the warm aromas of maple and bacon, is an experience like no other.
Encourage your friends and family to join in the baking process, turning it into a fun activity that everyone can enjoy. Remember, baking is not just about the end product; it’s about the love and care you put into it. So, gather your ingredients, roll up your sleeves, and dive into the delicious world of cinnamon rolls—where every bite is a reminder of the joy of homemade treats.

