Introduction
Chocolate cake is undeniably one of the most beloved desserts around the world. Its rich, decadent flavor and moist texture are enough to make any chocolate lover weak at the knees. But what if we told you there’s a way to elevate this classic treat to new heights? Enter the irresistibly easy and delicious blackberry chocolate cake. By adding fresh blackberries to the mix, this confection not only gains a burst of fruity flavor but also a stunning visual appeal that is sure to impress.
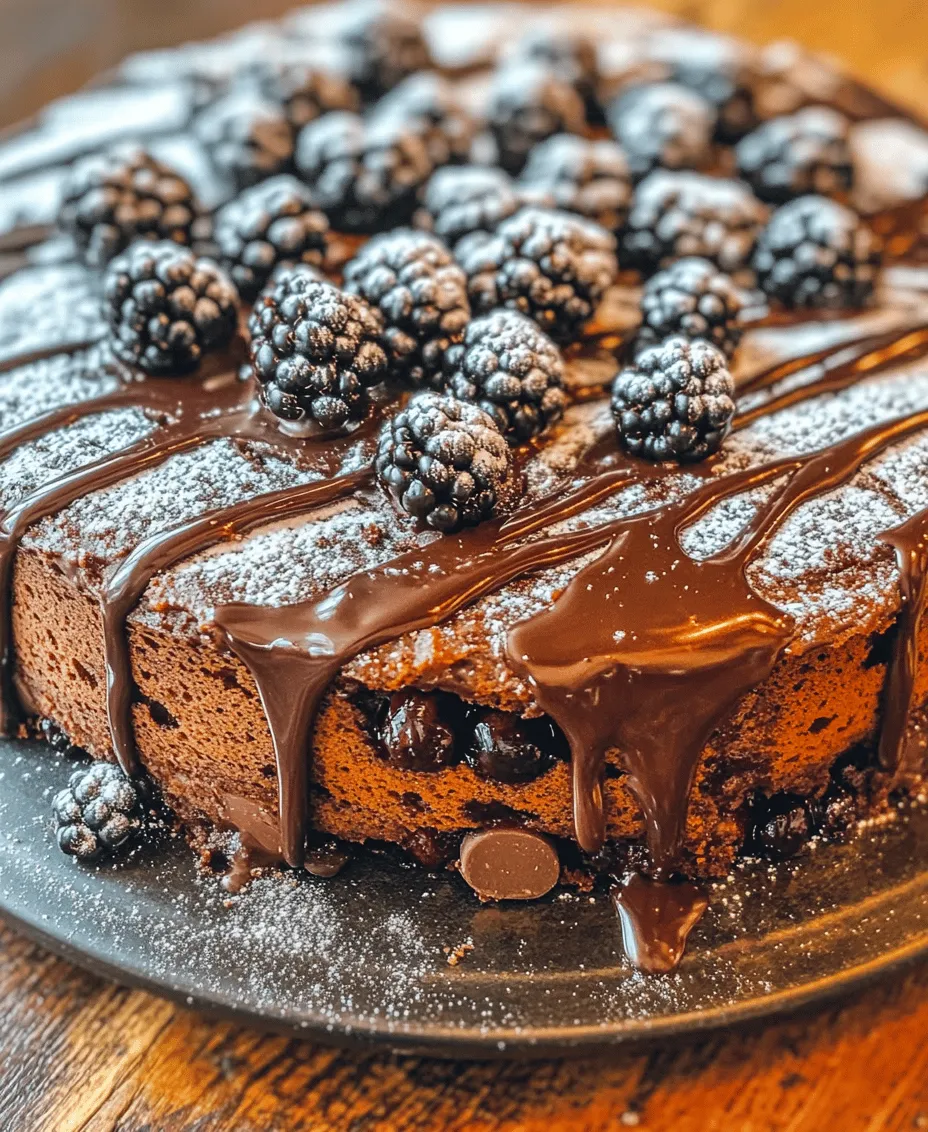
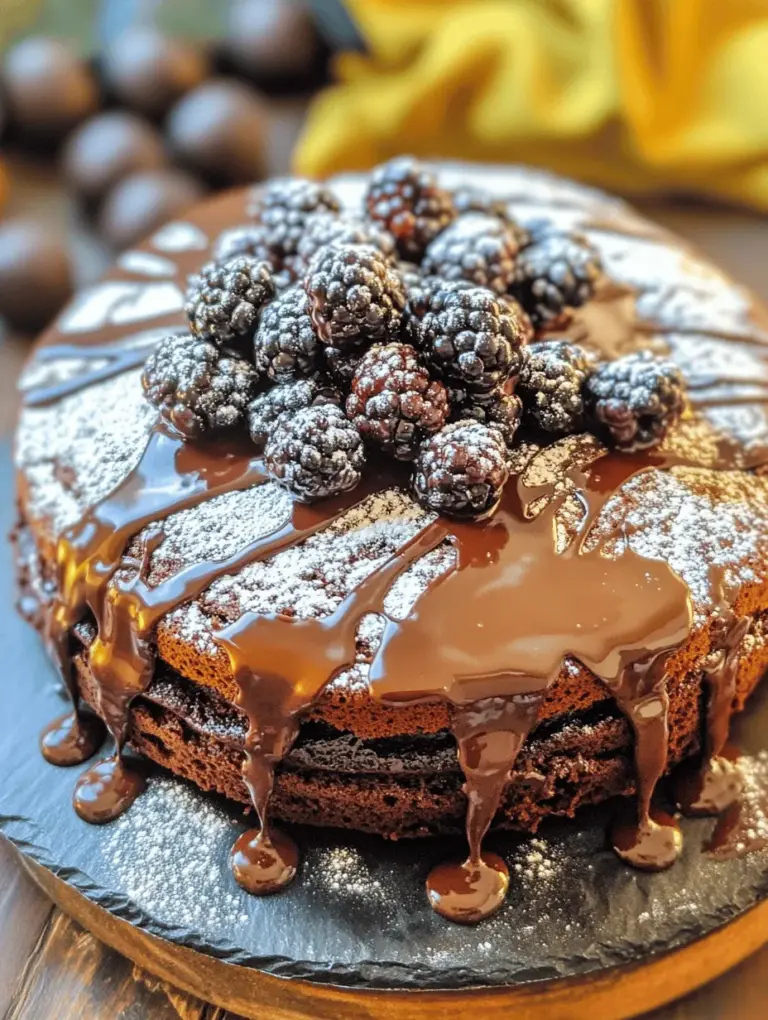
This blackberry chocolate cake is incredibly versatile, making it suitable for a variety of occasions. Whether you’re hosting a casual get-together with friends or planning a special celebration like a birthday or anniversary, this cake fits the bill perfectly. Its beautiful dark hue accented with vibrant blackberry bursts is sure to steal the spotlight, while the ease of preparation means you can spend less time in the kitchen and more time enjoying the company of your guests.
One of the most appealing aspects of this recipe is its straightforwardness. Even novice bakers will find that they can whip up this delightful cake with minimal fuss. The combination of chocolate and blackberries results in a mouthwatering dessert that is as delicious as it is easy to prepare. So, let’s dive into what makes this cake so special and how you can make it at home.
The Allure of Blackberry Chocolate Cake
What makes blackberry chocolate cake such a tantalizing treat? The answer lies in its complex flavor profile. The richness of the chocolate pairs seamlessly with the tartness of the blackberries, creating a symphony of taste that dances on your palate. The chocolate delivers that familiar comforting sweetness, while the blackberries add a refreshing contrast that cuts through the heaviness. Together, they create an experience that is both indulgent and invigorating.
Combining fruits with chocolate is not just about flavor; it’s also about enhancing the cake’s texture and overall enjoyment. The juicy blackberries contribute a delightful moistness, ensuring that each slice remains tender and soft. As you take a bite, you’ll experience a burst of berry goodness that complements the deep, satisfying flavor of the chocolate. This contrast not only makes the cake more enjoyable to eat but also adds an element of surprise that keeps your taste buds engaged.
Beyond its deliciousness, the inclusion of blackberries in this cake also brings a host of health benefits. Blackberries are packed with antioxidants, vitamins, and minerals that can contribute to overall health. They are rich in vitamin C, which boosts the immune system, and vitamin K, which is essential for bone health. Additionally, the high fiber content of blackberries aids in digestion and can help regulate blood sugar levels. So, as you indulge in this decadent dessert, you can feel good knowing that you’re also nourishing your body with wholesome ingredients.
Ingredients Breakdown
To create this irresistible blackberry chocolate cake, you will need a selection of ingredients that each play a crucial role in achieving the perfect balance of flavors and textures. Here’s a detailed breakdown of what you’ll need:
Essential Ingredients
1. All-purpose flour: This serves as the foundation of the cake, providing structure and stability. For a healthier twist, you can substitute part of the all-purpose flour with whole wheat flour, which adds fiber and nutrients without sacrificing too much texture.
2. Granulated sugar: This ingredient sweetens the cake and contributes to its moistness. If you’re looking for alternatives, consider using coconut sugar or a sugar substitute to cater to dietary preferences.
3. Unsweetened cocoa powder: The star of the show! Cocoa powder brings deep chocolate flavor to the cake. Opt for high-quality Dutch-processed cocoa for a smoother, richer taste.
4. Baking powder and baking soda: These leavening agents are essential for helping the cake rise and attain a light, fluffy texture.
5. Salt: A pinch of salt enhances the overall flavor, balancing the sweetness of the cake.
6. Eggs: Eggs provide moisture and act as a binding agent, helping to give the cake structure. For a vegan version, you can substitute eggs with flax eggs or applesauce.
7. Butter or oil: Both options will add richness to the cake. Unsalted butter gives a more traditional flavor, while vegetable oil can contribute to a moister cake.
8. Milk: This ingredient helps to combine the dry ingredients and adds moisture. You can use dairy milk or plant-based milk alternatives, such as almond, soy, or oat milk.
9. Fresh blackberries: The star ingredient! Fresh blackberries not only impart flavor but also create a beautiful visual appeal. Be sure to choose ripe, juicy blackberries for the best results. If fresh blackberries are unavailable, frozen ones can be used, but make sure to thaw and drain excess moisture before incorporating them into the batter.
Optional Additions
– Vanilla extract: A splash of vanilla enhances the overall flavor of the cake, making it even more aromatic and delicious.
– Chocolate chips: For chocolate enthusiasts, adding chocolate chips to the batter can intensify the chocolate flavor and create an even more decadent dessert.
Understanding the role of each ingredient not only helps you appreciate the recipe but also allows for customization based on your dietary needs or preferences. Whether you choose to swap in whole wheat flour or opt for a dairy-free milk, these adjustments can help you create a version of this cake that suits your taste.
Preparation Steps
Now that you have your ingredients ready, it’s time to get into the preparation of this delectable blackberry chocolate cake. Follow these step-by-step instructions to ensure that your baking experience is smooth and successful.
Step 1: Preheat the Oven
Before diving into mixing, preheat your oven to 350°F (175°C). Preheating the oven ensures that the cake bakes evenly and rises properly.
Step 2: Prepare the Cake Pans
Grease two round cake pans (9-inch) with butter or cooking spray and line the bottoms with parchment paper. This step is crucial for easy removal of the cake once it’s baked. Parchment paper prevents the cake from sticking to the pan, ensuring that your layers remain intact and beautiful.
Step 3: Mix the Dry Ingredients
In a large mixing bowl, combine the all-purpose flour, granulated sugar, cocoa powder, baking powder, baking soda, and salt. Whisk together until thoroughly mixed. This step ensures that the leavening agents are evenly distributed throughout the flour, which is essential for even rising during baking.
Step 4: Combine the Wet Ingredients
In another bowl, beat the eggs and then add the melted butter (or oil), milk, and vanilla extract. Mix until well combined. If you are using any dairy-free alternatives, this is the time to incorporate them.
Step 5: Combine Dry and Wet Mixtures
Pour the wet mixture into the bowl with the dry ingredients. Gently stir the two mixtures together using a spatula or a wooden spoon. Be careful not to overmix, as this can lead to a dense cake. Stop mixing as soon as you don’t see any dry flour—some lumps are perfectly fine.
Step 6: Fold in the Blackberries
Gently fold in the fresh blackberries, taking care not to break them apart. Distributing the berries evenly will ensure that every bite of cake has the delightful burst of flavor that comes from the fruit.
Step 7: Pour and Bake
Divide the batter evenly between the prepared cake pans. Use a spatula to smooth out the tops. Place the pans in the preheated oven and bake for 25-30 minutes, or until a toothpick inserted in the center comes out clean. Keep an eye on the cakes towards the end of the baking time to prevent overbaking, which can dry them out.
Step 8: Let it Cool
Once baked, remove the cake pans from the oven and allow them to cool for about 10-15 minutes. After that, carefully run a knife around the edges of the pans to loosen the cakes, then invert them onto a wire rack to cool completely. This step is essential for preventing sogginess and ensuring that the cakes are cool enough for frosting.
Step 9: Prepare for Frosting
While the cakes are cooling, take the time to clean up your workspace and prepare any frosting or toppings you plan to use. A simple chocolate ganache or cream cheese frosting pairs wonderfully with the flavors of the blackberry chocolate cake.
Tips for Accurate Measurement
Accurate measurements are vital for baking success. Here are some tips:
– Use a kitchen scale for precise measurements, especially for dry ingredients like flour and cocoa powder.
– When measuring flour, spoon it into your measuring cup and level it off with a knife, rather than scooping directly from the bag, which can lead to overpacking and a denser cake.
– Always measure liquids in a clear liquid measuring cup for accuracy.
Prepping Your Baking Equipment
Before you start baking, it’s essential to have all your equipment ready. Here’s a quick overview of the tools you’ll need:
– Mixing bowls: At least two bowls for mixing wet and dry ingredients separately.
– Whisk: For combining dry ingredients and beating eggs.
– Spatula: Essential for folding in blackberries and scraping down the sides of the bowl.
– Measuring cups and spoons: For accurate ingredient measurements.
– Cake pans: Two 9-inch round cake pans are recommended for this recipe.
– Parchment paper: To line your cake pans for easy removal.
– Cooling rack: For cooling the cakes evenly after baking.
Having your equipment ready will streamline the baking process and help you create a successful blackberry chocolate cake.
With these steps and tips, you’re well on your way to creating a stunning and delicious dessert that will wow your family and friends. Stay tuned for the next part where we’ll dive into frosting options, presentation ideas, and serving suggestions!

Importance of Preheating the Oven for Even Baking
Preheating your oven is a crucial step in baking, particularly for cakes. When you preheat, you ensure that the cakes begin baking at the right temperature, which is vital for achieving that perfect rise and texture. A properly preheated oven allows the leavening agents in your batter to activate correctly, resulting in a light, fluffy cake rather than a dense one.
For our Blackberry Chocolate Cake, set your oven to 350°F (175°C) and allow it to reach this temperature before placing your cake inside. This preheating process typically takes about 10-15 minutes, depending on your oven. Take this time to prepare your baking pans and gather all your ingredients. Remember, starting with a hot oven is key to achieving that irresistible fluffy texture.
Mixing Techniques for Optimal Texture
The mixing technique you use can significantly impact the final texture of your cake. For this Blackberry Chocolate Cake, we will employ the creaming method, which is a classic technique that helps to incorporate air into the batter, leading to a lighter cake.
Creaming Method Explained: Begin by beating the softened butter and sugar together until the mixture is light and fluffy. This process typically takes about 3-5 minutes. Properly creamed butter and sugar should appear pale in color and should have a slightly fluffy texture. This is because the air bubbles formed during this process will expand in the oven, helping the cake rise.
Avoiding Overmixing: Once you’ve added the dry ingredients and any liquid components (like eggs or milk), it’s essential not to overmix the batter. Overmixing can lead to a tough cake due to the gluten development in the flour. Mix just until the ingredients are combined; small lumps are okay.
Visual Cues During Mixing: Look for a few specific signs during the mixing stages. When creaming, the mixture should appear light and fluffy. After you combine the wet and dry ingredients, the batter should be smooth without large lumps. If you see flour pockets or clumps, gently fold the batter with a spatula rather than using the mixer.
Baking the Cake
With your batter prepared, it’s time to bake. Pour the batter into your prepared cake pans, ensuring an even layer in each. Place the pans on the center rack of your preheated oven.
Baking Instructions: Bake the cakes for approximately 25-30 minutes. Keep an eye on them during the last few minutes of baking, as ovens can vary.
Testing for Doneness: To check if your cakes are done, use the toothpick method. Insert a toothpick into the center of the cake; if it comes out clean or with a few moist crumbs, your cake is ready. If it comes out with wet batter, it needs a few more minutes in the oven.
Common Baking Pitfalls: Be cautious of overbaking your cake, which can lead to dryness. Additionally, avoid opening the oven door too frequently, as this can cause fluctuations in temperature that affect the cake’s rise. If you notice that the tops are browning too quickly, you can cover them loosely with aluminum foil to prevent burning while the rest of the cake continues baking.
Cooling and Serving the Cake
Once your Blackberry Chocolate Cake is baked to perfection, it’s essential to cool it properly before serving.
Cooling Steps: Allow the cakes to cool in the pans for about 10-15 minutes. This helps them to set and makes them easier to remove. After this time, gently run a knife around the edges of the pans to loosen the cake, and then invert them onto a wire rack to cool completely. Cooling on a wire rack is important as it prevents the bottom from becoming soggy, allowing air to circulate around the cake.
Presentation Suggestions: For an elegant touch, consider dusting the cooled cake with powdered sugar just before serving. This simple addition enhances the visual appeal and adds a light sweetness that complements the rich chocolate and tart blackberries beautifully.
Pairing Ideas: The Blackberry Chocolate Cake pairs wonderfully with a variety of accompaniments. Serve it with a dollop of freshly whipped cream for a rich addition or a scoop of vanilla ice cream to enhance the dessert experience. Additionally, a drizzle of fresh berry sauce made from pureed blackberries can elevate the presentation and add a burst of flavor.
Storing and Preserving Leftovers
If you have leftovers (which is unlikely, given how delightful this cake is), proper storage will help maintain its freshness.
Best Practices for Storing: Allow any leftover cake to cool completely, then wrap it tightly in plastic wrap or store it in an airtight container. This will help prevent the cake from drying out.
Freezing Options: If you want to preserve your cake for a longer period, consider freezing it. Wrap the cooled cake in plastic wrap, then in aluminum foil to prevent freezer burn. When you’re ready to enjoy it again, let it thaw in the refrigerator overnight before bringing it to room temperature.
Conclusion
In summary, the Blackberry Chocolate Cake is not just simple to make; it is an indulgent treat that combines the rich flavors of chocolate with the tartness of blackberries, creating a dessert that is sure to impress. The techniques and tips outlined here ensure that even novice bakers can achieve a stunning result that tastes as good as it looks.
We encourage you to share this recipe with friends and family, fostering a sense of community through the joys of baking. The act of creating something from scratch is not only satisfying but also brings people together. Whether it’s a birthday celebration, a potluck, or simply a Tuesday night dessert, this cake is perfect for any occasion.
Finally, remember that baking is an art that thrives on creativity and experimentation. Enjoy the process and take pride in your delicious homemade treats. Happy baking!

