Introduction
Few desserts evoke the same level of excitement and indulgence as chocolate lava cake. This sumptuous treat, characterized by its rich, flowing molten center, has captured the hearts and palates of dessert lovers around the world. The moment you cut into its delicate outer shell, warm liquid chocolate spills forth, creating a sensory experience that is nothing short of heavenly. Whether enjoyed at a fine dining establishment or crafted in the comfort of your kitchen, chocolate lava cake is a celebration of chocolate in its most decadent form.
The allure of chocolate lava cake extends far beyond its taste. It represents a fusion of culinary art and science, bringing together simple ingredients to create something truly extraordinary. In this article, we aim to provide you with a comprehensive, easy-to-follow recipe for making chocolate lava cake at home. Along with step-by-step instructions, we will delve into the dessert’s origins, the science behind its unique texture, and perfect pairings that elevate the experience even further.
Understanding Chocolate Lava Cake
Definition and Characteristics
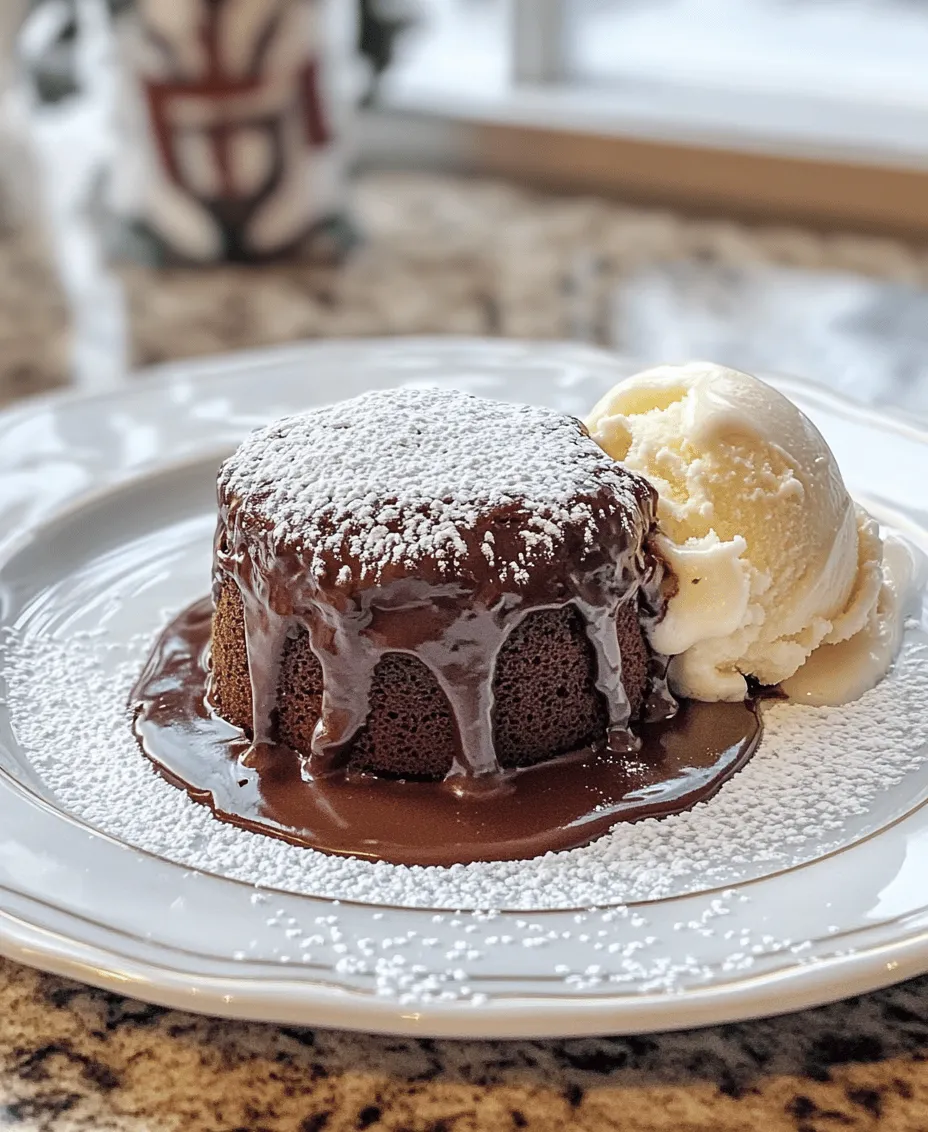
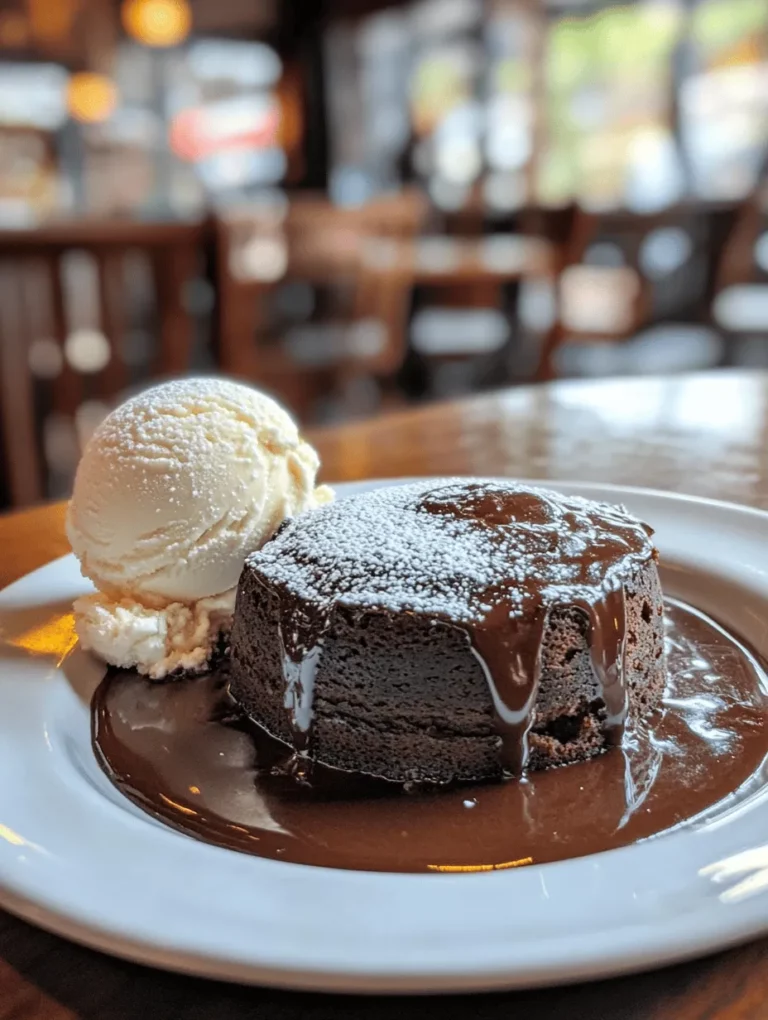
Chocolate lava cake is a dessert that boasts a distinctive combination of a firm outer layer and a soft, gooey center. Often referred to as “molten chocolate cake” or “chocolate fondant” in various regions, this dessert is known for its indulgent flavor and luxurious texture. The outer layer is typically made from a rich chocolate batter, baked just long enough to set the outside while keeping the inside molten. When served warm, it is often accompanied by a scoop of vanilla ice cream or a dollop of whipped cream, providing a delightful contrast to the rich chocolate.
Brief History
The origins of chocolate lava cake can be traced back to the late 1980s. It is widely credited to French chef Jean-Georges Vongerichten, who created the dessert as a spontaneous creation in his New York restaurant. The story goes that he undercooked a chocolate cake, resulting in a molten center that delighted diners. Since then, chocolate lava cake has evolved into a staple on dessert menus in restaurants worldwide. Its popularity surged as food enthusiasts began recreating it at home, leading to a resurgence of interest in classic dessert-making techniques.
Popularity in Restaurants and Home Baking
The chocolate lava cake has become a beloved choice for many restaurant-goers, often featured prominently on dessert menus. Its dramatic presentation and rich flavor profile make it a crowd-pleaser, perfect for special occasions or simply a treat after a meal. In recent years, the rise of cooking shows and food blogs has empowered home bakers to tackle the challenge of creating this dessert in their own kitchens. As a result, chocolate lava cake has emerged as a favorite among home bakers, offering both a sense of accomplishment and a delicious reward for their efforts.
The Science Behind Chocolate Lava Cake
Explanation of the Ingredients and Their Roles
Creating the perfect chocolate lava cake is as much a science as it is an art. Understanding the roles of the primary ingredients is crucial to achieving that coveted molten center.
1. Chocolate: The star of the show, chocolate is responsible for the cake’s rich flavor and velvety texture. Semi-sweet chocolate is commonly used, providing the right balance of sweetness and intensity. High-quality chocolate will yield the best results, so consider sourcing premium brands for a truly decadent experience.
2. Eggs and Egg Yolks: Eggs are essential for structure, moisture, and richness. The combination of whole eggs and egg yolks contributes to the cake’s creamy mouthfeel and helps to create the delicate balance between the firm exterior and the liquid interior.
3. Unsalted Butter: Butter adds richness and enhances the chocolate flavor. Using unsalted butter allows for better control of the overall saltiness of the dessert, ensuring that the sweetness of the chocolate remains front and center.
4. Granulated Sugar: Sugar not only sweetens the cake but also plays a role in creating a tender texture. It aids in the aeration process when creamed with butter, helping to give the cake its lift.
5. All-Purpose Flour: Flour provides structure to the cake. However, it’s essential not to overmix the batter, as this can lead to a dense texture rather than the desired lightness.
6. Vanilla Extract: This ingredient enhances the overall flavor profile of the cake, complementing the chocolate and adding depth to the dessert.
7. Salt: A pinch of salt is crucial for balancing sweetness and enhancing the chocolate’s flavor. It amplifies the overall taste and ensures a well-rounded dessert.
How the Baking Process Creates the Molten Center
The magic of chocolate lava cake happens during the baking process. When the batter is placed in the oven, the outer layer begins to set first, while the center remains liquid due to the high fat and moisture content from the chocolate and butter. The goal is to achieve a balance between baking long enough for the outside to firm up while keeping the inside delightfully gooey.
To achieve the perfect molten center, it’s critical to keep a watchful eye on the baking time. Typically, the cakes should be baked for about 12 to 14 minutes, depending on your oven and the size of the ramekins used. The cakes are done when the edges are set, but the center still jiggles slightly when gently shaken. This technique requires a bit of practice, but the reward—a warm, flowing center—is worth the effort.
Tips on Achieving the Perfect Texture and Consistency
1. Preheat Your Oven: Ensure your oven is preheated to the correct temperature before placing the cakes inside. This is crucial for consistent baking and achieving that perfect molten center.
2. Use Room Temperature Ingredients: Allow your butter and eggs to come to room temperature before mixing. This promotes better emulsification, leading to a smoother batter.
3. Grease Ramekins Thoroughly: To prevent sticking, it’s important to grease your ramekins well with butter and a light dusting of cocoa powder. This ensures that the cakes can be easily inverted onto plates without breaking apart.
4. Experiment with Baking Times: Every oven is different, so keep an eye on your cakes as they bake. You may need to adjust the baking time slightly based on your oven’s performance.
5. Serve Immediately: Chocolate lava cakes are best enjoyed right out of the oven. If left to cool, the center will solidify, losing the signature molten texture. Prepare to serve them as soon as they come out!
Ingredients for Decadent Chocolate Lava Cake
To create this indulgent dessert, you will need the following ingredients:
– Unsalted Butter: 1/2 cup (1 stick)
– Semi-Sweet Chocolate Chips: 1 cup
– Large Eggs: 2
– Egg Yolks: 2
– Granulated Sugar: 1/2 cup
– All-Purpose Flour: 1/4 cup
– Vanilla Extract: 1 teaspoon
– Salt: 1/4 teaspoon
Detailed Breakdown of Each Ingredient
Unsalted Butter: When it comes to baking, the quality of your butter can significantly impact the final product. Unsalted butter allows for precise control over the saltiness of the cake, ensuring that the natural sweetness of the chocolate shines through.
Semi-Sweet Chocolate Chips: Selecting the right type of chocolate is essential for flavor. Semi-sweet chocolate chips provide a perfect balance of sweetness and richness, making them ideal for lava cake. For an elevated taste, consider using high-quality chocolate bars that you chop into chunks.
Eggs and Egg Yolks: Each egg plays a vital role in creating the cake’s texture. Whole eggs contribute to the structure, while the additional egg yolks enhance richness and moisture. Together, they create a creamy, luscious batter that bakes to perfection.
Granulated Sugar: The sugar not only sweetens the cake but also helps achieve a tender crumb. When creamed with butter, sugar helps aerate the batter, leading to a lighter texture once baked.
All-Purpose Flour: Flour provides the necessary structure, but be cautious not to overmix. Overworking the batter can lead to a denser cake, which is not the desired outcome for a chocolate lava cake.
Vanilla Extract: Adding a splash of vanilla enhances the overall flavor, complementing the chocolate and adding depth to the dessert. Opt for pure vanilla extract for the best results.
Salt: A small amount of salt is crucial for balancing flavors. It brings out the sweetness of the chocolate and ensures a well-rounded taste, making each bite more enjoyable.
In the next part of this article, we will guide you through the step-by-step instructions for creating your own decadent chocolate lava cake, along with additional tips and common questions that may arise during the baking process. Get ready to impress your friends and family with this show-stopping dessert that is sure to become a favorite!

Optional Ingredients and Variations for Customization
To truly make the decadent chocolate lava cake your own, consider incorporating optional ingredients and variations that can elevate this classic dessert. Here are some ideas to customize your cake:
1. Chocolate Types: While dark chocolate is the traditional choice, you can experiment with semi-sweet or even white chocolate for a different flavor profile. Each type will yield a unique sweetness and richness.
2. Flavored Extracts: Add a hint of flavor by mixing in extracts such as vanilla, almond, or even orange. A teaspoon of espresso powder can also enhance the chocolate flavor, giving it a more profound depth.
3. Add-ins: Consider folding in a handful of chocolate chips, nuts, or even a tablespoon of your favorite liqueur (like Grand Marnier or Frangelico) into the batter before baking. This not only adds flavor but also an interesting texture.
4. Gluten-Free Option: Substitute all-purpose flour with a gluten-free flour blend to accommodate gluten sensitivities without compromising on taste.
5. Mini Lava Cakes: Instead of using traditional ramekins, pour the batter into a muffin tin for mini lava cakes. This variation allows for a fun serving size and is perfect for sharing.
Step-by-Step Instructions for Baking Chocolate Lava Cake
Prepping the Oven and Ramekins: Importance of Greasing and Dusting
Begin by preheating your oven to 425°F (220°C). This temperature allows the outside of the cake to bake while ensuring the inside remains molten.
Next, prepare your ramekins. Generously grease each one with butter, ensuring all surfaces are coated to prevent sticking. Dust the insides with cocoa powder, tapping out any excess. This step is crucial; it ensures the cake releases smoothly after baking, avoiding any mishaps during the all-important reveal.
Melting Chocolate and Butter: Techniques for Smoothness
In a heatproof bowl, combine 6 ounces of high-quality dark chocolate and ½ cup of unsalted butter. To melt, you can use a double boiler method or simply microwave in 20-second intervals, stirring in between until fully melted and smooth. Avoid overheating; this can lead to a grainy texture. The goal is a silky mixture that will serve as the foundation of your cake.
Whisking Eggs and Sugar: Achieving the Right Consistency
In a separate mixing bowl, whisk together 2 large eggs, 2 large egg yolks, and ½ cup of granulated sugar. Use a hand whisk or electric mixer to beat the mixture until it becomes pale and slightly thickened, which should take about 3-5 minutes. This aeration is essential for a light texture and helps the cake rise properly.
Combining Mixtures: How to Fold Without Deflating
Once your chocolate and butter mixture has cooled slightly, gently fold it into the egg and sugar mixture. Use a spatula to combine them carefully, ensuring you maintain the air you’ve whipped into the egg mixture. Add in ¼ cup of all-purpose flour and fold gently until just combined. Be cautious not to overmix, as this will deflate the batter and negatively impact the cake’s texture.
Baking Tips: Knowing When the Cake is Perfectly Done
Divide the batter evenly among the prepared ramekins, filling each about ¾ full. Bake in the preheated oven for 12-14 minutes. The edges should look firm, but the center will still be soft and slightly jiggly. Keep a close eye on the cakes, as overbaking will result in a fully set center rather than the desired molten core.
Cooling and Serving: Ensuring the Perfect Reveal
Once baked, remove the ramekins from the oven and let them cool for 1 minute. Carefully run a knife around the edges to loosen the cakes. Place a plate over the top of each ramekin and invert it to release the cake. Gently lift the ramekin off, and if all goes well, you’ll have a beautiful, intact lava cake ready to be garnished.
Serving Suggestions for Chocolate Lava Cake
Presentation Ideas: Dusting with Powdered Sugar
For a beautiful finish, lightly dust the top of your chocolate lava cake with powdered sugar. This adds an elegant touch and a contrast to the rich chocolate.
Pairing with Vanilla Ice Cream: Enhancing the Experience
Serve your lava cake warm, alongside a generous scoop of vanilla ice cream. The cold creaminess pairs perfectly with the warm, molten chocolate, creating a delightful contrast that enhances the overall experience.
Creative Toppings: Fresh Berries, Whipped Cream, or a Drizzle of Caramel
Add a splash of color and flavor by garnishing your cake with fresh berries, such as raspberries or strawberries. A dollop of whipped cream also works wonders to balance the richness of the cake. For an indulgent touch, drizzle with caramel or chocolate sauce to elevate your dessert even further.
Common Mistakes to Avoid
Overmixing the Batter: Consequences on Texture
One of the most common mistakes is overmixing the batter after adding the flour. This can lead to a dense cake rather than the light, airy texture you desire. Mix just enough to combine the ingredients, and your cake will turn out perfectly.
Baking Time Miscalculations: How to Tell When It’s Done
Misjudging the baking time can lead to either a fully cooked cake or an undercooked one. Trust your instincts and keep an eye on the cakes as they bake. If you’re unsure, start checking at the 12-minute mark. Remember, the goal is a firm outer layer with a soft center.
Not Preparing Ramekins Properly: Risk of Sticking
Failing to properly grease and dust the ramekins can result in a sticky disaster. Take your time with this step, as it’s essential for a successful un-molding and presentation.
Storing and Reheating Chocolate Lava Cake
Best Practices for Storing Leftovers
If you have any leftover lava cakes (which is unlikely!), allow them to cool completely before storing. Place them in an airtight container and refrigerate for up to 2 days. For longer storage, consider freezing them, wrapped tightly in plastic wrap, for up to a month.
Reheating Techniques to Maintain the Molten Center
To reheat, place the chilled cake in the microwave for about 30 seconds on medium power. Keep an eye on it to avoid overheating. If you’ve frozen the cakes, allow them to thaw in the refrigerator overnight before reheating. The goal is to warm the exterior while keeping the center gooey and molten.
Conclusion
Making a chocolate lava cake at home is not just about baking; it’s about creating a delightful experience that brings joy to you and your loved ones. The rich, molten center and the warm, decadent chocolate flavor are sure to impress anyone who takes a bite. Don’t hesitate to experiment with different flavors and ingredients to make this recipe your own.
Whether you’re celebrating a special occasion or simply indulging in a sweet treat, chocolate lava cake is a guaranteed crowd-pleaser. So gather your ingredients, follow the steps, and enjoy the satisfaction of creating a dessert that not only tastes heavenly but also looks stunning on the plate. Embrace the joy of baking, and share this delectable dessert with those you cherish, making moments that are truly memorable.

