Introduction
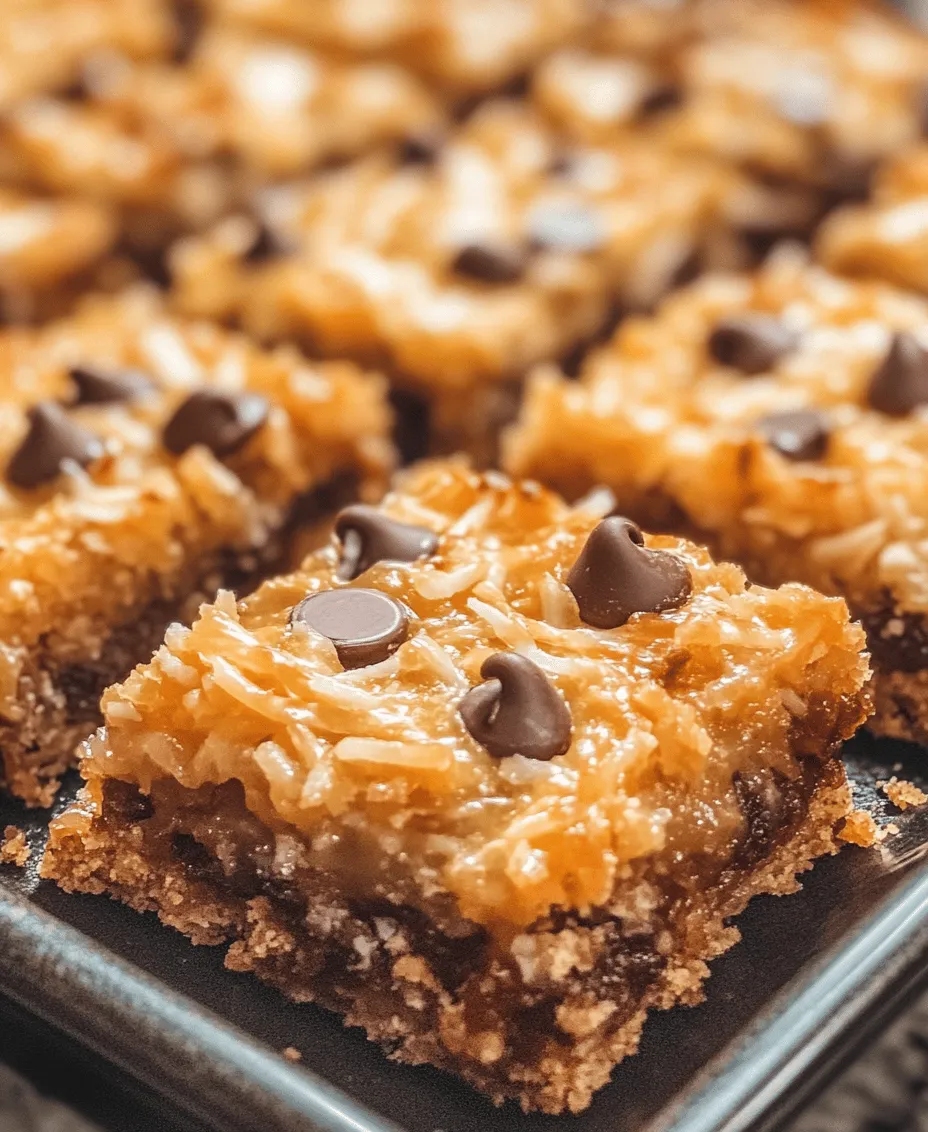
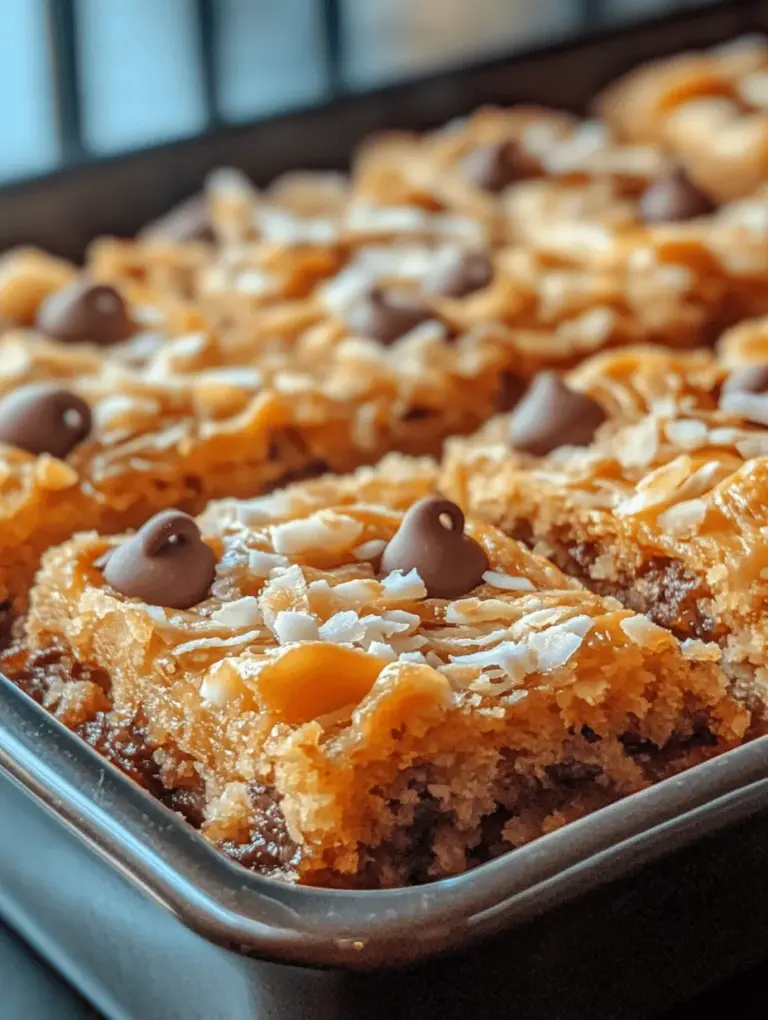
In the world of desserts, few treats can capture the imagination quite like enchanted magic cookie bars. These delightful bars are not just a feast for the eyes with their vibrant layers and textures; they are a symphony of flavors that come together to create a deliciously satisfying experience. Perfect for a plethora of occasions—be it lively parties, cozy family gatherings, or festive holidays—these cookie bars are sure to impress your guests and satisfy your sweet tooth.
What sets enchanted magic cookie bars apart from traditional cookies is their unique combination of flavors and textures. Imagine a luscious, buttery base topped with a medley of rich chocolate, sweet butterscotch, and chewy coconut, all held together by creamy sweetened condensed milk. This delectable treat is as visually stunning as it is mouthwateringly delicious, making it a beloved choice among dessert lovers of all ages.
The Allure of Cookie Bars
In recent years, cookie bars have surged in popularity, offering a modern twist on the classic cookie. One of the primary reasons for this trend is convenience. Cookie bars are incredibly easy to make compared to their individually baked counterparts. Instead of rolling out dough and shaping cookies one by one, you simply press the mixture into a pan, bake it, and cut it into squares once cooled. This streamlined process not only saves time but also reduces the mess typically associated with traditional cookie baking.
Moreover, cookie bars cater to a variety of tastes and dietary preferences, making them an ideal choice for any gathering. Whether you’re hosting a birthday party or a holiday celebration, you can easily adapt the recipe to accommodate various dietary needs, such as gluten-free or vegan options. This versatility ensures that everyone can enjoy a slice of the magic, further enhancing their appeal.
Ingredient Breakdown
To create the enchanting layers of flavor and texture in these magic cookie bars, you’ll need a selection of ingredients that work harmoniously together. Let’s take a closer look at each component:
– Unsalted Butter: The foundation of any good baked good, unsalted butter is crucial for flavor control. Using unsalted butter allows you to manage the saltiness of your recipe; this is particularly important when balancing the sweetness of the other ingredients.
– Graham Cracker Crumbs: These crumbs form the delicious base of the cookie bars, adding a subtle sweetness and a delightful crunch. They provide a sturdy structure that holds everything together while contributing to the overall flavor profile.
– Sweetened Shredded Coconut: This ingredient adds a chewy texture and a hint of tropical flavor that elevates the cookie bars to a new level. The coconut’s natural sweetness complements the other flavors beautifully.
– Semisweet Chocolate Chips: A classic choice for any dessert, semisweet chocolate chips provide a well-balanced sweetness and a rich, chocolatey taste. Their melty goodness is one of the main attractions of these cookie bars.
– Butterscotch Chips: These little morsels introduce a unique flavor profile that perfectly complements the chocolate. Their buttery sweetness adds complexity, making each bite a delightful experience.
– Sweetened Condensed Milk: Acting as both a binding agent and a source of creaminess, sweetened condensed milk is key to achieving that gooey texture that makes magic cookie bars so irresistible. It ensures that the ingredients meld together beautifully.
– Chopped Nuts: For those who enjoy a bit of crunch, chopped nuts such as walnuts or pecans add a delightful nutty flavor and texture. They provide a contrast to the soft, chewy elements of the bars, enhancing the overall sensory experience.
– Vanilla Extract: A staple in baking, vanilla extract enhances the overall flavor of the cookie bars. It adds depth and richness, making the dessert even more enjoyable.
– Pinch of Salt: Although it may seem counterintuitive to add salt to a sweet recipe, a pinch of salt is essential for enhancing sweetness. It balances the flavors, intensifying the overall taste of the bars.
With all these ingredients combined, you can create a dessert that not only looks enchanting but also tastes incredible. The next step is to dive into the preparation process, where we’ll break down the steps to crafting these delightful cookie bars.
Step-by-Step Instructions
Creating enchanted magic cookie bars is an enjoyable process that doesn’t require advanced baking skills. Here’s a detailed breakdown of how to prepare these delicious treats:
Preheating the Oven
Before you begin mixing your ingredients, it’s essential to preheat your oven. A consistent oven temperature is crucial for even baking, ensuring that your cookie bars turn out perfectly golden brown. Preheat your oven to 350°F (175°C) and allow it to reach the desired temperature while you prepare the base.
Making the Base
1. Prepare Your Baking Pan: Line a 9×13-inch baking pan with parchment paper, leaving some overhang on the sides. This will make it easy to lift the bars out once they’ve cooled.
2. Melt the Butter: In a saucepan over low heat or in a microwave-safe bowl, melt the unsalted butter until it’s completely liquid. Be careful not to let it brown; you want it just melted.
3. Combine Ingredients for the Base: In a mixing bowl, combine the melted butter with the graham cracker crumbs and a pinch of salt. Stir until the crumbs are evenly coated in butter. This mixture will serve as the firm crust of your cookie bars.
4. Press the Mixture into the Pan: Transfer the crumb mixture to your prepared baking pan. Using the back of a measuring cup or your hands, press the mixture firmly and evenly across the bottom of the pan. This step is crucial for achieving a solid base that won’t crumble apart when you cut the bars.
Layering the Toppings
1. Add the Shredded Coconut: Once the base is prepared, sprinkle the sweetened shredded coconut evenly over the top. This layer adds not only flavor but also a delightful chewiness.
2. Sprinkle the Chocolate Chips and Butterscotch Chips: Next, sprinkle the semisweet chocolate chips and butterscotch chips over the coconut layer. Make sure to distribute them evenly for a balanced flavor in every bite.
3. Drizzle with Sweetened Condensed Milk: Pour the sweetened condensed milk in a steady stream over the entire surface of the pan, ensuring that it covers the chocolate and coconut layers. This will bind everything together and create that gooey texture that makes these bars so addictive.
4. Top with Chopped Nuts: If you’re using nuts, sprinkle the chopped walnuts or pecans over the top of the condensed milk layer. This final touch adds crunch and enhances the overall flavor profile.
By carefully layering your ingredients, you create a visually appealing and delicious dessert. The next steps will involve baking and cooling the bars to achieve perfection, setting the stage for the final reveal of your enchanted magic cookie bars. Keep an eye on the oven as they bake, and prepare yourself for the delightful aroma that will fill your kitchen.

Pouring the Sweetened Condensed Milk
The sweetened condensed milk is the secret to achieving the rich, gooey texture that makes Enchanted Magic Cookie Bars so irresistible. As you begin to pour the sweetened condensed milk over your layered ingredients, ensure that it is evenly distributed. This step is crucial for optimal texture; the milk not only binds the layers together but also contributes to the overall sweetness and creaminess of the bars.
To pour effectively, tilt the can slightly and move it in a slow back-and-forth motion over the surface of the cookie base. This allows the milk to flow into all the nooks and crannies, ensuring that every bite will be just as delicious as the last. Avoid pouring it all in one spot, as this could create uneven cooking and texture. Taking the time to ensure complete coverage will result in well-balanced flavors and a cookie bar that is both chewy and satisfying.
Baking Time
Baking your Enchanted Magic Cookie Bars is where the magic truly happens. Preheat your oven to 350°F (175°C) and bake the bars for about 25 to 30 minutes. However, keep in mind that baking times can vary based on your oven and the thickness of your layers.
To check for doneness, look for a light golden brown color on the top, and the edges should begin to pull away from the sides of the pan. If you prefer a softer, chewier texture, aim for the lower end of the baking time. For a firmer bar, bake a few minutes longer until the center is set. A toothpick inserted into the center should come out with a few moist crumbs but not wet batter. Remember, the bars will continue to firm up slightly as they cool, so avoid overbaking.
Cooling Process
Once your cookie bars are finished baking, it’s time for the cooling process. Allow them to cool in the pan for at least 10 to 15 minutes before attempting to cut them. This cooling period is essential; it helps the layers set and makes it easier to cut into clean squares. If you try to cut the bars while they are still hot, they may crumble or fall apart.
For best results, after the initial cooling, transfer the pan to the refrigerator for about 30 minutes. This will help firm up the bars even more, giving you that perfect bite without the risk of a messy cut. Once chilled, use a sharp knife to slice them into squares or rectangles, wiping the knife clean between cuts for the best results.
Flavor Combinations and Variations
One of the most enchanting aspects of the Enchanted Magic Cookie Bars is their versatility. While the basic recipe is delightful, you can easily customize the flavors to suit your preferences. Here are some creative variations to consider:
– Chocolate and Nut Substitutions: Instead of the standard chocolate chips, try using white chocolate, dark chocolate, or even butterscotch chips for a different flavor profile. You can also mix in different nuts, such as pecans, almonds, or walnuts, to add a satisfying crunch.
– Spices and Flavorings: Enhance the flavor by adding a pinch of cinnamon or nutmeg to the dry ingredients. A sprinkle of sea salt on top just before baking can elevate the sweet and salty profile, making each bite more complex and satisfying.
– Gluten-Free Option: For those with gluten sensitivities, you can easily make a gluten-free version of these cookie bars. Simply substitute regular graham cracker crumbs with gluten-free graham cracker crumbs. This small change ensures that everyone can enjoy the magic of these dessert bars.
These variations not only cater to different dietary needs but also allow for a personalized touch, making your cookie bars uniquely yours.
Serving Suggestions
When it comes to serving your Enchanted Magic Cookie Bars, the possibilities are endless. Here are some ideas to elevate your dessert experience:
– Indulgent Pairings: Serve the cookie bars warm with a scoop of vanilla ice cream or a dollop of whipped cream on top. The contrast between the warm, gooey bars and the cold ice cream creates a delightful combination that is sure to impress.
– Presentation for Gatherings: If you’re hosting a party or gathering, consider arranging the cookie bars on a decorative platter. You can dust them with powdered sugar or drizzle melted chocolate over the top for an elegant touch. Adding fresh berries or mint leaves as garnish can also enhance the visual appeal.
– Beverage Pairings: To complement the rich flavors of the cookie bars, consider offering beverages such as freshly brewed coffee, hot cocoa, or a glass of cold milk. These drinks can enhance the dessert experience and provide a satisfying balance to the sweetness of the bars.
Storage Tips
To keep your Enchanted Magic Cookie Bars fresh for as long as possible, proper storage is key. Here are some tips to maintain their deliciousness:
– Room Temperature Storage: If you plan to eat the bars within a few days, store them in an airtight container at room temperature. They will remain fresh for about 3 to 4 days. Make sure to separate layers with parchment paper to avoid sticking.
– Refrigeration: For extended freshness, you can store the cookie bars in the refrigerator. They will last up to a week when kept in an airtight container. Chilling the bars can also enhance their texture, making them even more enjoyable.
– Freezing Options: For longer storage, you can freeze the cookie bars. Cut them into squares and wrap each piece tightly in plastic wrap, then place them in a freezer-safe bag or container. They can last up to 3 months in the freezer. To thaw, simply leave them in the refrigerator overnight or let them sit at room temperature for a couple of hours.
Nutritional Information
While Enchanted Magic Cookie Bars are undeniably delicious, it’s also important to consider their nutritional aspects. Each bar contains a mix of ingredients that provide a balance of carbohydrates, fats, and sugars.
For those looking to make healthier choices, consider the following modifications:
– Reduced Sugar: You can cut back on the amount of sweetened condensed milk or opt for a low-sugar alternative if available.
– Nut Butters: Substituting part of the butter with a natural nut butter can add healthy fats and protein.
– Add More Fiber: Incorporating oats or using whole grain graham cracker crumbs can increase the fiber content, making the bars a bit more wholesome.
By making these modifications, you can enjoy the enchanting flavors of your cookie bars while still being mindful of your dietary goals.
Conclusion
In conclusion, Enchanted Magic Cookie Bars are an exceptional treat that brings both joy and satisfaction to any dessert table. Their delightful combination of textures and flavors, alongside the endless possibilities for customization, makes them a must-try for any baking enthusiast. Whether you enjoy them as is or add your own twist, these cookie bars are sure to impress family and friends alike.
We encourage you to try this recipe and explore the variations that suit your taste. Share your baking experiences and let the enchanting qualities of these dessert bars bring happiness to your home. With their gooey goodness and versatility, Enchanted Magic Cookie Bars are destined to become a favorite in your recipe collection.

