Introduction
Mochi, a traditional Japanese delicacy, is much more than just a sweet treat; it embodies a rich cultural heritage that dates back centuries. Made from glutinous rice, this chewy rice cake has become a beloved staple in Japanese cuisine and is celebrated for its versatility and unique texture. Whether enjoyed on its own, filled with sweet or savory ingredients, or used as a topping for desserts, mochi has a special place in the hearts of many.
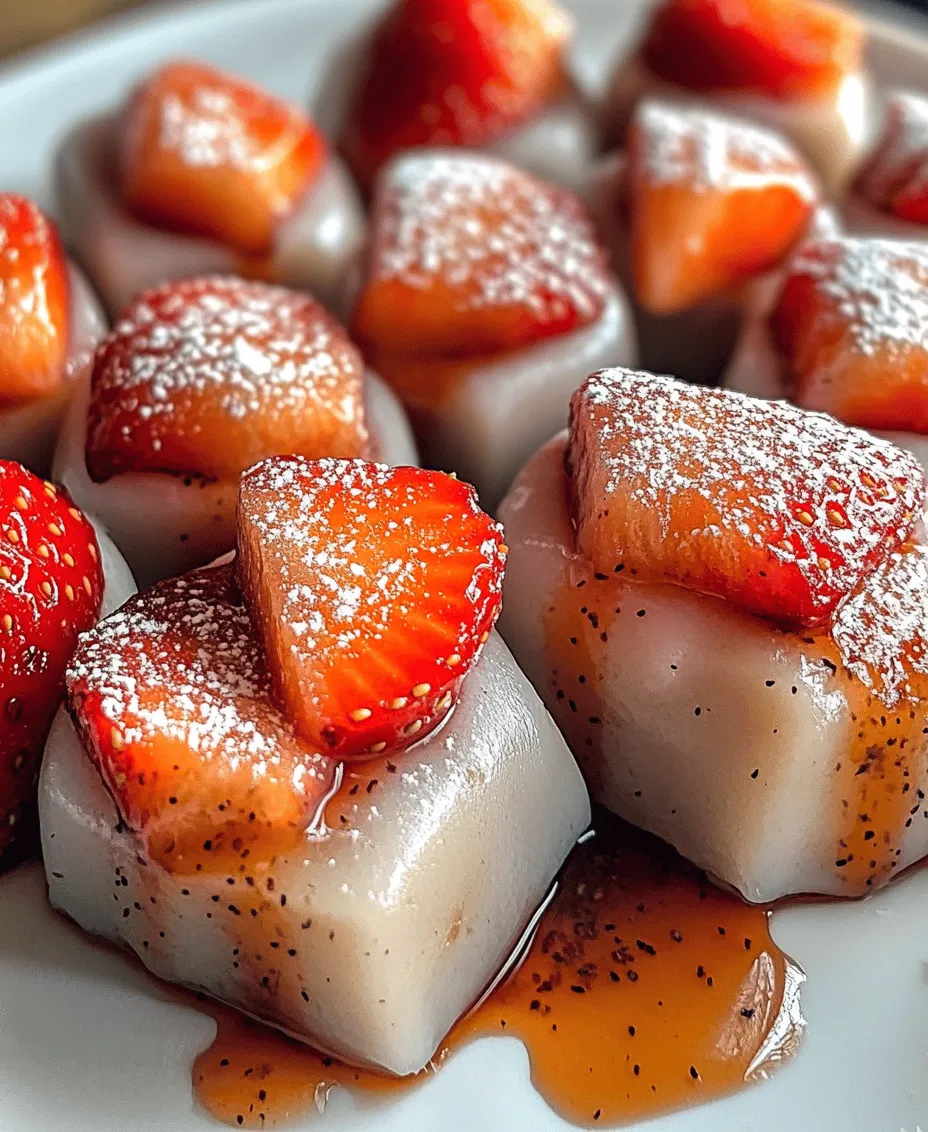
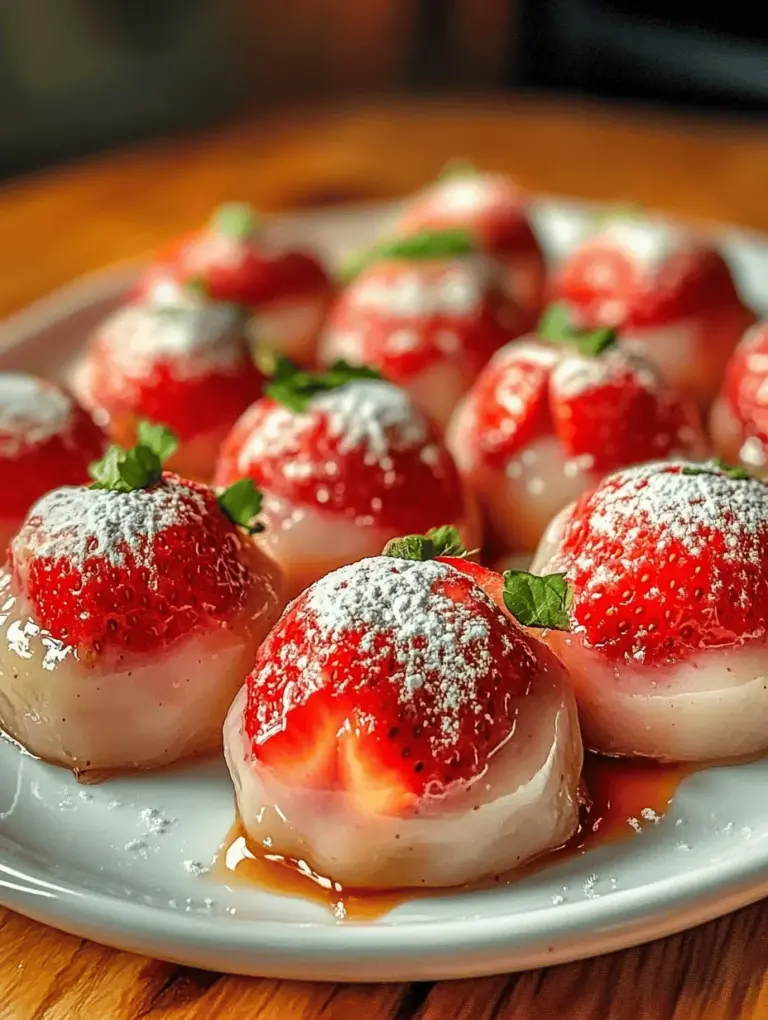
In this delightful recipe, we take mochi to new heights by incorporating fresh strawberries into the mix. The combination of sweet, juicy strawberries and the chewy, soft texture of mochi creates an irresistible treat that is perfect for any occasion. Not only does this recipe highlight the vibrant flavors of strawberries, but it also showcases the fun and rewarding process of making mochi at home.
Creating homemade mochi allows you to control the ingredients and customize the flavors to suit your preferences. Whether you prefer a classic filling of sweet red bean paste or want to keep it simple with just strawberries, the possibilities are endless. Join us as we explore the enchanting world of strawberry mochi magic.
Understanding Mochi: The Basics
To fully appreciate the art of making mochi, it’s essential to understand what it is and the key ingredient that makes it unique. Mochi is a Japanese rice cake made from glutinous rice flour, also known as mochiko. This special type of flour is derived from short-grain rice that has a high starch content, giving mochi its signature chewy, elastic texture.
The texture of mochi can be described as soft and pliable, with a satisfying chewiness that makes it a favorite among dessert lovers. When prepared correctly, mochi has a delicate balance of firmness and tenderness, allowing it to be molded into various shapes and forms. Traditionally, mochi is enjoyed in many forms, from simple rice cakes to elaborate desserts like daifuku, which are filled with sweet fillings.
In Japanese culture, mochi holds significant meaning, often associated with special occasions and celebrations. It is commonly enjoyed during the New Year (Oshogatsu), where it symbolizes good fortune and prosperity. Mochi is also used in traditional sweets, such as sakura mochi, which celebrates the beauty of cherry blossoms in spring.
Ingredients Breakdown
To create your delightful strawberry mochi, you’ll need a few key ingredients that will come together to produce this magical treat. Here’s a detailed breakdown of each component:
Glutinous Rice Flour
The star ingredient of mochi is glutinous rice flour, or mochiko. This flour is essential for achieving the unique texture that defines mochi. When combined with water and cooked, it transforms into a sticky, stretchy dough that can be molded and shaped. You can find glutinous rice flour at most Asian grocery stores or online. It’s important not to confuse it with regular rice flour, as only glutinous rice flour will yield the desired results.
Granulated Sugar
Granulated sugar plays a crucial role in sweetening the mochi dough. It not only adds sweetness but also contributes to the overall texture, helping to create a soft and chewy consistency. Depending on your taste preferences, you can adjust the amount of sugar to suit your liking.
Fresh Strawberries
Selecting the right strawberries is vital for this recipe. Opt for ripe, sweet berries that are firm and free from blemishes. The freshness of the strawberries will enhance the flavor of the mochi, making each bite a burst of fruity goodness. When preparing your strawberries, be sure to choose ones that are of similar size for an even wrapping experience.
Cornstarch
Cornstarch is an essential ingredient for dusting the mochi and preventing it from sticking during the preparation process. It helps to keep the surface of the mochi smooth and allows for easy handling. Be generous with the cornstarch as you work, as it will make the entire process much easier.
Sweetened Condensed Milk (Optional)
For those who enjoy a creamier texture, sweetened condensed milk can be added to the mochi dough. This optional ingredient enhances the richness of the mochi and adds a layer of sweetness that pairs beautifully with the strawberries.
Red Bean Paste (Optional)
Another traditional filling for mochi is red bean paste, made from adzuki beans. This sweet paste is often used in Japanese desserts and provides a delightful contrast to the fresh strawberries. If you choose to include red bean paste, it’s essential to prepare it ahead of time, as it requires some cooking and cooling.
Step-by-Step Instructions for Making Strawberry Mochi
Now that you have a solid understanding of the ingredients, it’s time to dive into the process of making strawberry mochi. Following these step-by-step instructions will guide you through the preparation and ensure that your mochi turns out perfectly.
Preparing the Strawberries
The first step in making delightful strawberry mochi is preparing the strawberries. Here’s how to do it:
1. Hulling the Strawberries: Begin by washing the strawberries under cool running water. Use a gentle touch to avoid bruising the fruit. Next, hull the strawberries by removing the green caps, taking care not to cut too much of the fruit away. You want to preserve as much of the berry as possible.
2. Preparing Strawberries for Wrapping: Once hulled, you can choose to either leave the strawberries whole or cut them in half, depending on your preference. If you’re using large strawberries, cutting them in half may make them easier to wrap in mochi. Set the prepared strawberries aside while you make the mochi dough.
3. Optional: Preparing Red Bean Paste: If you’d like to incorporate red bean paste into your mochi, you can prepare it now. Soak adzuki beans overnight, then boil them until they are soft. Drain and mash the beans, then mix in sugar to taste. Allow the mixture to cool completely before using it as a filling.
Making the Mochi Dough
The next step is to create the mochi dough, which will envelop the strawberries in a delightful chewy layer.
1. Mixing Glutinous Rice Flour and Sugar: In a microwave-safe bowl, combine 1 cup of glutinous rice flour and 1/4 cup of granulated sugar. Mix them together until they are well incorporated. This step is crucial as it ensures even sweetness throughout the dough.
2. Gradual Water Addition: Slowly add 3/4 cup of water to the flour-sugar mixture, stirring continuously to avoid lumps. It’s important to achieve a smooth mixture without any dry pockets of flour. The consistency should be similar to a thick pancake batter. If the mixture appears too thick, you can add a little more water, but be cautious not to make it too runny.
3. Microwaving the Mixture: Cover the bowl with plastic wrap, leaving a small vent for steam to escape. Microwave the mixture on high for 1 minute. After the first minute, carefully remove the bowl (it will be hot) and stir the mixture. Return it to the microwave for another minute, then stir again. Repeat this process one more time, cooking for an additional minute. The dough should become translucent and slightly sticky when finished.
At this point, your mochi dough is ready to be shaped and filled, leading you to the next exciting steps in the process of making delightful strawberry mochi magic. Stay tuned for the continuation of this delicious journey as we explore how to assemble and enjoy this sweet Japanese treat!

Delightful Strawberry Mochi Magic: A Comprehensive Guide
Covering the Bowl: The Importance of Steam in Cooking
When preparing your mochi, covering the bowl during the cooking process is essential. The steam generated inside the bowl helps to ensure even cooking of the dough, allowing it to become soft and pliable. This steaming method is crucial for achieving the perfect mochi texture, which is soft yet slightly chewy. As the dough cooks, the heat and steam work together to hydrate the glutinous rice flour, transforming it into a deliciously malleable mixture.
Techniques for Stirring and Checking the Dough’s Consistency
Once the dough has been cooked for about 10 minutes, it’s time to check its consistency. Begin by carefully removing the cover, taking caution with the steam that will escape. Use a sturdy spatula or wooden spoon to stir the dough gently. The goal is to ensure that it is well-mixed and smooth without any lumps.
You should observe a glossy, sticky texture resembling a thick paste. If the dough appears too dry or crumbly, it may need a few additional minutes of steaming. On the other hand, if it seems overly wet, you can sprinkle a small amount of glutinous rice flour into the mixture while stirring to balance the moisture. Once you achieve the desired consistency, proceed to the next step.
Cooling the Mochi Dough
After cooking, it’s important to let the mochi dough cool slightly before handling it. Transfer the dough onto a clean, dusted surface. Allow it to cool for about 10-15 minutes until it is warm but manageable. This step not only prevents burns but also makes the dough easier to shape.
Safety Tips for Handling Hot Dough
When working with hot dough, safety should be your top priority. Here are a few tips to keep in mind:
1. Use Heat-Resistant Gloves: When handling the warm dough, consider wearing kitchen gloves designed for heat resistance. This will protect your hands from burns.
2. Work Quickly: Since the dough will continue to cool and set, work efficiently to shape your mochi while it remains pliable.
3. Keep a Damp Cloth Handy: Having a damp cloth nearby can help you wipe off any excess stickiness from your fingers, making the shaping process easier.
Description of the Expected Texture Post-Cooking
Once the mochi dough has cooled to a manageable temperature, you should notice that it has taken on a smooth, elastic texture. The ideal mochi should be soft, chewy, and slightly sticky without being overly tacky. This texture is what makes mochi such a delightful treat, allowing it to envelop the fresh strawberries beautifully.
Dusting Your Surface
Dusting your working surface with cornstarch or potato starch is a crucial step in the mochi-making process. This prevents the dough from sticking to the surface, allowing for easy handling and shaping. Generously sprinkle a thin layer of starch over your work surface before placing the mochi dough down. You can also dust the dough lightly, ensuring that it remains easy to manipulate.
Importance of Dusting for Easy Handling and Shaping
Proper dusting not only aids in preventing stickiness but also contributes to the overall appearance of your mochi. A well-dusted surface allows for clean edges and a polished finish, resulting in a professional-looking treat. Remember, a little goes a long way; you want to ensure the dough does not become too dry or caked with starch.
Shaping the Mochi: A Step-by-Step Guide
1. Divide the Dough: Begin by dividing the mochi dough into equal portions, about the size of a golf ball. You should end up with 8-12 pieces, depending on how large you want your mochi.
2. Flatten the Dough: Take one piece of dough and flatten it gently with your fingers or a rolling pin, creating a circular shape about ¼ inch thick. Try to keep the center slightly thicker to accommodate the strawberry filling.
3. Wrapping the Strawberries: Place a fresh strawberry in the center of the flattened dough. Gently fold the edges of the dough over the strawberry, pinching the seams together to seal it. Ensure that the mochi is completely encasing the strawberry to prevent leakage.
4. Sealing the Mochi: To seal the mochi correctly, apply a little pressure and twist the dough slightly to ensure that the edges adhere. If you find the dough is too sticky, dust it lightly with cornstarch. This will help create a secure seal and prevent any filling from escaping during the cooking process.
Finishing Touches
Once all your mochi are shaped, it’s time for the finishing touches. A light dusting of cornstarch on the exterior of each mochi ensures a non-sticky finish, allowing for easy handling and a beautiful presentation.
Chilling and Serving
After dusting, place the mochi on a serving plate or a parchment-lined tray. Refrigerate them for at least 30 minutes to an hour. Chilling the mochi not only enhances the texture but also makes it easier to cut and serve.
For an added touch of sweetness, consider drizzling a bit of sweetened condensed milk over your mochi before serving. This elevates the flavor profile and adds a creamy contrast to the fresh strawberries inside.
Nutritional Information
Each serving of Strawberry Mochi (approximately two pieces) contains:
– Calories: 180-200
– Carbohydrates: 35g
– Protein: 2g
– Fat: 0.5g
– Fiber: 2g
– Sugars: 8g
Utilizing fresh strawberries not only provides natural sweetness but also adds vitamins and antioxidants to your treat. Exploring alternative fillings, such as sweet red bean paste or other fruits, can enhance the nutritional value of your mochi while keeping it delicious.
Cultural Significance and Variations of Mochi
Mochi has a rich history in Japanese culture, traditionally made during special occasions, including the New Year. The process of mochi pounding, known as “mochi tsuki,” involves soaking glutinous rice, steaming it, and then pounding it into a smooth paste. This communal activity symbolizes unity and celebration in Japan.
Variations of mochi have expanded globally, with many incorporating different fruits or fillings. For instance, mango and chocolate are popular choices that delight the taste buds. Matcha mochi, infused with green tea powder, has also gained immense popularity, showcasing the versatility of this beloved treat.
Fun fact: Mochi has transcended cultural boundaries, inspiring desserts worldwide, from mochi ice cream to trendy mochi waffles, proving its adaptability and growing appeal.
Conclusion
Making and sharing Strawberry Mochi is not just about enjoying a sweet treat; it’s an experience filled with creativity and joy. The process of crafting each piece allows you to explore different flavors and fillings, making it a fun activity for family and friends.
So, whether you’re preparing it for a special occasion or simply indulging in a homemade dessert, let your imagination guide you. With the delightful taste of fresh strawberries enveloped in soft, chewy mochi, you’re sure to find happiness in every bite. Embrace the art of mochi-making, and enjoy the delightful journey it brings!

