Introduction
If you have a penchant for desserts that are rich, indulgent, and utterly satisfying, then turtle bars should be on your radar. Combining the irresistible trio of chocolate, caramel, and nuts, these bars are a delightful treat that has captured the hearts of dessert lovers everywhere. The name “turtle” is derived from the candy that inspired these delicious treats, which features pecans and caramel coated in chocolate, resembling a turtle’s shell.
What makes turtle bars even more appealing is the joy of creating your own homemade desserts. There’s something uniquely satisfying about baking in your own kitchen—measuring out ingredients, mixing them together, and then watching as they transform into something delectable. Homemade turtle bars not only allow for personal customization but also provide an opportunity to impress friends and family with your culinary skills.
These bars are incredibly versatile, making them perfect for various occasions. Whether you’re hosting a party, gathering around the holidays, or simply enjoying a casual get-together, turtle bars are sure to elevate the dessert table. Their combination of textures and flavors will leave your guests craving more and asking for the recipe.
Understanding the Turtle Bar Dessert
The origin of turtle desserts can be traced back to the early 20th century, with the first turtle candies appearing in the United States. These confections were created by combining caramel, chocolate, and nuts, resulting in a treat that was both rich and satisfying. Over the years, the turtle concept evolved, leading to the creation of turtle bars—a bar-style version that incorporates all the beloved flavors of the original candy into an easy-to-slice dessert.
What makes turtle bars truly unique is their flavor profile and texture. The contrast between the smooth, creamy chocolate, the gooey caramel, and the crunchy nuts creates a symphony of taste and mouthfeel. Each bite delivers a burst of sweetness, complemented by the nutty crunch, making it a decadent experience that is hard to resist. Whether you prefer the classic combination of pecans or the slight earthiness of walnuts, the choice of nuts adds a layer of depth to the bars, enhancing their overall appeal.
Ingredients Breakdown
Creating the perfect turtle bars starts with selecting the right ingredients. Here’s a detailed breakdown of what you will need:
– Unsalted Butter: The foundation of any great dessert, unsalted butter is crucial for imparting a rich flavor. It also helps in achieving a tender texture in the crust, making your turtle bars melt in your mouth.
– Brown and Granulated Sugar: A blend of these two sugars adds complexity to the sweetness. While granulated sugar provides a clean sweetness, brown sugar introduces a hint of molasses that enhances the caramel notes in the bars.
– Eggs: Eggs serve multiple purposes in baking. They act as a binding agent, ensuring that the bars hold together, while also contributing to leavening, giving the bars a light texture.
– Vanilla Extract: This ingredient is a flavor powerhouse. A splash of vanilla extract elevates the overall taste of the turtle bars, bringing all the other flavors together in perfect harmony.
– All-Purpose Flour: Essential for structure, flour lends the necessary body to the bars. It helps create a sturdy base that can support the layers of chocolate, caramel, and nuts.
– Salt: A small amount of salt is crucial in baking. It balances the sweetness and enhances the overall flavor profile, making each bite more enjoyable.
– Nuts (Pecans or Walnuts): The choice of nuts is vital in turtle bars. Pecans are the traditional choice and add a buttery, rich flavor. Walnuts bring a slightly bitter note that contrasts beautifully with the sweetness of the caramel and chocolate.
– Chocolate Chips: These little morsels are the star of the show, providing that beloved chocolatey richness. Using semi-sweet chocolate chips strikes a perfect balance, but you can also experiment with dark or milk chocolate for different flavor profiles.
– Caramel Sauce: Finally, the caramel sauce ties everything together. You can choose to make your own for a homemade touch, or opt for store-bought for convenience. Either way, the gooey caramel is what makes turtle bars truly decadent.
With these ingredients in hand, you are well on your way to creating a batch of decadent turtle bars that will leave everyone wanting more. The process of combining these ingredients is not only straightforward but also incredibly rewarding as the delightful aroma fills your kitchen.
As we move forward, we will delve into the specific steps you need to follow to create these delicious bars. Whether you are a seasoned baker or a novice in the kitchen, this turtle bar recipe is designed to be accessible and enjoyable for all. Prepare to embark on a culinary adventure that will result in a mouthwatering dessert that is sure to impress!

Flaky Sea Salt: The Finishing Touch for Flavor Contrast
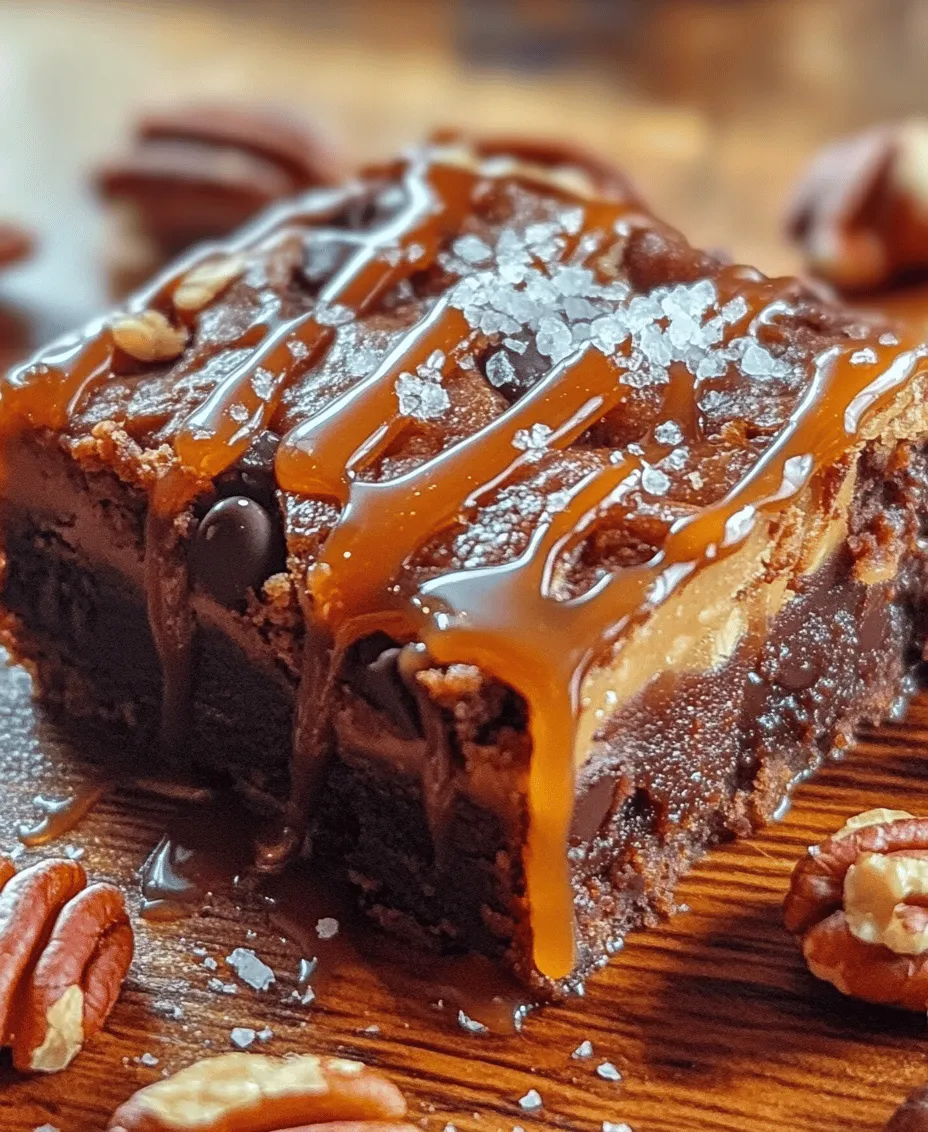
Flaky sea salt is the crowning jewel of turtle bars, elevating the decadent sweetness of chocolate and caramel with its crunchy texture and briny notes. The contrast of salty and sweet not only enhances the overall flavor profile but also adds a sophisticated touch to the dessert. As you prepare your turtle bars, keep in mind the importance of this finishing touch. A light sprinkle of flaky sea salt just before serving will bring all the elements together, making each bite a delightful experience.
Step-by-Step Instructions for Making Turtle Bars
Preheating the Oven: Importance of This Step
Before you begin mixing your ingredients, preheat your oven to 350°F (175°C). This step is crucial as it ensures that the bars bake evenly and set properly. An oven that’s not preheated can result in uneven baking, leaving you with gooey centers or overly dry edges. Setting the right temperature before you start working on your batter helps achieve the perfect texture for your turtle bars.
Mixing Wet Ingredients: Techniques for Proper Blending
In a large mixing bowl, start by combining your wet ingredients: melted butter, brown sugar, eggs, and vanilla extract. Using a whisk or an electric mixer, blend these ingredients until smooth and creamy. Ensure the brown sugar is fully dissolved, as this will contribute to the moistness and flavor of the bars. The key here is to mix until just combined; overmixing can lead to dense bars, so stop once you achieve a homogenous mixture.
Combining Dry Ingredients: Tips for Sifting and Mixing Without Overworking
In another bowl, whisk together your dry ingredients: flour, baking powder, and salt. Sifting the flour can help aerate it, preventing clumps and ensuring a lighter texture in your final product. Once sifted, gradually add the dry mixture to the wet ingredients, stirring gently with a spatula or wooden spoon. Be careful not to overwork the batter; mixing just until the flour is incorporated is sufficient. This will help keep your turtle bars soft and chewy.
Adding Nuts and Chocolate: Best Practices for Even Distribution
Next, fold in the chopped pecans and chocolate chips. It’s essential to ensure that they are evenly distributed throughout the batter. This can be achieved by gently folding the mixture rather than stirring vigorously. The goal is to coat the nuts and chocolate in the batter without breaking them apart. This will lead to a delightful texture and bursts of flavor in each bar.
Spreading the Batter: Techniques for an Even Layer in the Pan
Grease a 9×13-inch baking dish or line it with parchment paper for easy removal. Pour the batter into the prepared pan, using a spatula to spread it into an even layer. Take your time with this step to ensure that the batter reaches all corners of the pan. An even layer will promote uniform baking and prevent some parts from being overcooked while others remain undercooked.
Drizzling with Caramel: How to Achieve a Marbled Effect
Once the batter is spread evenly, it’s time to drizzle the caramel sauce over the top. You can use store-bought caramel or make your own, but ensure it’s warm and pourable for easy drizzling. Use a spoon or a squeeze bottle to create a marbled effect by zigzagging the caramel across the surface of the batter. Use a knife to gently swirl the caramel into the batter, ensuring it doesn’t sink completely. This technique not only enhances the flavor but also creates an appealing visual element.
Finishing Baking: Indicators for Doneness and Testing Methods
Bake your turtle bars in the preheated oven for about 25-30 minutes or until the edges are golden brown and a toothpick inserted into the center comes out with a few moist crumbs. It’s important not to overbake, as you want the bars to remain chewy and soft. Keep an eye on them during the last few minutes of baking; the aroma of chocolate and caramel will fill your kitchen as they approach perfection.
Cooling and Cutting: Best Practices for Achieving Neat Cuts and Presentation
Once baked, remove the bars from the oven and let them cool in the pan for at least 10-15 minutes. This resting period allows the caramel to set slightly, making it easier to cut the bars without them falling apart. After they have cooled, transfer them to a cutting board and use a sharp knife to cut them into squares or rectangles. For cleaner cuts, wipe the knife with a damp cloth between slices. Serve them as is, or sprinkle with a bit of flaky sea salt for that extra touch.
Baking Tips for Perfect Turtle Bars
While making turtle bars is relatively straightforward, there are common pitfalls to avoid that can affect the outcome of your dessert:
– Overmixing the Batter: As mentioned earlier, overmixing can lead to dense bars. Stir just until combined for a softer texture.
– Underbaking: Keep a close watch on the baking time. Underbaking will result in a gooey mess, while overbaking can dry them out.
– Using Cold Ingredients: Ensure your eggs and butter are at room temperature for better incorporation into the batter.
For those with dietary restrictions, modifications can be made:
– Gluten-Free Options: Substitute all-purpose flour with a gluten-free flour blend. Ensure that the other ingredients, like baking powder, are gluten-free.
– Nut-Free Alternatives: If you have nut allergies, you can omit the pecans or replace them with seeds, such as sunflower or pumpkin seeds.
To maintain the freshness and flavor of your turtle bars, store them in an airtight container at room temperature for up to a week. For longer storage, consider refrigerating them, which can extend their lifespan for up to two weeks. For optimal taste, allow them to come to room temperature before serving.
Serving Suggestions
When it comes to serving your turtle bars, presentation can elevate the overall experience. Here are some ideas:
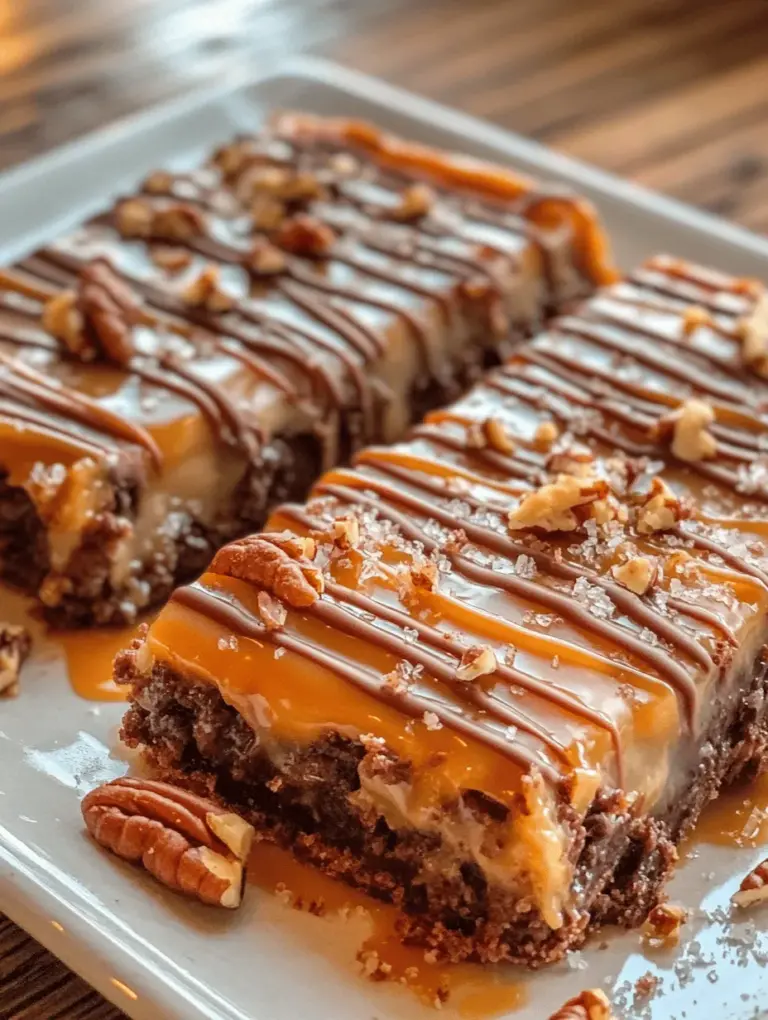
– Garnishing: A light dusting of powdered sugar or a sprinkle of flaky sea salt can add visual appeal and flavor contrast.
– Pairing Suggestions: Serve them warm with a scoop of vanilla ice cream or a dollop of whipped cream for a delightful dessert combination. The creaminess of the ice cream complements the rich flavors of the bars beautifully.
– Presentation Ideas: For special occasions, consider placing the bars on a decorative platter with fresh berries or a drizzle of chocolate sauce around them. This not only enhances the visual presentation but also adds a touch of elegance to your dessert table.
Conclusion
Baking turtle bars is not just about following a recipe; it’s about creating a delightful treat that brings joy to those who share it. The combination of rich chocolate, gooey caramel, and crunchy nuts makes these bars a favorite among dessert lovers. The versatility of this recipe allows for various adaptations, making it easy to tailor to different tastes and dietary needs.
Whether you’re preparing a batch for a family gathering, a potluck, or simply indulging in a sweet treat at home, these turtle bars are sure to impress. So roll up your sleeves, gather your ingredients, and enjoy the process of baking. The satisfaction of sharing your homemade turtle bars with loved ones will resonate long after the last bite is gone. Try making these delicious bars, and let the flavors of chocolate and caramel bring a smile to your face!

