Introduction
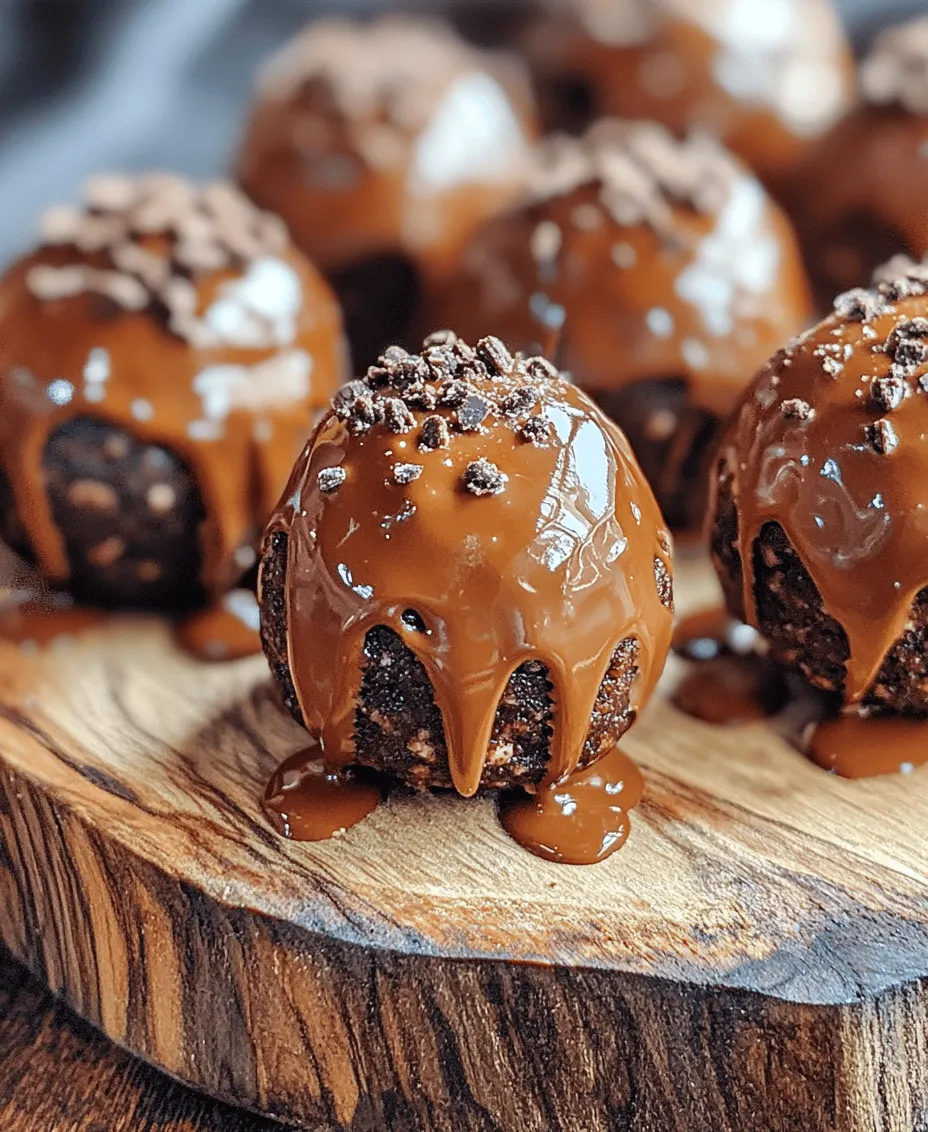
Oreo Bliss Balls have taken the dessert world by storm, captivating taste buds with their delightful blend of flavors and textures. These no-bake treats are the perfect indulgence for anyone who craves a sweet fix without the hassle of baking. Whether you’re planning a birthday party, a holiday gathering, or simply looking for a tasty snack, Oreo Bliss Balls are a convenient option that will impress your guests and satisfy your sweet tooth.
One of the standout features of these delectable bites is their simplicity. With just a handful of ingredients and no need for an oven, you can whip up a batch in no time at all. The combination of crunchy Oreo cookie crumbs, creamy cream cheese, and rich chocolate creates an irresistible treat that is both rich and satisfying. Each bite delivers a burst of flavor, making them perfect for sharing or savoring all alone.
The beauty of Oreo Bliss Balls lies not only in their taste but also in their versatility. You can customize them to suit your preferences or the occasion, whether you prefer a classic chocolate coating or want to experiment with colorful toppings. With their creamy filling and delightful crunch, these bliss balls are sure to become a favorite in your dessert repertoire.
Understanding the Ingredients
Creating the perfect Oreo Bliss Balls starts with understanding the key ingredients that contribute to their deliciousness. Each component plays a vital role in achieving the right flavor, texture, and overall appeal.
Oreo Cookies
The star of the show in this recipe is undoubtedly the iconic Oreo cookie. Known for their distinct chocolate flavor and creamy filling, Oreos bring a unique richness to desserts. Their crunchy texture contrasts beautifully with the smoothness of the cream cheese, creating a delightful mouthfeel that enhances the overall experience. The versatility of Oreos is impressive; they can be used in various desserts, from cheesecakes to milkshakes, and they shine in this bliss ball recipe.
Cream Cheese
Cream cheese is the secret ingredient that elevates the Oreo Bliss Balls to a new level of indulgence. It adds a creamy richness that perfectly complements the chocolatey crunch of the Oreos. When softened, cream cheese mixes easily, allowing it to blend seamlessly with the crushed cookies, resulting in a smooth and luscious filling. The slight tanginess of cream cheese also balances the sweetness of the cookies, creating a harmonious flavor profile that keeps you coming back for more.
Semi-Sweet Chocolate Chips
No dessert is complete without chocolate, and in this recipe, semi-sweet chocolate chips are the ideal choice for coating the bliss balls. They provide a rich, velvety layer that enhances the overall taste and presentation. The bittersweet flavor of semi-sweet chocolate pairs beautifully with the sweetness of the filling, creating a perfect balance. Additionally, the chocolate coating helps to lock in the moisture and flavor of the filling, ensuring that each bite is as delicious as the last.
Coconut Oil
While optional, coconut oil can be a fantastic addition to your chocolate coating. It acts as a melting agent, making it easier to dip the bliss balls in chocolate. Furthermore, coconut oil adds a subtle coconut flavor that can enhance the overall taste profile of the dessert. It also contributes to a smooth, glossy finish on the chocolate coating, making your treats even more visually appealing.
Additional Crushed Oreos for Topping
To elevate your Oreo Bliss Balls, consider using extra crushed Oreos as a topping. Not only does this enhance the presentation, giving your treats a professional touch, but it also adds an extra layer of flavor and texture. The additional crunch from the Oreo crumbs on top complements the smooth chocolate coating and creamy filling, making each bite even more delightful.
Step-by-Step Guide to Making Oreo Bliss Balls
Now that we have a good understanding of the ingredients, let’s dive into the step-by-step process of making these delectable Oreo Bliss Balls. This guide will ensure you achieve the perfect consistency and flavor, resulting in a batch of bliss balls that will impress everyone.
Preparing the Crust
The first step in creating Oreo Bliss Balls is preparing the crust. This is where the magic begins, as the crushed Oreos will serve as the base for your delicious filling.
1. Crushing Oreos: Start by placing your Oreo cookies in a food processor. Pulse them until they reach a fine crumb consistency. If you don’t have a food processor, you can also place the cookies in a zip-top bag and crush them with a rolling pin. Be sure to get them as fine as possible for a smooth texture in the final product.
2. Achieving the Right Consistency: The goal is to have a fine, sandy texture without any large chunks. If you notice larger pieces, continue processing until they are broken down. This ensures that the crust binds well with the cream cheese, providing a cohesive filling.
Mixing the Filling
Once you have your Oreo crumbs ready, it’s time to mix the filling. This step is crucial for achieving the creamy, delicious center of your bliss balls.
1. Soften the Cream Cheese: Before mixing, make sure your cream cheese is softened to room temperature. This will allow for easier blending and a smoother filling. If you forget to take it out ahead of time, you can microwave it for about 10-15 seconds to soften it slightly, but be cautious not to melt it.
2. Mixing Technique: In a large mixing bowl, combine the crushed Oreos and softened cream cheese. Using a spatula or hand mixer, mix until the ingredients are well combined and a thick, creamy mixture forms. Ensure there are no lumps of cream cheese remaining, as this will affect the texture of the filling.
Forming the Balls
With the filling mixed to perfection, it’s time to shape your Oreo Bliss Balls.
1. Portion Size: For uniformity and an appealing presentation, use a cookie scoop or your hands to create balls that are about 1 inch in diameter. This size is perfect for popping in your mouth and allows for easy sharing.
2. Rolling and Shaping: Once you’ve portioned out the filling, roll each piece in your hands to form smooth balls. Make sure to apply gentle pressure to avoid cracks and create a cohesive shape. If the mixture is too sticky, you can chill it in the refrigerator for about 15 minutes to make it easier to handle.
Chilling the Balls
The final step before coating is to chill the formed bliss balls. This is an essential part of the process that ensures they hold their shape during coating.
1. Importance of Chilling: Chilling the balls for at least 30 minutes in the refrigerator or about 15 minutes in the freezer will help firm them up. This step is crucial because it prevents them from falling apart when you dip them in the melted chocolate.
2. Recommended Time: While 30 minutes is the general recommendation, feel free to leave them in longer if you have the time. The firmer the bliss balls are, the easier they will be to coat.
Now that you have the bliss balls prepared and chilling, you are well on your way to creating a delightful treat that is sure to please. Stay tuned for the next steps, which will cover coating the bliss balls in chocolate and adding those irresistible finishing touches!

Coating the Bliss Balls
Coating your Decadent Oreo Bliss Balls is a crucial step that transforms them from simple treats into indulgent bites of chocolatey goodness. Here’s how to melt the chocolate perfectly and coat your bliss balls for a delightful finish.
Melting the Chocolate
To create a smooth, velvety coating for your bliss balls, you’ll need to melt chocolate carefully. Here’s how to do it:
1. Choose the Right Chocolate: You can use milk, dark, or white chocolate depending on your preference. For a classic Oreo flavor, milk chocolate often works best.
2. Chop the Chocolate: Break the chocolate into small, uniform pieces. This will help it melt evenly and prevent burning.
3. Melting in the Microwave: Place the chopped chocolate in a microwave-safe bowl. Heat it in short bursts of 20-30 seconds on medium power. Stir after each interval until the chocolate is mostly melted but still has a few solid pieces. This method ensures that the chocolate doesn’t seize up.
4. Stirring and Monitoring: Stirring is essential. Chocolate can burn quickly, so keep a close watch. Once it’s nearly melted, remove it from the microwave and stir continuously until fully melted. This technique utilizes the residual heat from the chocolate to melt any remaining solid pieces.
Coating Techniques
Now that your chocolate is melted, it’s time to coat the Oreo Bliss Balls. Follow these techniques for an even, beautiful layer of chocolate:
1. Dipping the Balls: Using a fork or a skewer, dip each bliss ball into the melted chocolate. Ensure that the ball is fully submerged. Gently lift it out, allowing excess chocolate to drip off. This will create a smooth exterior.
2. Letting Excess Drip Off: To prevent a pool of chocolate from forming, hold the ball over the bowl for a few seconds. Tap the fork gently against the edge to help the excess chocolate drip away.
3. Setting on Parchment: Place the coated bliss balls on a parchment-lined baking sheet. This will prevent sticking and make for easy cleanup.
Adding Toppings
Elevate your Oreo Bliss Balls by adding toppings. Here are some creative ideas:
1. Crushed Oreos: While the chocolate is still wet, sprinkle crushed Oreos over the top of each bliss ball. This not only enhances the flavor but also adds a decorative touch.
2. Other Topping Options: Consider using colorful sprinkles, chopped nuts (like almonds, pecans, or hazelnuts), or even a drizzle of contrasting chocolate. You can also use edible glitter for a festive look.
Final Chilling and Serving Suggestions
After your bliss balls are coated and topped, they need a final chill to set the chocolate coating properly.
1. Importance of Second Chill: Place the baking sheet with the coated bliss balls in the refrigerator for at least 30 minutes. This allows the chocolate to harden, ensuring a perfect bite every time.
2. Presentation Ideas: Serve your Oreo Bliss Balls in a decorative bowl or on a platter. You can arrange them artfully, perhaps with a few whole Oreos scattered around for decoration. For special occasions, consider placing them in cupcake liners for an elegant touch.
3. Pairing Suggestions: These bliss balls pair wonderfully with a variety of beverages. Consider serving them with cold milk, coffee, or even a scoop of vanilla ice cream. They also make a delightful addition to dessert platters alongside brownies, cookies, or fresh fruit.
Nutritional Information of Oreo Bliss Balls
While these treats are undeniably indulgent, it’s essential to be aware of their nutritional content to enjoy them mindfully.
1. Breakdown of Nutrients: Each bliss ball contains approximately 120 calories, with about 7 grams of fat and 10 grams of sugar. This can vary depending on the type of chocolate used and the size of each ball.
2. Moderation and Enjoyment: As with any dessert, moderation is key. Enjoying a bliss ball or two as an occasional treat is a great way to satisfy your sweet tooth while still indulging.
Oreo Bliss Balls for Different Occasions
Decadent Oreo Bliss Balls are perfect for a wide variety of occasions, making them a versatile dessert option.
1. Party and Holiday Ideas: Whether it’s a birthday party, holiday gathering, or a casual get-together, these bliss balls are sure to impress. You can customize them for various themes; for example, use colored sprinkles for a festive look or add seasonal flavors like peppermint or pumpkin spice.
2. Kid-Friendly Treats: Kids love these chocolatey bites! Involve them in the preparation process by letting them help with crushing the Oreos or adding toppings. It’s a fun activity that can spark their interest in cooking.
3. Customization Possibilities: Feel free to experiment with flavors and dietary restrictions. You can make gluten-free Oreo Bliss Balls by using gluten-free Oreos or create a vegan version using dairy-free chocolate and nut butter instead of cream cheese.
Conclusion
Making Decadent Oreo Bliss Balls is a simple yet rewarding process that results in a crowd-pleasing dessert. With their rich chocolate coating and creamy Oreo filling, they are sure to be a hit at any gathering. The ease of preparation and the flexibility for customization make these bliss balls a must-try recipe.
Whether you’re serving them at a party, enjoying them with a friend over coffee, or just treating yourself to something sweet, these bliss balls are perfect for any occasion. We encourage you to give this recipe a try and share your experiences with friends and family. Your journey into the world of bliss balls starts now—enjoy every bite!

