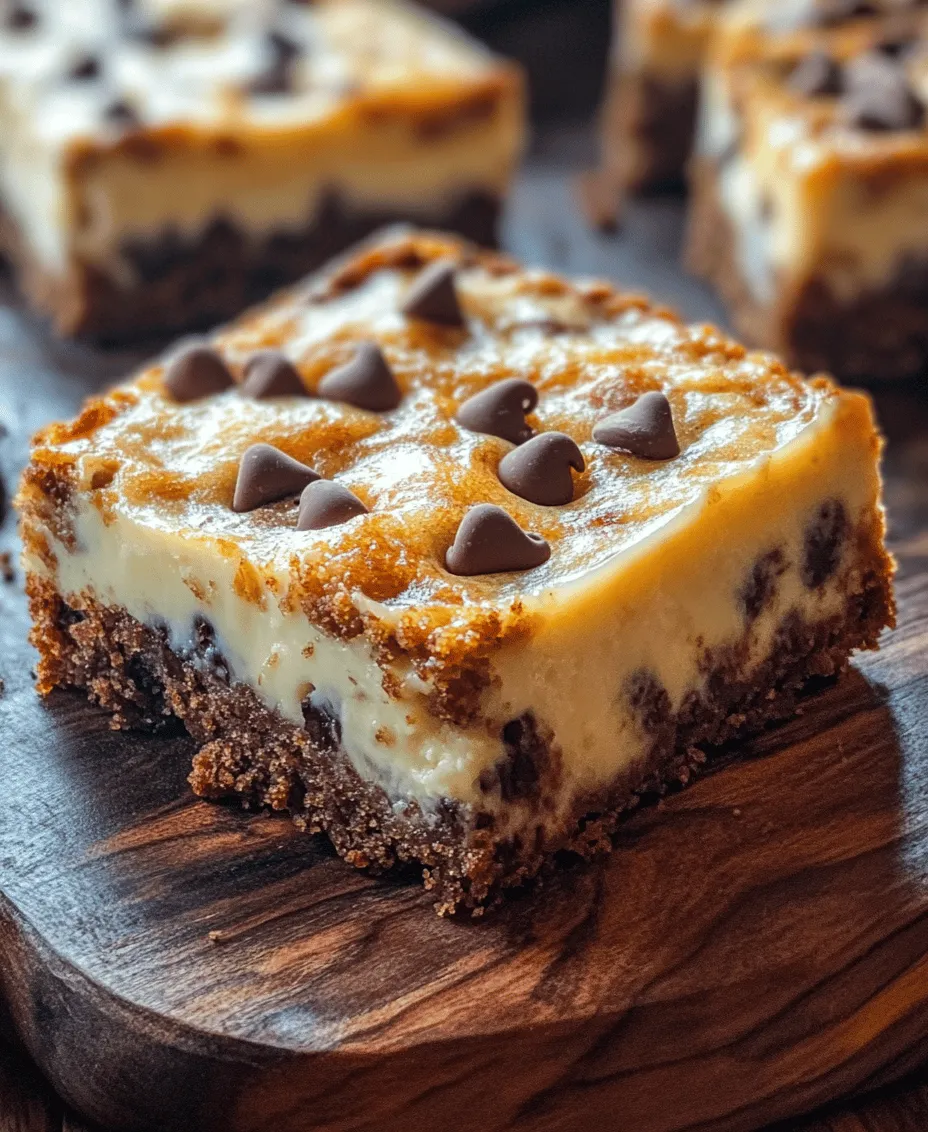
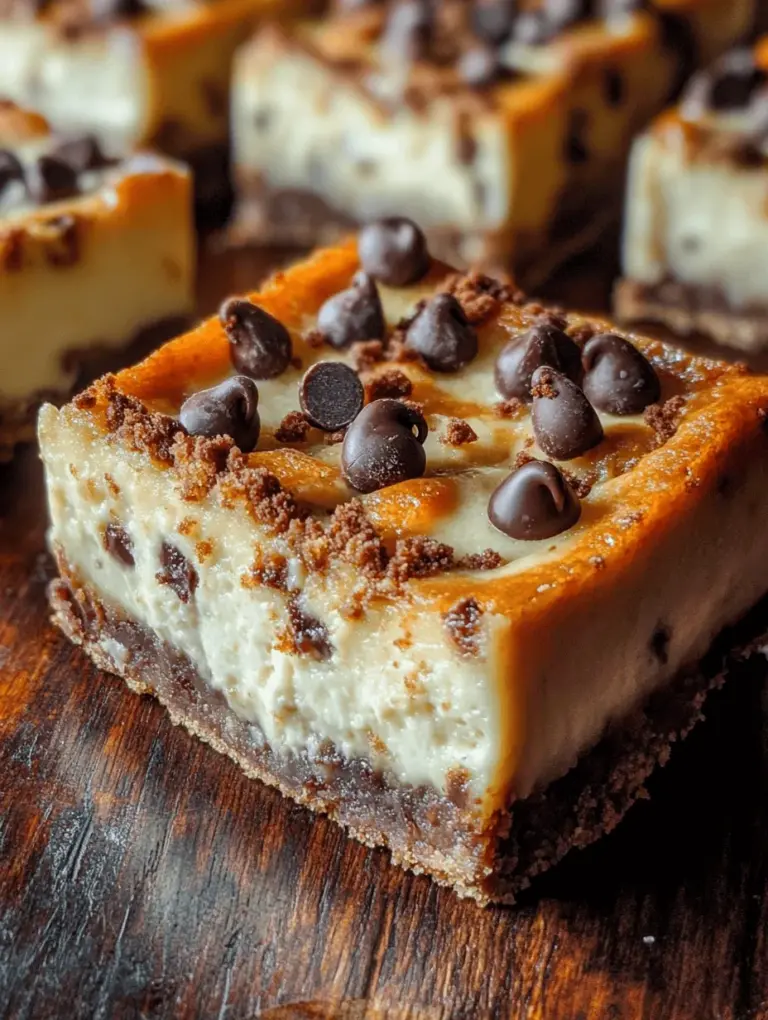
Indulging in a dessert that perfectly combines two beloved favorites—chocolate chip cookies and cheesecake—can be a transformative experience for any sweet tooth. The Decadent Chocolate Chip Cookie Cheesecake Bars are a delightful creation that promises not just flavor, but also a rich, textural experience. With a buttery, cookie-like base layered beneath a creamy cheesecake filling, these bars deliver a combination that is both satisfying and memorable. Whether you’re hosting a gathering, celebrating a special occasion, or simply treating yourself to something sweet after a long day, this dessert is a must-try.
The appeal of these cheesecake bars extends beyond their delicious taste; they are also relatively easy to make, making them an excellent choice for bakers of all skill levels. In this article, we will guide you through the entire process of making these delightful bars, from understanding the key ingredients to step-by-step instructions for preparation. By the end, you’ll be equipped with all the knowledge you need to create your very own batch of Decadent Chocolate Chip Cookie Cheesecake Bars.
Understanding the Layers of Flavor
Exploring the Cookie Layer
The foundation of these cheesecake bars is the cookie layer, which plays a crucial role in the overall flavor and texture of the dessert. A good cookie base must be buttery, slightly chewy, and capable of holding the creamy cheesecake layer above it. Let’s delve into the importance of the cookie base and the key ingredients that contribute to its deliciousness.
Importance of the Cookie Base
A well-made cookie base provides structure to the cheesecake bars while also adding a rich flavor that complements the creamy filling. This layer not only serves as a support system for the cheesecake but also stands out on its own with a delightful taste that balances the sweetness of the cheesecake.
Key Ingredients and Their Roles
1. Unsalted Butter: Creaminess and Flavor
Unsalted butter is essential for creating a rich and flavorful cookie base. The butter adds moisture and contributes to the tender texture of the cookie. Using unsalted butter allows for better control over the overall saltiness of the dessert.
2. Sugars: Balancing Sweetness
A combination of granulated sugar and brown sugar is typically used in cookie recipes. Granulated sugar helps to create a crisp exterior, while brown sugar adds moisture and a hint of caramel flavor, enhancing the overall taste of the cookie layer.
3. Egg: Binding the Ingredients
The egg acts as a binding agent, helping to hold the cookies together while also contributing to their overall texture. The protein in the egg coagulates during baking, ensuring that the cookie layer is firm yet chewy.
4. Flour, Baking Soda, and Salt: Structure and Texture
All-purpose flour provides the structure needed for the cookie layer. Baking soda promotes a slight rise, giving the cookies a soft and chewy texture. A pinch of salt enhances the flavors and balances the sweetness.
5. Chocolate Chips: Adding Decadence
No chocolate chip cookie is complete without chocolate chips. Semi-sweet chips are a popular choice, providing a rich chocolate flavor that pairs perfectly with the creamy cheesecake filling.
Delving into the Cheesecake Layer
Once the cookie layer is prepared, the next step is to create the cheesecake layer. This layer is the star of the show, bringing a silky smooth texture that contrasts beautifully with the cookie base.
Characteristics of a Perfect Cheesecake
A perfect cheesecake is creamy, rich, and has a balanced sweetness. It should not be overly dense or heavy, but instead, have a light and airy quality that melts in your mouth. The flavor should be enhanced with just the right touch of vanilla, and a hint of tanginess can elevate the overall experience.
Essential Ingredients for the Cheesecake Filling
1. Cream Cheese: The Heart of the Cheesecake
Cream cheese is the primary ingredient in any cheesecake, providing the rich and creamy texture that defines this dessert. It should be at room temperature for easy mixing and to ensure a smooth filling.
2. Granulated Sugar: Sweetness and Stability
Granulated sugar not only sweetens the cheesecake but also helps stabilize the filling. It dissolves into the cream cheese during mixing, creating a smooth, lump-free texture.
3. Eggs: Providing Structure
Eggs play a vital role in the cheesecake filling, providing structure and stability. They help the filling set as it bakes, ensuring that the cheesecake maintains its form when cut into bars.
4. Vanilla Extract: Enhancing Flavor
A splash of pure vanilla extract adds a lovely aromatic quality to the cheesecake filling, enhancing its overall flavor profile. Vanilla is a classic companion to both chocolate and cream cheese.
5. Sour Cream: Creaminess and Tang
Sour cream is often added to cheesecake recipes for its rich, creamy texture and slight tanginess. This ingredient enhances the flavor while providing an extra layer of creaminess that elevates the dessert.
Step-by-Step Instructions for Making Decadent Chocolate Chip Cookie Cheesecake Bars
Prepping Your Kitchen for Success
Before diving into the recipe, it’s important to prepare your kitchen to ensure a smooth baking experience. Here are the essential tools and equipment you will need:
Essential Tools and Equipment
1. Baking Pan and Parchment Paper
A 9×13-inch baking pan is ideal for this recipe. Lining the pan with parchment paper allows for easy removal of the bars once baked, ensuring a clean presentation.
2. Mixing Bowls and Electric Mixer
Having a variety of mixing bowls on hand, along with an electric mixer (or a sturdy whisk), will make the mixing process more efficient. An electric mixer is particularly useful for achieving a smooth cheesecake filling.
3. Measuring Cups and Spoons
Accurate measurements are crucial in baking. Ensure you have a complete set of measuring cups and spoons to get the ingredient ratios just right.
Creating the Cookie Layer
Now that your kitchen is prepped, let’s move on to creating the cookie layer. Follow these steps to ensure a perfect base for your cheesecake bars:
Creaming the Butter and Sugars
1. In a large mixing bowl, combine the softened unsalted butter, granulated sugar, and brown sugar. Using an electric mixer, beat the mixture on medium speed until it becomes light and fluffy. This process typically takes about 2-3 minutes and is essential for incorporating air into the batter, which helps create a tender cookie layer.
2. Scrape down the sides of the bowl to ensure all ingredients are evenly incorporated.
Mixing in the Egg and Vanilla
3. Add the egg and pure vanilla extract to the butter and sugar mixture. Mix on low speed until just combined. Be careful not to overmix, as this can lead to a denser cookie.
As you can see, the process of making Decadent Chocolate Chip Cookie Cheesecake Bars is straightforward yet rewarding. The combination of a rich cookie base and a creamy cheesecake layer creates a dessert experience that is hard to resist. In the following sections, we will continue with detailed instructions for completing the bars, baking them to perfection, and sharing valuable tips for achieving the best results.

Combining Dry Ingredients and Folding in Chocolate Chips
To create the perfect base for your Decadent Chocolate Chip Cookie Cheesecake Bars, start by sifting together the dry ingredients. In a large mixing bowl, combine 2 ¼ cups of all-purpose flour, 1 teaspoon of baking soda, and ½ teaspoon of salt. Sifting these ingredients helps to aerate the flour, ensuring a light and fluffy cookie base. Once mixed, add in 1 cup of semi-sweet chocolate chips, folding them gently into the dry mixture. Make sure to use a spatula or wooden spoon to incorporate the chocolate chips evenly without over-mixing, which can lead to a tough texture.
Baking the Cookie Base: Timing and Tips
After your dry ingredients and chocolate chips are combined, it’s time to prepare the cookie base for baking. Preheat your oven to 350°F (175°C) and line a 9×13-inch baking pan with parchment paper, allowing some overhang so you can easily lift the finished bars out later. Press about two-thirds of the cookie dough mixture evenly into the bottom of the pan, forming the base layer.
When it comes to baking, timing is crucial. Bake the cookie base for 12-15 minutes, or until it is slightly golden around the edges but still soft in the center. Remember that it will continue to cook slightly after being removed from the oven, so you want it to be just underdone for the best texture. Allow the cookie base to cool for about 10 minutes in the pan before moving on to the cheesecake filling.
Preparing the Cheesecake Filling
Beating the Cream Cheese to Perfection
For the cheesecake layer, ensure your cream cheese is at room temperature before beginning. This is essential for achieving a smooth and creamy texture. In a large mixing bowl, beat 16 ounces of softened cream cheese using an electric mixer on medium speed. Beat until the cream cheese is completely smooth, which should take about 2-3 minutes.
Incorporating Sugar Gradually
Next, gradually add 1 cup of granulated sugar to the cream cheese while continuing to mix. Adding the sugar slowly helps to incorporate it evenly, reducing the risk of graininess in your cheesecake filling. Continue mixing for another 1-2 minutes until the mixture is fluffy and well-combined.
Adding Eggs and Mixing Smoothly
Now, it’s time to add the eggs. Incorporate 3 large eggs, one at a time, mixing on low speed after each addition until just combined. This gentle mixing prevents over-beating, which can lead to cracks in your cheesecake.
The Role of Sour Cream and Vanilla
For added creaminess and flavor, mix in ½ cup of sour cream and 1 teaspoon of vanilla extract. The sour cream not only enhances the flavor but also contributes to the creamy texture of the cheesecake. Beat the mixture until it is completely smooth and creamy, ensuring no lumps remain.
Assembling the Bars
Pouring the Cheesecake Mixture Over the Cookie Layer
With both layers prepared, it’s time to assemble your bars. Pour the creamy cheesecake mixture evenly over the cooled cookie base in the baking pan. Use a spatula to smooth the top, making sure it’s evenly distributed.
Crumbling the Remaining Cookie Dough on Top
Take the remaining cookie dough and crumble it over the cheesecake layer. This adds texture and visual appeal to your bars. Don’t worry about covering the cheesecake completely; some areas can remain exposed for a lovely contrast.
Optional Toppings: Adding Extra Chocolate Chips
For extra indulgence, consider sprinkling additional chocolate chips on top of the crumbled cookie layer. This not only enhances the flavor but also creates a beautiful presentation.
Baking the Bars to Perfection
Understanding Baking Time and Temperature
Return the assembled bars to the oven and bake at 350°F (175°C) for an additional 30-35 minutes. During this time, the cheesecake will set and the cookie topping will bake to a golden brown.
Recognizing Signs of Doneness
To check for doneness, gently shake the pan. If the center has a slight jiggle but the edges are set, your bars are ready to come out of the oven. Avoid overbaking, as this can lead to a dry texture.
Cooling and Serving
The Importance of Chilling
After baking, allow your bars to cool in the pan on a wire rack for about 30 minutes. This cooling period is crucial for the texture of the cheesecake layer.
Why Cooling is Essential for Texture
Cooling helps the cheesecake set properly, ensuring it slices neatly without falling apart. If you skip this step, you may end up with a gooey mess when trying to cut your bars.
Proper Cooling Techniques
Once the bars have cooled at room temperature, cover the pan with plastic wrap and refrigerate for at least 4 hours, preferably overnight. Chilling the bars allows the flavors to meld and the cheesecake to firm up completely.
Slicing and Presenting Your Bars
Techniques for Neat Cuts
When ready to serve, remove the bars from the pan using the parchment paper overhang. Place them on a cutting board and use a sharp knife to slice them into squares or rectangles. For clean cuts, dip the knife in hot water and wipe it dry between cuts.
Creative Serving Suggestions
These decadent cheesecake bars are delicious on their own, but you can elevate their presentation by serving them with a dollop of whipped cream, a drizzle of chocolate syrup, or fresh berries. For added texture, consider serving with chopped nuts or a sprinkle of sea salt to enhance the chocolate flavors.
Exploring Variations and Customizations
Personalizing Your Cheesecake Bars
The beauty of these Decadent Chocolate Chip Cookie Cheesecake Bars is their versatility. You can easily tailor the flavors to suit your preferences or dietary needs.
Flavor Variations: Adding Extracts or Zest
Experiment with different extracts such as almond or mint for a unique twist. You can also add lemon or orange zest to the cheesecake mixture for a refreshing citrus flavor that complements the richness of the chocolate.
Ingredient Swaps: Gluten-Free Options
For those with gluten sensitivities, you can substitute the all-purpose flour with a gluten-free blend. Ensure that the other ingredients are also certified gluten-free to maintain the integrity of your dessert.
Topping Ideas: Nuts, Caramel, or Fruit
Get creative with toppings! Consider adding caramel drizzle, crushed nuts, or even a layer of fruit preserves on top of the cheesecake before adding the cookie crumble. These additions can enhance both the flavor and appearance of your bars.
Conclusion
The Decadent Chocolate Chip Cookie Cheesecake Bars are a harmonious blend of flavors and textures, making them a delightful addition to any dessert table. With their rich cookie base and creamy cheesecake filling, these bars are not only visually appealing but also incredibly satisfying. By following the detailed instructions and understanding the ingredients involved, you can create a dessert that is sure to impress family and friends. Whether for a special occasion or a sweet treat at home, these cheesecake bars will undoubtedly become a favorite in your recipe collection. Enjoy the process of making them, and savor every delicious bite.

