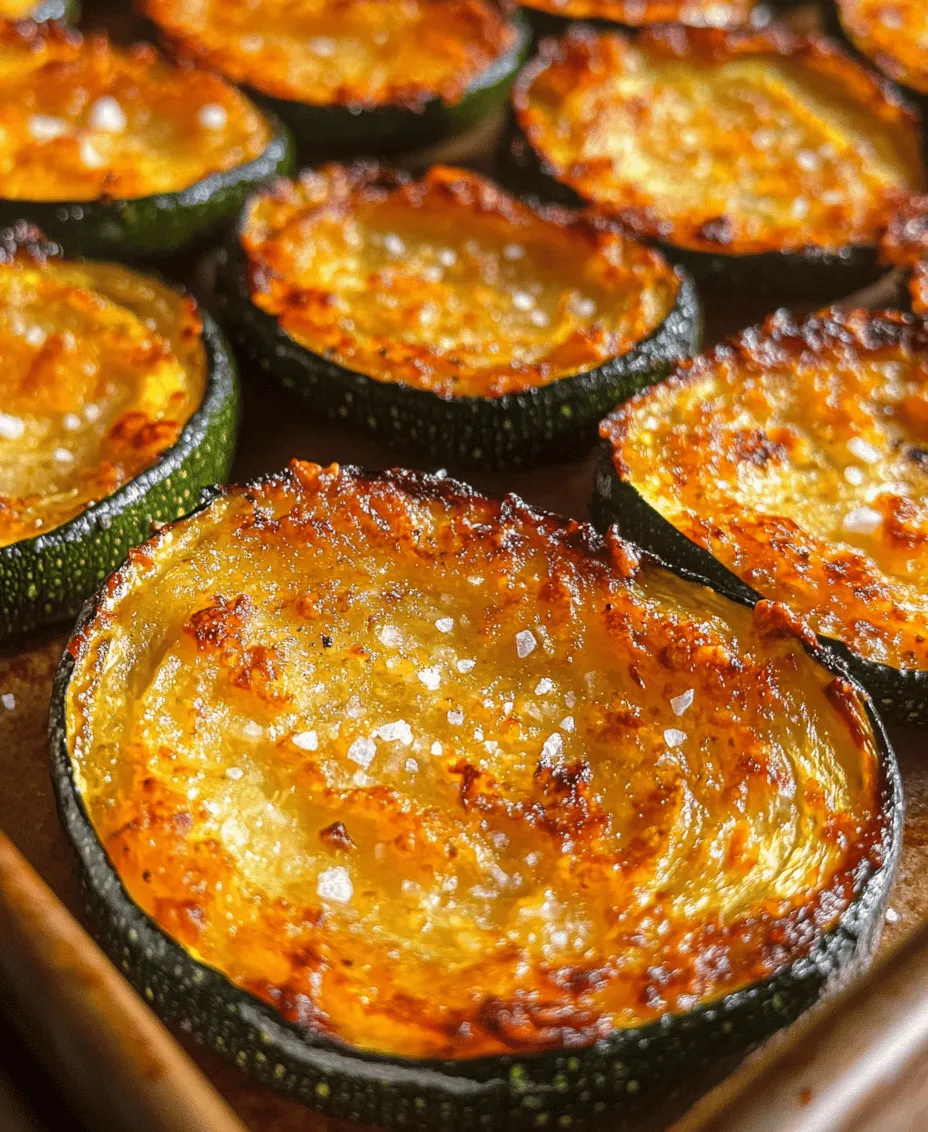
Introduction to Crispy Baked Zucchini Chips
In the quest for healthier snacking options, crispy baked zucchini chips emerge as a standout choice. Gone are the days when snacking meant reaching for greasy potato chips laden with empty calories. Instead, zucchini chips offer a delightful crunch without the guilt, making them an ideal substitute for those who crave something savory and satisfying. This recipe not only satisfies your cravings but also aligns with a healthier lifestyle, showcasing the versatility of zucchini—a humble vegetable that transforms into a culinary star.
Zucchini, often overlooked in the pantry, is a fantastic base for creating snacks that are both delicious and nutritious. When baked to perfection, these chips deliver a satisfying texture and flavor that can rival traditional snacks. Rich in vitamins and minerals, zucchini is a low-calorie vegetable that can help you maintain your health goals while indulging in a tasty treat. With the increasing popularity of homemade snacks, crafting crispy baked zucchini chips is a fun and straightforward way to enjoy a wholesome alternative.
Understanding Zucchini: A Nutritional Powerhouse
Before diving into the recipe, it’s essential to appreciate the nutritional benefits of zucchini. This vibrant green vegetable is an excellent addition to any diet, particularly for those seeking to incorporate more plant-based foods. One of the standout features of zucchini is its low calorie count; a medium-sized zucchini contains roughly 33 calories. This makes it a guilt-free ingredient that can be enjoyed in various forms without derailing your dietary ambitions.
But the benefits of zucchini extend beyond its caloric content. It’s also rich in dietary fiber, which aids in digestion and promotes feelings of fullness. A serving of zucchini provides about 1 gram of fiber, making it a great choice for those looking to manage their weight or improve their digestive health. Moreover, zucchini is packed with essential vitamins and minerals, including vitamin C, which supports immune function, and potassium, which helps regulate blood pressure.
Incorporating zucchini into your diet can be especially beneficial for those who are looking for healthy snack options. By making your zucchini chips at home, you can control the ingredients and avoid the preservatives often found in store-bought snacks. This homemade version not only caters to your taste preferences but also ensures that you’re consuming a product that aligns with your health goals.
Ingredients for the Perfect Zucchini Chips
To make crispy baked zucchini chips, you’ll need just a few simple ingredients, each contributing to the overall flavor and texture of the final product. Here’s what you’ll need:
– Zucchini: The star of the recipe. When selecting zucchini, look for firm, unblemished specimens. Choose medium-sized zucchinis, as they tend to be more flavorful and have a better texture for baking. Avoid oversized zucchinis, as they may contain more seeds and have a watery texture, which can lead to soggy chips.
– Olive Oil: A key ingredient that helps achieve that coveted crispiness. The use of olive oil not only enhances the flavor but also provides healthy fats that are beneficial for heart health. Its monounsaturated fats contribute to lower cholesterol levels and can reduce the risk of heart disease.
– Seasonings: The flavor profile of your zucchini chips can be adjusted based on your preferences. Common seasonings include salt, garlic powder, and onion powder, which complement the natural flavor of the zucchini. For those looking to spice things up, smoked paprika adds a delightful smoky flavor, while grated Parmesan cheese can introduce a rich umami element. Feel free to experiment with herbs such as oregano or thyme for an aromatic twist.
Having the right ingredients is crucial for achieving the best results in your zucchini chips. Fresh produce will always yield the most satisfying texture and taste, so prioritize quality when shopping for your ingredients.
The Step-by-Step Process of Making Zucchini Chips
Creating crispy baked zucchini chips is straightforward, but following a few essential steps can ensure you achieve the perfect texture and flavor.
Preheating the Oven for Optimal Crispness
The first step in making zucchini chips is preheating your oven. This step is crucial because it helps to create a consistent cooking environment that can dry out the moisture from the zucchini, leading to a crispier final product. For zucchini chips, the ideal temperature is typically between 225°F to 250°F (about 107°C to 121°C). Baking at a lower temperature allows the chips to dehydrate without burning, ensuring that they turn out crunchy and flavorful.
Before you begin preparing the zucchini, set your oven to preheat. This way, by the time your chips are ready to go in, the oven will be at the perfect temperature to start the drying process immediately.
Preparing Zucchini for Baking
Once your oven is preheated, it’s time to prepare the zucchini for baking. Start by rinsing the zucchinis under cold water to remove any dirt. Pat them dry with a clean towel to ensure moisture does not interfere with the crisping process.
Next, slice the zucchini into thin, even rounds—about 1/8 inch thick. Uniform slices are key to ensuring that all chips bake evenly; thicker slices may remain soft and chewy, while thinner ones may become burnt. A mandoline slicer is an excellent tool for achieving consistent thickness, but a sharp knife works just as well with a bit of practice.
After slicing the zucchini, place the rounds in a large bowl and drizzle with olive oil. Use just enough oil to lightly coat each slice—too much oil can lead to soggy chips. Toss the zucchini well to ensure that every piece is evenly coated. Then, it’s time to season! Sprinkle your chosen seasonings over the zucchini slices and toss again to distribute the flavors evenly.
Following these preparation steps will set you up for success as you move forward with baking your crispy zucchini chips. Stay tuned as we delve deeper into the baking process and how to achieve that irresistible crunch that makes these chips a favorite among health-conscious snackers.

Washing, Drying, and Slicing Zucchinis
When preparing to make crispy baked zucchini chips, the first crucial step is ensuring your zucchinis are clean and sliced correctly. Start by rinsing the zucchinis under cold running water to remove any dirt or pesticides. After washing, pat them dry with a clean kitchen towel or paper towels. This is essential because moisture on the surface can prevent the chips from crisping up during baking.
Once the zucchinis are dry, it’s time to slice them. Uniformity is key to achieving evenly cooked chips. Aim for slices that are approximately 1/8 to 1/4 inch thick. Thinner slices will yield crispier chips, while thicker slices may remain chewy. For precision, consider using a mandoline slicer. This tool not only allows for consistent thickness across all slices but also speeds up the slicing process. When using a mandoline, always exercise caution and use the hand guard to protect your fingers.
Creating the Perfect Seasoning Mix
The flavor of your baked zucchini chips largely depends on the seasoning mix you choose. Start with a base of sea salt and black pepper, then feel free to get creative. A good starting point for a basic seasoning mix is 1 teaspoon of salt and 1/2 teaspoon of black pepper per medium zucchini. For an extra layer of flavor, consider adding garlic powder, onion powder, or dried herbs such as oregano or basil.
For those looking to elevate their chips further, smoked paprika is an excellent addition. It provides a subtle smokiness that complements the zucchini beautifully. Combine your chosen seasonings in a small bowl. This ensures that the flavors are well balanced and evenly distributed. When seasoning the zucchini slices, it’s important to coat them evenly. You can achieve this by placing the slices in a large bowl, sprinkling the seasoning mix over them, and gently tossing until all slices are well coated.
Arranging Zucchini Slices for Baking
Proper arrangement of the zucchini slices on the baking sheet is vital for achieving that perfect crunch. Preheat your oven to 225°F (107°C) to ensure that the chips bake slowly and evenly, which helps eliminate moisture. Line a baking sheet with parchment paper for easy cleanup and to prevent sticking.
Spread the seasoned zucchini slices in a single layer on the baking sheet, making sure they do not overlap. Overlapping can lead to uneven cooking and soggy spots. If you have a large batch, consider using multiple baking sheets or baking in batches to maintain that single layer. This allows the hot air to circulate around each chip, resulting in a crisp texture.
Adding Cheese for Extra Flavor
For those cheese lovers out there, adding a sprinkle of Parmesan cheese can take your zucchini chips to the next level. Parmesan adds a rich flavor and delightful crunch. To incorporate cheese, sprinkle it over the zucchini slices just before they go into the oven. A good rule of thumb is about 1/4 cup of grated Parmesan for two medium zucchinis.
If you’re looking for alternatives, consider trying other cheeses like cheddar or nutritional yeast for a dairy-free option that still packs a punch of flavor. You could also experiment with different seasoning blends like Italian seasoning or even chili powder for a spicy kick. The versatility of zucchini chips means you can tailor them to your taste preferences.
Baking for the Perfect Crunch
Once your zucchini slices are arranged and seasoned, it’s time to bake. Place the baking sheet in the preheated oven and set a timer for 40 minutes. Halfway through the baking time, take the chips out and carefully flip them. This ensures both sides get evenly crispy.
Keep an eye on the chips as they approach the end of the baking time. They should turn a lovely golden brown and feel crispy to the touch. Depending on your oven’s accuracy and the thickness of your slices, the total baking time may vary. If after 40 minutes they aren’t quite right, continue to bake them, checking every 5 minutes. Properly baked zucchini chips will be crisp and dry, yet slightly golden in color—this is your visual cue for doneness.
Cooling and Serving Suggestions
After you’ve removed the zucchini chips from the oven, allow them to cool on the baking sheet for a few minutes. This cooling process is essential, as the chips will continue to crisp up as they cool. Be careful not to leave them on the baking sheet for too long, as they can become overly dry.
When ready to serve, these zucchini chips pair wonderfully with a variety of dips. Consider serving them with creamy hummus, zesty guacamole, or even a homemade ranch dressing. They also make an excellent topping for salads or can be enjoyed as a stand-alone snack.
Conclusion: Enjoying Your Crispy Baked Zucchini Chips
Making crispy baked zucchini chips at home is not only a fun culinary project but also a fantastic way to enjoy a healthy snack. These chips are low in calories, packed with nutrients, and can easily be customized to suit your taste preferences. Whether you stick to the classic seasoning or experiment with different flavors, the result is a crunchy treat that’s sure to satisfy.
Encourage your family and friends to join in on the fun. Experimenting with various seasonings and cheese options can lead to delightful discoveries. With each batch, you can create a unique twist on this simple yet delicious recipe. So grab some zucchinis, gather your favorite seasonings, and enjoy the process of creating a nutritious, homemade snack that everyone will love.

