Introduction
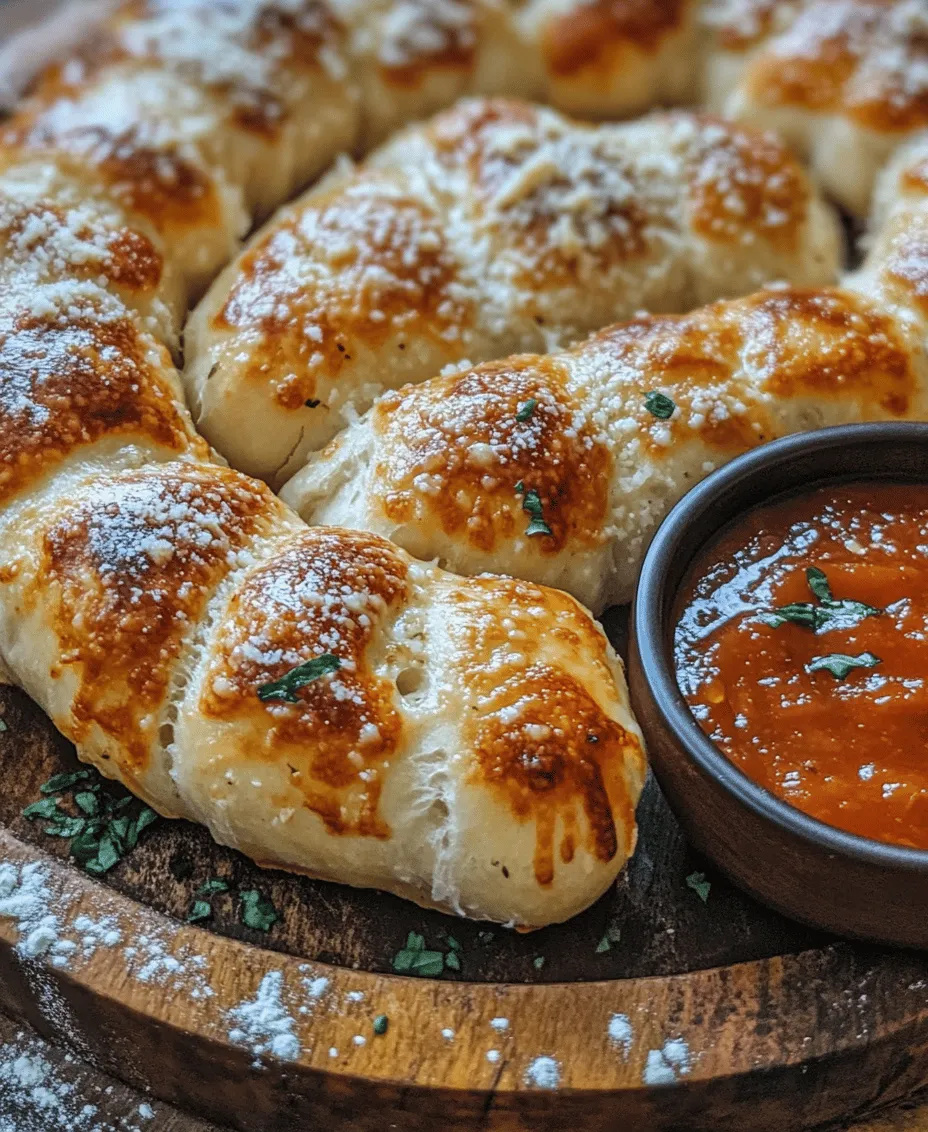
When it comes to comfort food, few things can rival the warm, buttery allure of Pizza Hut breadsticks. These soft, pillowy delights, often accompanied by a side of marinara sauce, have garnered a devoted fan base over the years. Their appeal lies not just in their taste but also in their ability to evoke a sense of nostalgia for many who have savored them during family outings, celebrations, or cozy nights in. However, the good news is that you can recreate these beloved breadsticks right in your own kitchen, ensuring freshness and the opportunity for customization.
Homemade breadsticks offer a unique appeal. Unlike their restaurant counterparts, you can control the ingredients, ensuring that every bite is tailored to your preferences. Whether you want to make them extra garlicky, cheesy, or even spice them up with a hint of red pepper flakes, the possibilities are endless. The objective of this article is to provide you with a detailed, step-by-step guide that will help you master the art of making Pizza Hut-style breadsticks at home. Get ready to impress your family and friends with this delightful recipe that is sure to become a staple in your household.
Understanding the Ingredients
Before diving into the recipe, it’s essential to understand the role of each ingredient in creating the perfect breadsticks. This knowledge not only enriches your cooking experience but also helps you troubleshoot any issues that may arise during the process.
Active Dry Yeast
One of the key players in this recipe is active dry yeast. This ingredient is crucial for the dough’s rise, transforming it from a dense mixture to light and airy breadsticks. Yeast works by consuming sugar and releasing carbon dioxide, which causes the dough to expand. When activating yeast, it’s important to ensure that the water temperature is just right—too hot, and you risk killing the yeast; too cold, and it won’t activate. The optimal temperature for activating yeast is between 100°F to 110°F (38°C to 43°C).
Warm Water
The use of warm water is vital in this recipe. As mentioned previously, it helps activate the yeast, allowing it to bloom properly. Additionally, warm water aids in dissolving sugar and salt, ensuring they are evenly distributed throughout the dough. When measuring your water, temperature is paramount; using a thermometer can help you achieve the perfect warmth.
Bread Flour
For texture and structure, bread flour is preferred over all-purpose flour. The higher protein content in bread flour (typically around 12-14%) contributes to the development of gluten, which provides the dough with elasticity and strength. This results in breadsticks that have a delightful chewiness and a robust structure, allowing them to hold up against toppings and sauces.
Flavor Enhancers
To elevate the taste of your breadsticks, several flavor enhancers are included in the recipe. Garlic powder brings a savory depth, infusing the dough with an irresistible aroma. Italian seasoning adds a medley of herbs that evoke the flavors of traditional Italian bread, while crushed red pepper flakes lend a subtle kick for those who enjoy a bit of spice. These ingredients not only enhance the flavor profile but also provide that signature taste reminiscent of Pizza Hut’s offerings.
Parmesan Cheese and Melted Butter
Finally, we can’t overlook the finishing touches that make these breadsticks truly special. Grated Parmesan cheese adds a nutty, salty flavor that complements the breadsticks beautifully. It also contributes to an appealing golden crust when baked. Meanwhile, melted butter brushed on top before and after baking ensures that the breadsticks are rich, moist, and packed with flavor. This combination of ingredients creates a mouthwatering experience that’s hard to resist.
Step-by-Step Instructions
Now that you have a solid understanding of the ingredients and their purpose, let’s dive into the step-by-step process of making your very own Copycat Pizza Hut breadsticks.
Activating the Yeast
The first step in your breadstick creation is to activate the yeast. Begin by measuring out the warm water and pouring it into a mixing bowl. Next, sprinkle the active dry yeast over the water, followed by a teaspoon of sugar. The sugar acts as food for the yeast, promoting a robust activation process. Allow the mixture to sit for about 5 to 10 minutes. During this time, you should see bubbles forming and the mixture becoming frothy—this is a sign that your yeast is alive and ready to work its magic.
Mixing the Dough
With your yeast activated, it’s time to mix the dough. In a large mixing bowl, combine the activated yeast mixture with the remaining ingredients: bread flour, salt, garlic powder, Italian seasoning, and crushed red pepper flakes. Using a wooden spoon or a spatula, gently stir the mixture until it begins to come together. At this stage, you may find that the dough appears shaggy and uneven—that’s perfectly normal.
Once the ingredients are combined, it’s time to knead the dough. Transfer it to a floured surface and begin kneading by folding the dough over itself and pressing down with the heels of your hands. This process helps develop the gluten, resulting in a chewy texture. Knead for about 8 to 10 minutes, or until the dough is smooth and elastic. A good visual cue to know when your dough is ready is the “windowpane test”: stretch a small piece of dough between your fingers; if you can stretch it thin enough to see light through without tearing, you’re good to go.
The First Rise
After kneading, shape the dough into a ball and place it in a lightly greased bowl, turning it to coat all sides with oil. Cover the bowl with a clean kitchen towel or plastic wrap, and place it in a warm, draft-free environment. Allow the dough to rise until it has doubled in size, which usually takes about 1 to 1.5 hours. If you’re in a hurry, you can use the oven method: preheat it to the lowest setting for a few minutes, then turn it off and place the dough inside to rise.
Keep an eye on the dough; it should have a soft, puffy appearance when ready. You can gently poke the dough with your finger—if the indentation remains, it’s a sign that your dough has risen adequately and is ready for the next step.
With the first rise complete and the dough ready, you’re well on your way to creating the cheesy, buttery breadsticks that will undoubtedly bring smiles to your kitchen. In the upcoming sections, we’ll continue with the shaping, second rise, baking, and finishing touches that will take these breadsticks from good to unforgettable. Stay tuned for the next part, where we’ll guide you through the final steps of this delicious journey!

Shaping the Breadsticks
Once your dough has risen and is ready to be shaped, it’s time to turn that fluffy mass into delicious breadsticks reminiscent of those from Pizza Hut. Start by lightly flouring your work surface to prevent sticking. Take the risen dough and gently punch it down to release any trapped air. This step is crucial as it helps maintain the right texture in your breadsticks.
Divide the dough into equal portions, typically about 12 to 16 pieces, depending on how thick or thin you want your breadsticks to be. For uniformity, use a kitchen scale to weigh each piece, aiming for around 2 ounces each.
To shape the breadsticks, take one portion of dough and roll it into a long, thin stick between your palms or on the work surface, about 6 to 8 inches long. If you prefer, you can also twist the dough to create a spiral effect or flatten it slightly for a wider shape. Just keep in mind that the thickness will influence the baking time—thicker breadsticks will require longer baking, while thinner ones will bake quicker.
Tips for Rolling and Cutting the Dough Evenly
Achieving evenly shaped breadsticks not only enhances their appearance but also ensures they bake evenly. Here are some helpful tips:
– Use a Bench Scraper: This tool can assist you in cutting the dough without squashing it, maintaining the airiness.
– Flour Your Hands: Lightly flouring your hands while shaping can help prevent the dough from sticking, making it easier to handle.
– Consistent Pressure: Apply consistent pressure while rolling to maintain an even thickness, which leads to uniform cooking.
Suggestions for Different Shapes or Sizes if Desired
Feel free to get creative with your breadsticks! Instead of the classic long stick shape, consider these variations:
– Breadstick Twists: After rolling out, twist the dough to create a fun, spiraled breadstick.
– Mini Breads: Roll the dough into smaller balls for bite-sized bread bites.
– Stuffed Breadsticks: Flatten the dough and fill it with cheese or herbs before rolling it up to create stuffed breadsticks.
The Second Rise
After shaping the breadsticks, allow them to rise again for about 30 minutes. This second rise is vital for achieving that light, airy texture that makes the breadsticks so irresistible.
Importance of This Step for Achieving Fluffy Breadsticks
The second rise allows the gluten to relax and develop further, ensuring that the breadsticks will puff up beautifully in the oven. Skipping this step can lead to denser breadsticks that lack the soft, pillowy texture.
Proper Techniques for Covering and Keeping the Dough Warm
To ensure the best results during this rise, cover the shaped dough with a clean kitchen towel or plastic wrap to prevent it from drying out. You can also place the dough in a warm, draft-free area, such as an oven that has been preheated for just a minute and then turned off. The warmth will help the dough rise effectively.
Preheating the Oven
While your breadsticks are undergoing their second rise, it’s time to preheat your oven. Set it to 375°F (190°C), as this temperature is ideal for baking breadsticks to achieve a golden-brown exterior while keeping the inside soft and fluffy.
Discussing the Importance of Preheating and Timing
Preheating is critical for even cooking. If you place your dough in an unheated oven, it may not rise properly and can lead to uneven baking. Proper timing ensures that the breadsticks develop a nice crust while remaining tender on the inside.
Preparing the Topping
The topping is what elevates your breadsticks from merely good to extraordinary. Here’s how to prepare it:
1. Gather Your Ingredients: You will need melted butter, garlic powder (or minced garlic for a fresher flavor), dried parsley, and a pinch of salt.
2. Mixing the Topping Ingredients: In a small bowl, combine 4 tablespoons of melted butter with 1 teaspoon of garlic powder, 1 teaspoon of dried parsley, and a pinch of salt. Mix well until all ingredients are combined.
3. How This Topping Contributes to the Overall Flavor Profile: The butter adds richness, while the garlic and parsley provide aromatic flavors that are quintessential to the classic breadstick experience. This topping not only enhances the taste but also gives the breadsticks a beautiful golden hue once baked.
Baking the Breadsticks
Now it’s time for the most exciting part—baking!
Ideal Temperatures and Baking Times
Place the risen breadsticks on a baking sheet lined with parchment paper, making sure to leave some space between each one to allow for expansion. Brush the topping generously over each breadstick. Bake in the preheated oven for about 15-20 minutes, or until they are golden brown.
Visual Indicators of Doneness (Color and Texture)
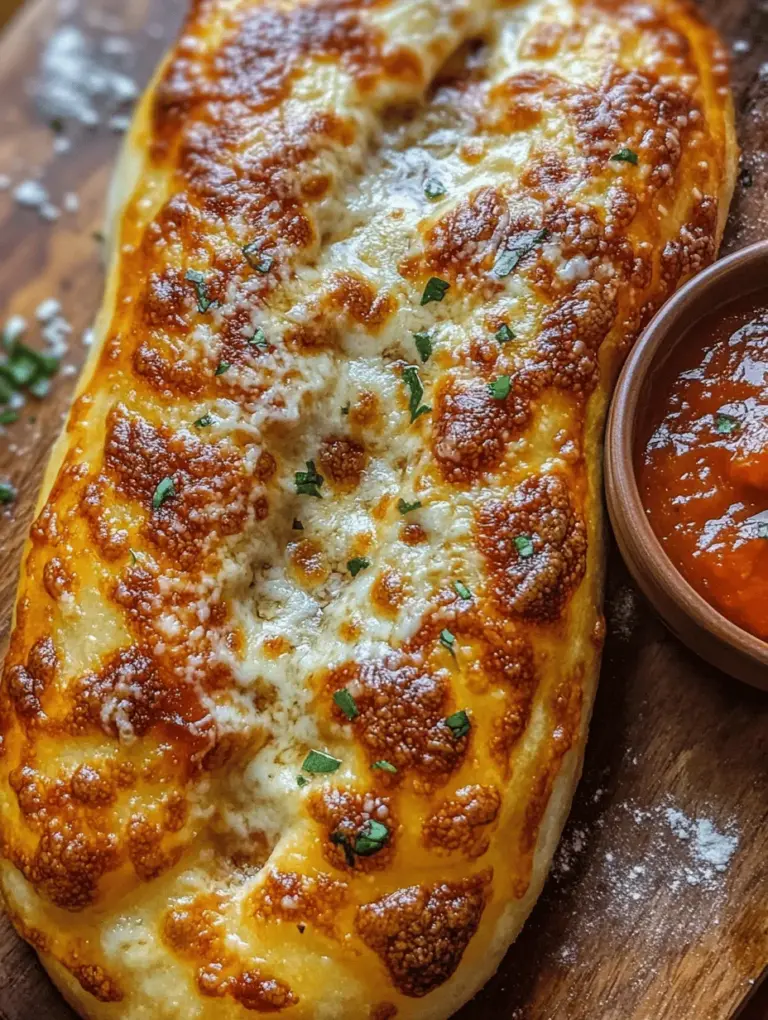
Keep an eye on the breadsticks during the last few minutes of baking. They should be a lovely golden brown, and you should be able to tap them lightly to hear a hollow sound. The texture should be firm on the outside with a soft, fluffy interior.
Serving Suggestions
Once your breadsticks are out of the oven and slightly cooled, it’s time to serve them up!
– Classic Marinara Sauce Dip: A warm marinara sauce is a timeless pairing that complements the garlic flavor perfectly.
– Garlic Butter: For an extra indulgent touch, melt some additional butter with garlic and brush it over the warm breadsticks before serving.
– Cheese Dip: Consider serving with a cheesy dip, like a creamy alfredo or a simple melted cheese blend, for added flavor.
Suggestions for Pairing with Other Dishes
These breadsticks can be a delightful addition to a variety of meals. They pair beautifully with:
– Salads: Serve alongside a fresh garden salad for a complete meal.
– Pastas: They are the perfect side for your favorite pasta dishes, soaking up sauces and enhancing the dining experience.
Discussion of Storage Options for Leftovers and Reheating Methods
If you have any leftovers (though they are unlikely!), store them in an airtight container at room temperature for up to two days. For longer storage, consider freezing them. Just ensure they are completely cooled before placing them in a freezer bag.
To reheat, simply pop them in a preheated oven at 350°F (175°C) for about 5-10 minutes, or until warmed through. This will help restore their crispy exterior.
Nutritional Information
Understanding the nutritional content of your homemade breadsticks can help you enjoy them guilt-free. On average, each breadstick contains approximately:
– Calories: 150-200
– Carbohydrates: 30g
– Protein: 4g
– Fat: 4-6g
– Fiber: 1g
Considerations for Dietary Preferences
If you have dietary restrictions or preferences, here are some alternatives:
– Gluten-Free Options: Substitute all-purpose flour with a gluten-free flour blend. Ensure that your yeast is certified gluten-free as well.
– Vegan Options: Use plant-based butter and a dairy-free milk option to create a vegan version of these delicious breadsticks.
Conclusion
Making homemade Copycat Pizza Hut Breadsticks is not only a rewarding kitchen project but also an opportunity to savor the joy of crafting a restaurant favorite in your home. The delightful aroma, the warm, fluffy texture, and the customizable flavors all come together to create a truly memorable treat.
We encourage you to experiment with different flavors, mix in herbs or spices, or even incorporate cheese into your breadsticks. The possibilities are endless, and each batch can be a new culinary adventure. So gather your ingredients, roll up your sleeves, and enjoy the satisfaction that comes with creating something delicious. Happy baking!

