Introduction
Cheesy garlic pull-apart rolls have taken the culinary world by storm, becoming a beloved staple in kitchens everywhere. Their popularity stems from their irresistible combination of gooey cheese, aromatic garlic, and soft, pillowy bread that simply begs to be pulled apart and devoured. Whether you’re hosting a family gathering, celebrating a special occasion, or simply enjoying a cozy night in, these rolls make the perfect addition to any meal. Their comforting nature and delightful flavor profile create a warm and inviting atmosphere that brings people together around the table.
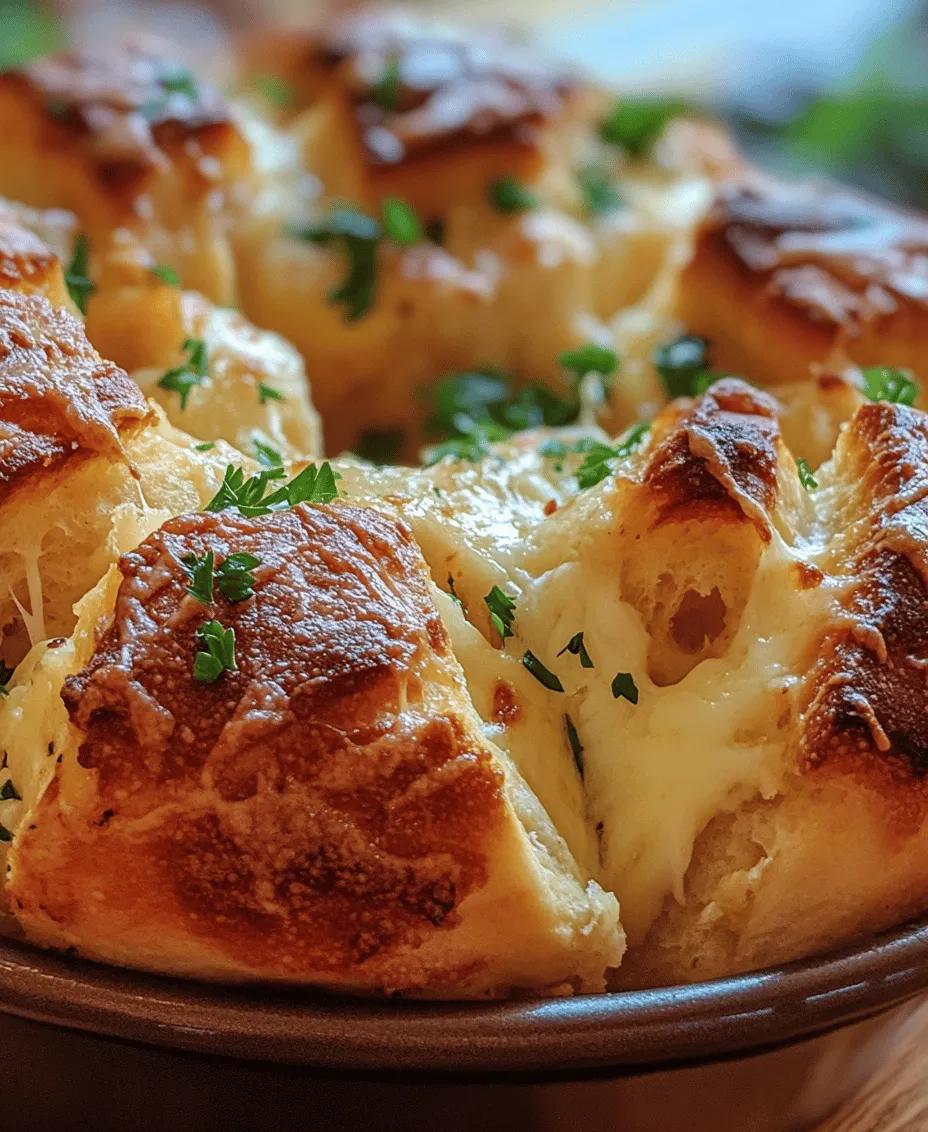
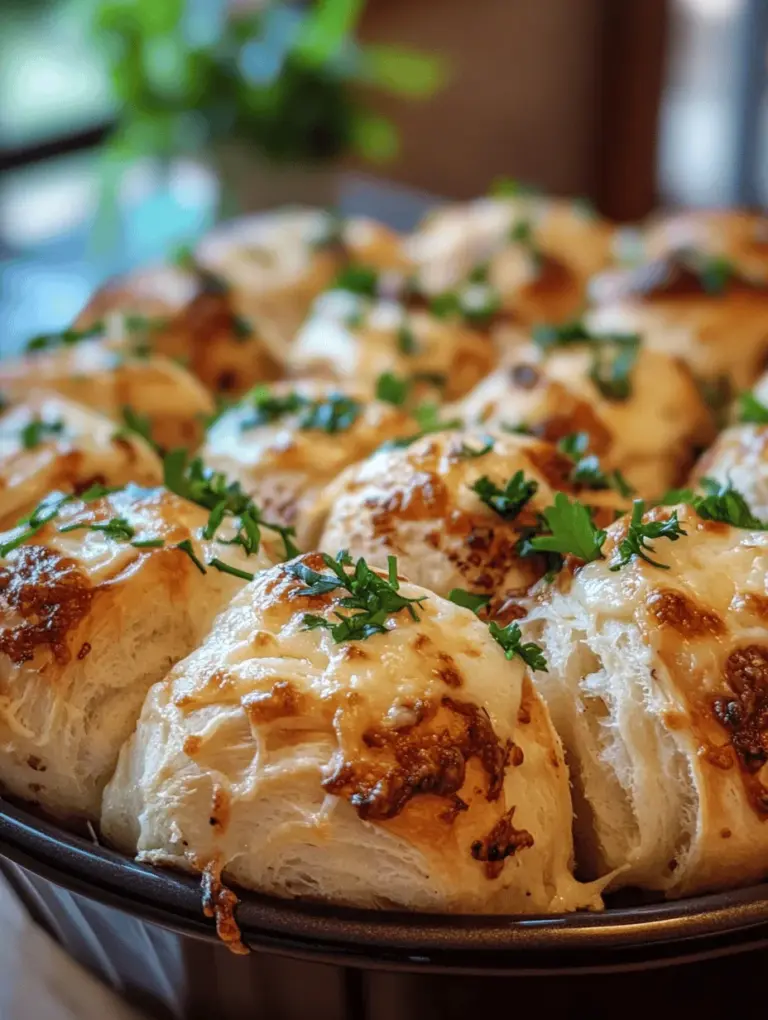
Imagine a freshly baked roll, golden brown and steaming, filled with melted cheese and infused with the rich aroma of garlic. The moment you pull one apart, the cheese stretches delightfully, creating an enticing visual and olfactory experience. These rolls are not just about taste; they deliver an engaging sensory adventure that enhances any dining experience. Their versatility allows them to be served as a side dish, an appetizer, or even as a snack, making them a must-try for any garlic and cheese lover.
Understanding the Ingredients
To create the perfect cheesy garlic pull-apart rolls, it’s essential to understand the role of each ingredient in the recipe. Each component contributes to the overall flavor, texture, and success of the rolls. Let’s delve into the core ingredients that make these rolls so special.
– All-Purpose Flour: This ingredient serves as the backbone of the dough, providing the necessary structure and stability. The protein content in all-purpose flour helps develop gluten, which is crucial for achieving the desired chewy texture in the rolls. When mixed with water and kneaded, the flour forms a network of gluten strands that traps air, allowing the dough to rise beautifully.
– Active Dry Yeast: Yeast is the magic ingredient that brings life to our rolls. Active dry yeast is a leavening agent that ferments the sugars present in the dough, producing carbon dioxide gas. This gas creates air pockets in the dough, leading to a light and airy texture. The importance of the yeast cannot be overstated, as it is responsible for the rise and fluffiness of the bread.
– Warm Milk: The addition of warm milk is vital in activating the yeast. When yeast is combined with warm liquid, it wakes up from its dormant state and begins to ferment. Ensuring the milk is at the right temperature—typically around 110°F (43°C)—is crucial; too hot, and it can kill the yeast, while too cold will not activate it effectively.
– Sugar: A small amount of sugar not only balances the overall flavor of the dough but also acts as food for the yeast. This sugar helps to enhance the fermentation process, allowing the rolls to rise more effectively. As the yeast consumes the sugar, it produces carbon dioxide and alcohol, contributing to the dough’s texture and flavor.
– Unsalted Butter: Butter enhances the flavor and texture of the rolls, adding richness and moisture. Unsalted butter is preferred as it allows for better control over the salt content in the recipe. The fat in the butter also helps to tenderize the dough, resulting in a softer roll.
– Garlic: The star of our cheesy filling, garlic provides a robust flavor that complements the richness of the cheese. Freshly minced garlic adds depth and aroma, making each bite an explosion of flavor. The garlic also infuses the rolls with a delightful fragrance as they bake, enticing everyone around.
– Cheese (Mozzarella and Parmesan): The combination of mozzarella and Parmesan cheese is what truly elevates these rolls. Mozzarella is known for its excellent melting qualities, creating that stretchy, gooey texture we all crave. Parmesan, on the other hand, adds a sharp, nutty flavor that enhances the overall taste experience. Together, they create a harmonious blend of flavors that is simply irresistible.
– Dried Italian Herbs: A sprinkle of dried Italian herbs, such as oregano and basil, introduces a subtle complexity to the flavor profile. These herbs complement the garlic and cheese, creating a well-rounded taste that transports you to an Italian kitchen.
– Fresh Parsley: While not a primary ingredient, fresh parsley plays an important role in the presentation of the rolls. Its vibrant green color adds visual appeal, while its mild flavor provides a fresh contrast to the rich cheese and garlic.
Preparation Steps
Now that we’ve explored the ingredients, let’s move on to the preparation steps that will guide you through creating these cheesy garlic pull-apart rolls. Each step is designed to ensure that you achieve the best possible results.
Activating the Yeast
The first step in making your cheesy garlic pull-apart rolls is to activate the yeast. This process is vital for ensuring that your rolls rise properly and develop the desired texture. Start by measuring out the warm milk into a small bowl and adding the active dry yeast. Sprinkle a teaspoon of sugar over the yeast and let it sit for about 5-10 minutes. During this time, the yeast will begin to froth and bubble, indicating that it is alive and ready to be incorporated into your dough.
Importance of Temperature and Timing
Temperature and timing are crucial during this step. If your milk is too hot, it will kill the yeast, preventing your dough from rising. Conversely, if the milk is too cold, the yeast will not activate effectively. Aim for a temperature of around 110°F (43°C). Additionally, allowing the yeast to sit undisturbed for the specified time ensures that it has enough opportunity to develop the necessary frothiness.
Making the Dough
Once the yeast is activated, it’s time to move on to making the dough. In a large mixing bowl, combine the all-purpose flour and salt. Make a well in the center of the flour mixture and pour in the activated yeast mixture, followed by the melted unsalted butter. Begin mixing the ingredients together, gradually incorporating the flour into the wet ingredients.
Step-by-Step Breakdown of Mixing Ingredients
1. Combine the Ingredients: Start by gently mixing the wet and dry ingredients together with a wooden spoon or spatula. It’s important to be gentle at this stage to avoid overworking the dough.
2. Add Additional Sugar: If you haven’t added all the sugar yet, now’s the time to do so. This will help to enhance the flavor and support the yeast’s fermentation process.
3. Achieve the Right Consistency: As you mix, you may find that the dough is too sticky or too dry. If the dough feels overly sticky, gradually add a little extra flour, one tablespoon at a time, until you achieve a workable consistency. If it’s too dry, you can add a splash of warm water or milk.
Kneading the Dough
Once your dough has come together, it’s time to knead. Kneading is a crucial step that develops the gluten in the flour, creating a strong and elastic dough. Turn the dough out onto a lightly floured surface and begin to knead it by folding it over onto itself and pushing it down with the heels of your hands. Rotate the dough a quarter turn and repeat the process.
Explanation of How Kneading Affects Texture
As you knead, you’ll notice the dough becoming smoother and more elastic. This is due to the development of gluten, which forms a network that traps air bubbles during fermentation. Knead the dough for about 8-10 minutes, or until it is smooth and elastic. You can test if it’s ready by performing the “windowpane test.” Take a small piece of dough and stretch it gently with your fingers. If it stretches thin enough to let light through without tearing, it’s ready for the first rise.
Signs That the Dough is Ready
You’ll know your dough is ready for its first rise when it feels smooth to the touch, has a slight bounce back when pressed, and passes the windowpane test. At this point, shape the dough into a ball and place it in a lightly greased bowl, covering it with a damp cloth or plastic wrap. This will prevent the dough from drying out as it rises.
First Rise
Allow the dough to rise in a warm, draft-free area for about 1-2 hours, or until it has doubled in size. The first rise is an essential step in the bread-making process, allowing the yeast to ferment and produce the carbon dioxide that gives the dough its airy texture. Once the dough has risen, you are ready to move on to the next steps in assembling your cheesy garlic pull-apart rolls.
This detailed preparation phase sets the stage for the delicious, cheesy rolls that will soon be making their way to your table, ready to impress your family and friends. Stay tuned for the next part where we will dive into shaping, filling, and baking these delectable rolls, ensuring they are a hit at your next gathering!

Optimal Conditions for Dough Rising
Creating the perfect dough for your Cheesy Garlic Pull-Apart Rolls hinges significantly on the conditions under which it rises. Yeast thrives in a warm, draft-free environment. The ideal temperature for dough rising is between 75°F to 85°F (24°C to 29°C). Here are some tips to create optimal rising conditions:
– Warm Oven Method: Preheat your oven to the lowest setting for a few minutes, then turn it off. Place the covered dough in the slightly warm oven. The gentle warmth will encourage the yeast to activate without cooking the dough.
– Use of a Damp Cloth: Cover the bowl with a damp kitchen towel. The moisture will help prevent a crust from forming on the dough as it rises.
– Avoid Cold Air: Yeast can slow down in cold temperatures, so ensure that the dough isn’t placed near drafts or cold windows.
What to Look For in a Properly Risen Dough
Once you’ve allowed your dough to rise, you’ll want to ensure it has reached the desired state before moving on to the next steps. A properly risen dough should have roughly doubled in size. Here are some signs to look for:
– Puffy Appearance: The dough should look light and airy, with visible bubbles forming on the surface.
– Softness: When you gently press your finger into the dough, it should leave an indentation that slowly springs back, indicating that the dough is ready.
– Slightly Sticky Texture: While the dough shouldn’t be overly wet or gooey, it should feel slightly tacky to the touch. This stickiness helps with the final texture of the rolls.
Creating the Cheesy Filling
Preparing the Garlic-Infused Olive Oil
One of the key components of these rolls is the garlic-infused olive oil that adds depth and flavor. To prepare this, follow these simple steps:
1. Ingredients Needed: Combine 1/4 cup of extra virgin olive oil with 4-5 cloves of minced garlic in a small saucepan.
2. Infusion Process: Heat the oil over low heat, allowing it to simmer gently. Avoid high heat, as this can burn the garlic and create a bitter taste. Let it simmer for about 5-7 minutes until fragrant.
3. Strain and Cool: Once infused, strain the oil to remove the garlic pieces. Allow it to cool slightly before using it in your recipe.
Importance of Letting the Garlic Infuse for Flavor
Infusing garlic in olive oil is crucial for extracting its flavors without overwhelming the rolls. This process allows the essential oils from the garlic to permeate the oil, creating a deliciously aromatic filling. The longer you let it sit (even up to an hour), the more robust the flavor will become.
Shaping the Rolls
Once your dough is ready and your garlic oil is infused, it’s time to shape the rolls. Follow these steps:
1. Divide the Dough: After the first rise, punch down the dough to release the air and divide it into equal portions (typically 12-15 pieces, depending on your preferred size).
2. Flatten Each Portion: Take one piece of dough and flatten it into a small circle using your hands or a rolling pin. Aim for about 3-4 inches in diameter.
3. Add the Filling: Brush a layer of the garlic-infused olive oil on the flattened dough. Sprinkle with shredded cheese (mozzarella works wonderfully) and any additional seasonings you desire, like Italian herbs or a pinch of salt.
Techniques for Filling and Shaping the Dough
To ensure your cheesy filling stays intact during baking, follow these techniques:
– Fold and Pinch: Bring the edges of the dough over the cheese, pinching them together to seal the filling inside. Make sure there are no gaps.
– Roll into a Ball: Gently roll the filled dough into a ball shape, ensuring the cheese is completely enclosed.
– Keep It Taut: As you form each roll, maintain slight tension on the dough to create a smooth surface.
Tips for Ensuring Cheese Stays Inside the Roll
– Don’t Overfill: Use a modest amount of cheese to avoid overflow. Too much filling can lead to cheese leaking out during baking.
– Proper Sealing: Ensure the edges are tightly sealed. If necessary, dab a little water on the edges to help them stick together.
– Rest Before Baking: Allow the shaped rolls to rest for a few minutes before placing them in the pan. This can help relax the gluten and make them easier to work with.
Assembling the Rolls
Greasing the Baking Pan
Before placing the rolls in the baking pan, it’s essential to grease it well to prevent sticking and ensure easy removal post-baking:
1. Choose Your Grease: You can use butter, olive oil, or non-stick spray for greasing.
2. Cover the Surface: Make sure to cover the entire surface of the pan, including the sides, to prevent any of the rolls from sticking.
Importance of a Well-Greased Pan to Prevent Sticking
A well-greased pan is crucial, as it allows for easy release of the rolls, ensuring they maintain their shape and don’t tear apart when you try to remove them. Additionally, this step helps develop a slightly crispy exterior.
Layering the Rolls in the Pan
Once greased, arrange your shaped rolls in the pan:
1. Spaced Arrangement: Place the rolls close together but not touching. This allows them to rise and expand without merging into one another.
2. Patterned Layering: For visual appeal, you can stagger the rolls in a circular or spiral pattern, creating an attractive presentation.
Second Rise
After arranging the rolls, it’s time for the second rise:
1. Cover and Rest: Cover the pan with a damp cloth or plastic wrap to keep moisture in. Allow them to rise for an additional 30-45 minutes.
2. Contribution to Texture: This second rise is essential as it further develops the dough’s structure, resulting in a light and fluffy texture in the final product.
Baking the Rolls
Preheating the Oven: Why It’s Crucial for Even Baking
Preheating your oven is a fundamental step to ensure that your rolls bake evenly. A hot oven creates an immediate rise in the dough and helps develop a beautifully golden crust. Set your oven to 375°F (190°C) and allow it to reach that temperature before placing your rolls inside.
Baking Time and Temperature
– Baking Temperature: Maintain the oven at 375°F (190°C).
– Baking Duration: Bake the rolls for approximately 25-30 minutes or until they are golden brown on top.
Signs to Look for to Know When Rolls Are Done
Monitor your rolls closely as they bake. Here are the key indicators that they are ready:
– Golden Brown Color: The tops should be a rich golden-brown, indicating that they are cooked through.
– Bubbling Cheese: Look for cheese bubbling out of the rolls; this is a good sign that the insides are melted and delicious.
– Hollow Sound: Tap the bottom of a roll lightly with your finger; if it sounds hollow, the rolls are likely done.
Garnishing and Serving
Importance of the Fresh Parsley Garnish
Once your rolls are out of the oven, don’t forget to garnish them with fresh parsley. This not only adds a pop of color but also enhances the overall flavor profile. The freshness of the parsley balances the richness of the cheese and garlic, making each bite delightful.
Enhancing Visual Appeal and Flavor
A sprinkle of freshly chopped parsley or even a drizzle of the leftover garlic-infused olive oil on top can elevate the visual appeal and flavor. You can also consider adding a sprinkle of Parmesan cheese before serving for an extra cheesy finish.
Suggestions for Serving (Dipping Sauces, Pairings)
Cheesy Garlic Pull-Apart Rolls can be served as an appetizer, side dish, or even as a snack. Here are some serving suggestions:
– Dipping Sauces: Pair the rolls with marinara sauce, a creamy ranch dressing, or a side of warm garlic butter for dipping.
– Complementary Dishes: They pair beautifully with salads, soups, or pasta dishes, making them a versatile addition to any meal.
Conclusion
Creating homemade Cheesy Garlic Pull-Apart Rolls is not just about the final product; it’s about the joy of the cooking process and sharing delicious food with loved ones. As you knead the dough, infuse the garlic, and shape each roll, you’re engaging in a culinary experience that brings warmth and comfort.
Encourage your family and friends to join in on the fun, making it a shared activity that fosters connection. Whether served at a cozy dinner, a festive gathering, or simply enjoyed as a snack, these rolls are sure to impress and delight.
Remember, this recipe is versatile—experiment with different cheeses, herbs, or fillings to make it your own. Enjoy the process, revel in the flavors, and celebrate the joy of homemade cooking with Cheesy Garlic Pull-Apart Rolls!

