Introduction
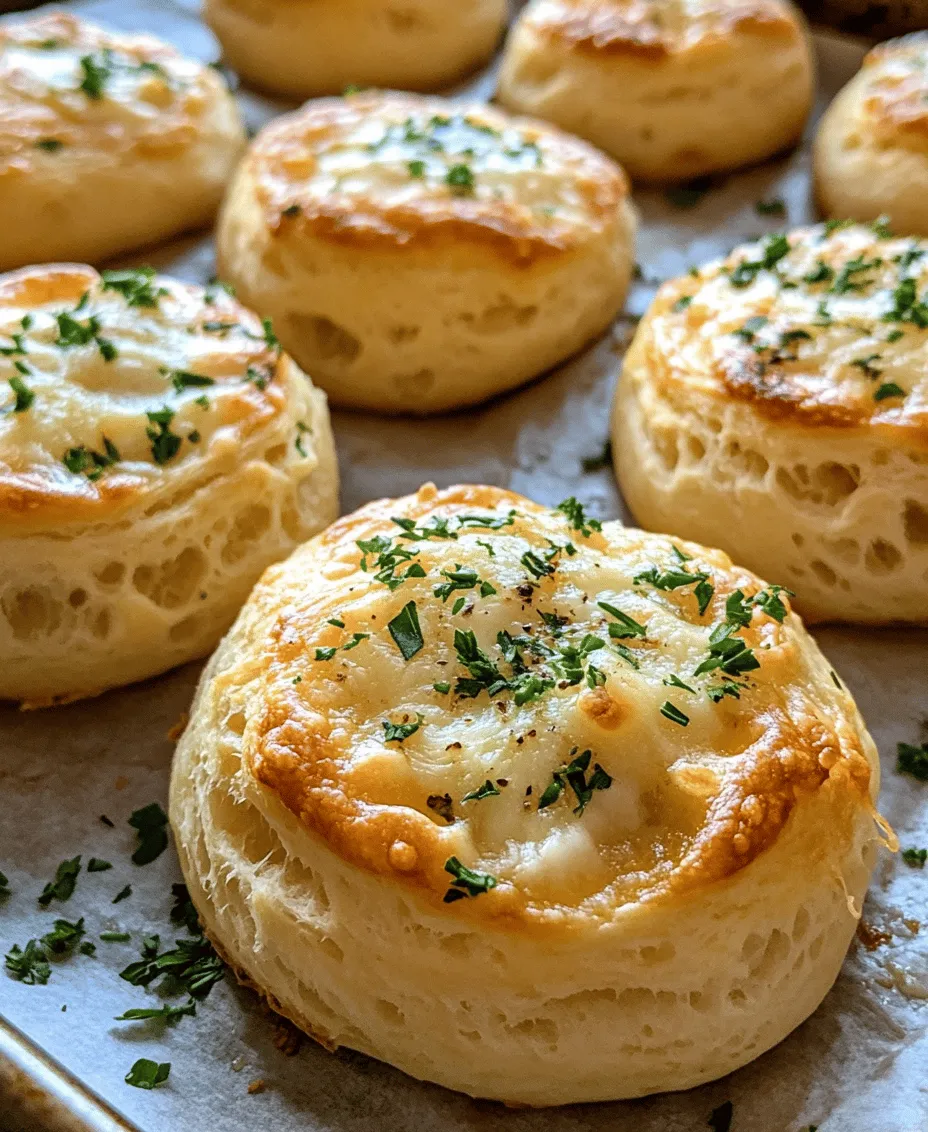
If you’re on the lookout for a snack that combines gooey cheese, aromatic garlic, and tender biscuit dough, look no further than cheesy garlic biscuit bombs. These delicious bites are the epitome of comfort food, boasting an irresistible combination of flavors and textures that are hard to resist. Whether you’re hosting a gathering, enjoying a cozy night in, or simply craving something savory, cheesy garlic biscuit bombs are the perfect addition to any occasion.
The beauty of these biscuit bombs lies not only in their flavor but also in their versatility. They can serve as an appetizer, a side dish, or even a stand-alone snack. Plus, they are incredibly easy to prepare, making them an ideal choice for those who may not have extensive cooking experience or simply want to whip up something tasty without spending hours in the kitchen. With just a handful of ingredients and straightforward steps, you’ll be on your way to enjoying these cheesy delights in no time.
Understanding the Basics of Cheesy Garlic Biscuit Bombs
Cheesy garlic biscuit bombs are a delightful fusion of baked biscuits stuffed with cheese and flavored with garlic. The origins of this dish can be traced back to the classic American comfort food scene, where biscuits are cherished for their flaky texture and ability to complement a variety of flavors. The addition of cheese and garlic elevates this humble biscuit into a mouthwatering treat that appeals to cheese lovers and garlic aficionados alike.
One of the keys to achieving the best results with cheesy garlic biscuit bombs is the quality of the ingredients used. Opting for fresh, high-quality ingredients not only enhances the flavor but also contributes to the overall texture and experience of the dish. Additionally, understanding the cooking techniques involved—such as proper biscuit preparation and baking methods—ensures that you achieve that perfect, golden-brown exterior with a melty, cheesy center.
Essential Ingredients for Cheesy Garlic Biscuit Bombs
To create these delightful cheesy garlic biscuit bombs, you’ll need a selection of essential ingredients, each playing a unique role in contributing to the final flavor and texture.
Pillsbury Grands! Refrigerated Buttermilk Biscuits
The foundation of our cheesy garlic biscuit bombs is the Pillsbury Grands! refrigerated buttermilk biscuits. These biscuits are not only convenient but also provide the ideal texture, being both fluffy and tender when baked. They save you the trouble of making biscuit dough from scratch, allowing you to focus on the fun part—creating the cheesy filling.
Shredded Mozzarella Cheese
For that creamy, gooey center, shredded mozzarella cheese is a must. Known for its excellent melting properties, mozzarella brings a delightful stretchiness to each bite, making these biscuit bombs incredibly satisfying.
Shredded Cheddar Cheese
To add richness and depth of flavor, shredded cheddar cheese is also included. Its sharpness perfectly complements the milder mozzarella, creating a well-rounded cheese experience.
Unsalted Butter
Unsalted butter is used to enhance the overall flavor and moisture of the biscuit bombs. It adds a rich, buttery taste and helps achieve a golden, crispy exterior when brushed on top before baking.
Minced Garlic
The star of the show is undoubtedly the minced garlic. Its aromatic and savory notes infuse the biscuit bombs with a robust flavor that pairs beautifully with the cheeses. Freshly minced garlic (or even roasted garlic for a sweeter note) can take these bites to the next level.
Dried Parsley
Dried parsley not only provides a pop of color but also adds a hint of freshness to the overall flavor profile. It complements the garlic and cheese, tying all the elements together.
Salt and Black Pepper
Essential seasonings like salt and black pepper are crucial for enhancing the flavors of the ingredients. A touch of salt brings out the natural flavors of the cheeses and garlic, while black pepper adds a subtle kick.
Optional Italian Seasoning
For those looking to add an extra layer of flavor, Italian seasoning can be sprinkled into the cheese mixture. This blend typically includes oregano, basil, and thyme, providing a delightful herby note that complements the cheesy, garlicky goodness.
All-Purpose Flour
Lastly, a little all-purpose flour is used for dusting your work surface. This ensures that the biscuit dough doesn’t stick, making it easier to work with as you assemble your cheesy garlic biscuit bombs.
Step-by-Step Instructions to Make Cheesy Garlic Biscuit Bombs
Prepping the Oven and Baking Sheet
Before you dive into the fun of assembling your cheesy garlic biscuit bombs, it’s important to prepare your workspace. Start by preheating your oven to 375°F (190°C). This temperature is ideal for achieving a perfectly baked biscuit with a golden-brown exterior. While the oven is heating up, line a baking sheet with parchment paper or lightly grease it to prevent sticking.
Importance of Preheating and Proper Preparation
Preheating your oven is a crucial step that ensures even baking. When the oven is at the right temperature, it allows the biscuit bombs to rise properly and develop that desirable golden crust. Skipping this step could result in unevenly cooked biscuits that may be doughy in the center.
Preparing the Cheese Filling
Now that your oven is preheated and your baking sheet is ready, it’s time to prepare the cheesy filling. In a mixing bowl, combine the shredded mozzarella and cheddar cheeses. Add the minced garlic, dried parsley, salt, black pepper, and optional Italian seasoning. Mix until all the ingredients are well incorporated, creating a flavorful cheese mixture that will be the heart of your biscuit bombs.
Once the filling is prepared, set it aside while you get the biscuit dough ready.
Stay tuned for the next part of the recipe, where we’ll dive into the assembly of these cheesy garlic biscuit bombs and the final baking process that will result in an irresistible treat!

Tips for Mixing Cheeses to Achieve the Perfect Blend
Creating the ultimate cheesy garlic biscuit bombs begins with the cheese selection. The key to achieving a delectable and gooey filling lies in mixing different types of cheese. Here are some tips for creating that perfect cheesy blend:
1. Choose a Melty Cheese: Cheeses like mozzarella or Monterey Jack are ideal due to their excellent melting properties. These cheeses provide that ooey-gooey texture that everyone loves.
2. Incorporate Flavorful Cheeses: For added flavor, consider mixing in some sharp cheddar or aged Gouda. These cheeses enhance the overall taste profile, giving your biscuit bombs a delightful contrast to the milder cheeses.
3. Experiment with Soft Cheeses: Adding a bit of cream cheese can create a rich and creamy filling that envelops the other cheeses beautifully, ensuring a luscious texture.
4. Balance is Key: Aim for a balance of textures and flavors. A combination of 2-3 different cheeses will yield the best results, giving your biscuit bombs that irresistible cheesy goodness.
Making the Garlic Butter Mixture
The garlic butter mixture is what elevates these biscuit bombs from ordinary to extraordinary. Here’s how to prepare it:
1. Ingredients: Melt half a cup of unsalted butter in a small saucepan over low heat. Add 2-3 cloves of minced garlic, and a pinch of salt. If desired, incorporate a teaspoon of dried parsley or Italian seasoning for added flavor.
2. Infusion: Allow the mixture to simmer on low for about 5 minutes. This step ensures the garlic flavors infuse thoroughly into the butter, creating a fragrant and tasty coating for the biscuit bombs.
3. Cool It Down: Let the garlic butter cool slightly before using, as this will prevent it from being too hot to touch when you coat the biscuit bombs.
Key to Infusing Flavor Throughout the Biscuit Bombs
To ensure every bite of your cheesy garlic biscuit bombs is bursting with flavor, consider these techniques:
1. Layering Flavors: While mixing your cheeses, add a teaspoon of garlic powder or onion powder to the blend. This not only amplifies the flavor but also ensures that the cheesy filling is flavorful all the way through.
2. Garlic Butter Brushing: As you assemble the biscuit bombs, brush a bit of the garlic butter onto the biscuits before filling them. This adds an extra layer of flavor that permeates each bite.
Preparing the Biscuits
For the biscuit dough, you can either make it from scratch or use store-bought options for convenience. If you choose to make it from scratch, here’s a simple method:
1. Basic Ingredients: Combine 2 cups of all-purpose flour, 1 tablespoon of baking powder, and 1/2 teaspoon of salt in a mixing bowl. Cut in 1/2 cup of cold butter until the mixture resembles coarse crumbs.
2. Add Liquid: Gradually stir in 3/4 cup of milk until the dough forms a ball. Avoid over-mixing, as this will lead to tough biscuits.
Techniques for Flattening and Filling the Biscuits
Once your biscuit dough is prepared, it’s time to shape and fill:
1. Portioning the Dough: Divide the dough into equal-sized balls, roughly the size of a golf ball. This ensures uniform cooking and a consistent size for your biscuit bombs.
2. Flattening the Dough: On a lightly floured surface, gently flatten each ball into a disc about 1/4-inch thick. You want it thick enough to hold the filling but not so thick that it takes too long to cook.
3. Filling the Biscuits: Place a generous tablespoon of your cheese blend in the center of each disc. Be careful not to overfill; otherwise, they may burst during baking.
Forming and Sealing the Biscuit Bombs
Sealing your biscuit bombs properly is crucial for avoiding leaks:
1. Encasing the Filling: Gently fold the edges of the biscuit disc over the filling, pinching them together to create a sealed ball. Ensure there are no gaps where the cheese could escape.
2. Shaping: Roll the filled biscuit gently between your hands to ensure a uniform shape. This step not only helps in sealing but also gives them a nice round appearance.
How to Ensure a Gooey Filling Without Any Leaks
To guarantee that your biscuit bombs maintain their cheesy goodness without leaking, follow these tips:
1. Proper Sealing: Make sure to pinch the edges tightly. If needed, use a bit of the dough to patch any holes.
2. Chilling the Filled Bombs: Before baking, place the formed biscuit bombs in the refrigerator for about 15-20 minutes. This helps the dough firm up and reduces the chance of leaks during baking.
Coating the Biscuit Bombs
Coating your biscuit bombs with the garlic butter mixture is essential for flavor:
1. Even Coating: Once your biscuit bombs are formed, dip each one into the cooled garlic butter mixture. Make sure they are completely coated; this will ensure that every bite is packed with flavor.
2. Use a Brush: Alternatively, you can use a pastry brush to apply the garlic butter, ensuring an even layer without the excess pooling at the bottom.
Importance of an Even Garlic Butter Coating for Flavor
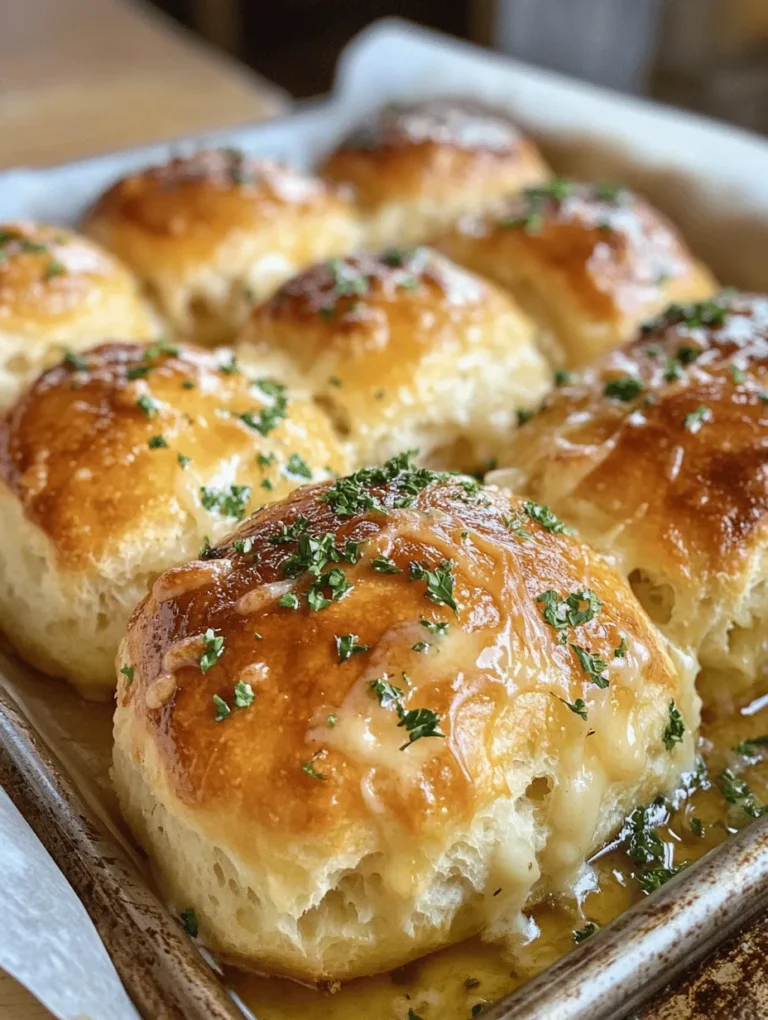
An even coating of garlic butter not only enhances the flavor but also creates a beautiful golden crust as they bake:
1. Flavor Distribution: An even coat ensures that every biscuit bomb has a consistent taste, making sure that no bite is bland.
2. Visual Appeal: A well-coated biscuit bomb will have an attractive, shiny finish that makes them irresistible when served.
Baking the Biscuit Bombs
Baking your cheesy garlic biscuit bombs is the final step to achieving perfection:
1. Preheat: Preheat your oven to 375°F (190°C). This temperature ensures that the biscuits cook through while achieving a golden brown exterior.
2. Baking Time: Place the biscuit bombs on a parchment-lined baking sheet, spaced a couple of inches apart. Bake for 15-20 minutes, or until they are golden brown.
Visual Cues for Knowing When They Are Perfectly Done
Knowing when your biscuit bombs are ready is crucial for achieving the perfect texture:
1. Color Check: Look for a golden-brown color on the tops of the biscuit bombs. They should also feel firm to the touch.
2. Smell Test: The aroma of garlic and melted cheese will fill your kitchen, signaling that they are nearly ready.
Serving Suggestions for Cheesy Garlic Biscuit Bombs
These cheesy garlic biscuit bombs make for an excellent appetizer or party snack. Here are some serving suggestions:
1. Pairing with Sauces or Dips: Serve your biscuit bombs alongside marinara sauce, ranch dressing, or a spicy aioli for dipping. These contrasts will elevate the flavor profile and enhance the dining experience.
2. Best Ways to Serve: These biscuit bombs are perfect for gatherings or as a game-day snack. They can also be enjoyed as a comforting side dish with soups and salads.
3. Suggestions for Garnishing: A sprinkle of fresh chopped parsley or chives adds a pop of color and freshness to your presentation. For an extra cheesy touch, consider adding a dusting of grated Parmesan on top just before serving.
Nutritional Information
Understanding the nutritional content of your cheesy garlic biscuit bombs can help you enjoy them mindfully:
1. Overview of Nutritional Content: Each biscuit bomb typically contains approximately 200-250 calories, depending on the size and type of cheese used. They also provide a good source of protein and carbohydrates.
2. Balance of Indulgence and Nutrition: While these biscuit bombs are indulgent, they can be balanced with a side of fresh vegetables or a light salad to create a more well-rounded meal.
Variations and Customizations
Don’t hesitate to get creative with your cheesy garlic biscuit bombs. Here are some ideas for variations:
1. Ingredient Swaps: Try using different types of cheese like feta or pepper jack for a twist. You can also add cooked bacon bits or sautéed spinach to the cheese mixture for extra flavor.
2. Gluten-Free or Dairy-Free Options: To make these biscuit bombs gluten-free, use a gluten-free baking blend. For a dairy-free version, opt for vegan cheese alternatives and dairy-free butter.
Conclusion
Cheesy garlic biscuit bombs are a delightful combination of gooey cheese and savory garlic, wrapped in a tender biscuit. This recipe offers a comforting treat that’s perfect for sharing with friends and family. The joy of creating these delicious bites in your kitchen is unmatched, and the smiles they bring will surely warm your heart.
Encourage your loved ones to gather around and enjoy this fun cooking experience together. Baking these cheesy garlic biscuit bombs not only satisfies cravings but also fosters cherished memories of homemade comfort food. So roll up your sleeves and get ready to indulge in the deliciousness of these irresistible treats!

