Introduction
If you’re looking for a dessert that perfectly balances buttery richness, sweet caramel, and a satisfying crunch, look no further than Butterfinger Caramel Crunch Bars. These delightful treats combine layers of graham cracker crust, creamy caramel, and the iconic crunch of Butterfinger candy bars, making them an indulgent snack that everyone will love.
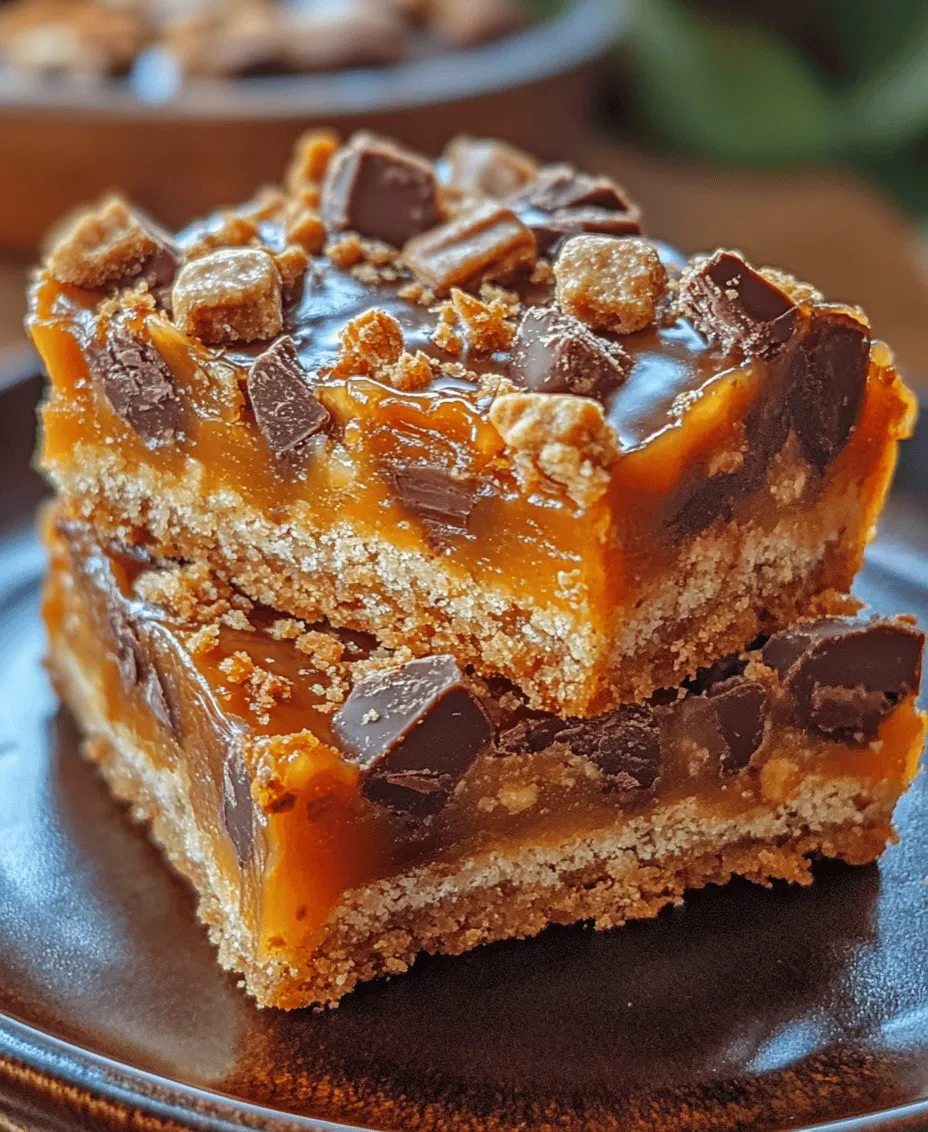
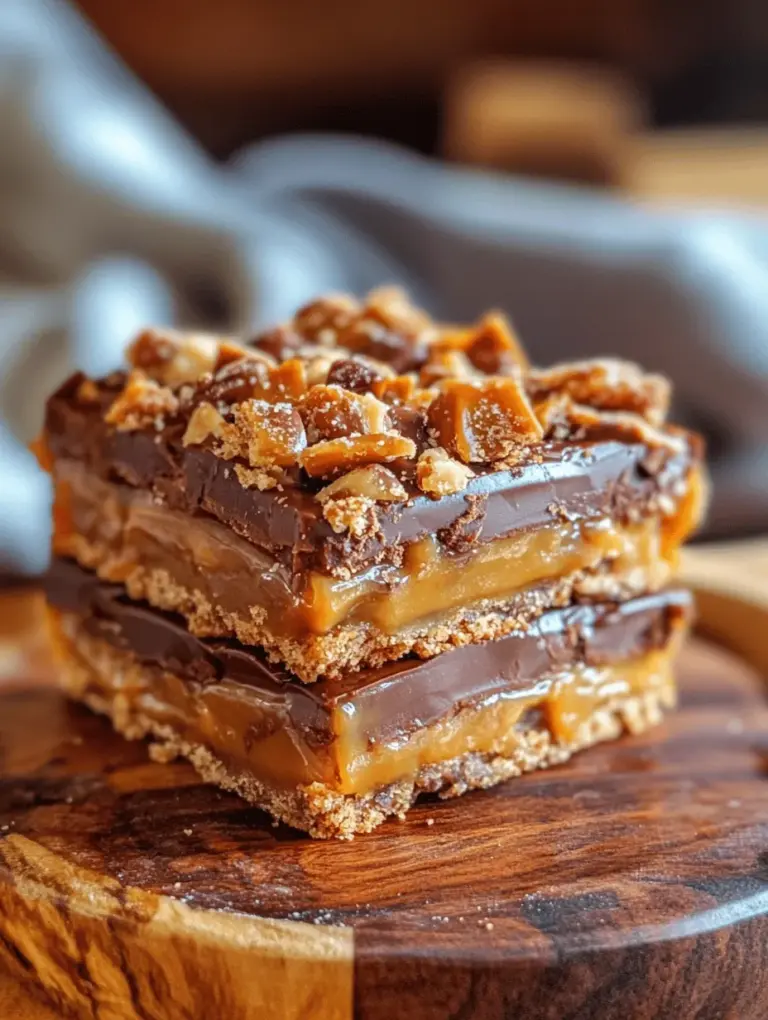
The appeal of Butterfinger Caramel Crunch Bars lies in their harmonious blend of flavors and textures. The buttery, sweet base is complemented by the sticky, sweet caramel layer, while the Butterfinger pieces add a delicious crunch and a hint of peanut butter flavor. Finished off with a luscious layer of semi-sweet chocolate, these bars are not just a feast for the taste buds but also a visual delight.
These bars are perfect for a variety of occasions, whether you’re hosting a party, celebrating a holiday, or simply looking to satisfy a sweet craving. They make an impressive addition to any dessert table and are sure to be a hit with friends and family alike. Plus, they are easy to make and can be made ahead of time, allowing you to spend more time enjoying your gathering and less time in the kitchen.
Understanding the Ingredients
To create the perfect Butterfinger Caramel Crunch Bars, it’s essential to understand the role each ingredient plays in this delectable recipe. Using high-quality ingredients can significantly impact the final result, ensuring that your bars are as delicious as possible.
Crushed Graham Crackers
The foundation of our bars is the crushed graham crackers, which provide a sweet, subtly nutty flavor and a delightful crunch. Originating from the early 19th century, graham crackers are a staple in many dessert recipes. They lend a firm yet tender texture to the base, making them an ideal choice for this recipe. When crushed finely, they mix seamlessly with the other ingredients, creating a cohesive crust that supports the layers above.
Unsalted Butter
Unsalted butter is crucial for achieving the right consistency and flavor in the crust. It adds richness and moisture, enhancing the overall taste of the bars. Opting for unsalted butter allows you to control the saltiness of the dessert, ensuring a balanced flavor profile. The butter helps bind the crust together, creating a sturdy base that holds the layers above without becoming too crumbly.
Granulated Sugar
Granulated sugar not only adds sweetness to the crust but also contributes to its texture. It caramelizes slightly during baking, giving the bars a golden color and a slightly crunchy top layer. The right amount of sugar is essential; too much can make the bars overly sweet, while too little can lead to a bland flavor.
Caramel Candies
The caramel layer is one of the stars of this recipe, and choosing the right type of caramel candies is essential for achieving that gooey, stretchy texture. Popular options include individually wrapped soft caramels or caramel bits, which melt easily and blend well with the other ingredients. The sweetness of the caramel contrasts beautifully with the saltiness of the butter, adding a layer of richness that elevates the entire dessert.
Butterfinger Candy Bars
No Butterfinger Caramel Crunch Bars would be complete without the signature crunch of Butterfinger candy bars. Known for their unique combination of chocolate and peanut butter-flavored crispy layers, Butterfinger bars lend not only a sweet, nutty flavor but also a delightful crunch. Chopped into smaller pieces, they melt slightly when baked, creating a harmonious blend with the other ingredients without losing their signature texture.
Semi-Sweet Chocolate Chips
The final touch to these bars is a layer of melted semi-sweet chocolate chips. They provide a rich, chocolatey flavor that complements the sweetness of the caramel and the Butterfinger pieces. When selecting chocolate chips, look for high-quality brands that melt smoothly and have a rich flavor. This layer solidifies as it cools, creating a perfect chocolate shell that holds everything together.
Coconut Oil
Coconut oil is an optional ingredient that can be used in the chocolate topping. It helps to create a smoother, glossier finish when melting the chocolate. Additionally, coconut oil gives the chocolate a slightly softer texture, making it easier to cut through when slicing the bars. If you prefer a firmer chocolate layer, you can omit the coconut oil.
Significance of Quality Ingredients
Using quality ingredients is crucial in any recipe, but particularly in desserts like these Bars, where each component contributes to the overall flavor and texture. Fresh, high-quality chocolate, butter, and caramel will make a noticeable difference in the final product. Investing in good ingredients not only enhances the taste but also makes the entire baking process more enjoyable, as you’ll be working with components that behave predictably and deliver outstanding results.
Step-by-Step Instructions
Now that we’ve covered the ingredients, let’s dive into the step-by-step instructions for making Butterfinger Caramel Crunch Bars. This process involves preparing the base, creating the caramel layer, and finishing with a luscious chocolate topping.
Preparing the Base
1. Preheat Your Oven: Start by preheating your oven to 350°F (175°C). This ensures that your bars bake evenly and thoroughly.
2. Prepare the Baking Dish: Line a 9×13 inch baking dish with parchment paper, leaving some overhang on the sides for easy removal later. This also helps prevent sticking, making for an easier cleanup.
3. Mix the Crust Ingredients: In a medium mixing bowl, combine the crushed graham crackers, melted unsalted butter, and granulated sugar. Use a spatula or your hands to mix until the crumbs are evenly coated and resemble wet sand.
4. Press Into the Baking Dish: Transfer the graham cracker mixture into the prepared baking dish. Using the back of a measuring cup or your hands, firmly press the mixture into an even layer across the bottom of the dish. Ensure the crust is tightly packed to avoid crumbling once baked.
5. Bake the Base: Place the dish in the preheated oven and bake for about 10-12 minutes or until the crust is lightly golden. Keep an eye on it to prevent over-baking, as you want the crust to remain soft and pliable.
6. Cool the Base: Once baked, remove the dish from the oven and allow the crust to cool completely in the pan. This cooling time is crucial before adding the caramel layer, as it helps prevent the layers from mixing together.
Making the Caramel Layer
1. Melt the Caramel Candies: In a medium saucepan over low heat, combine the caramel candies and a splash of water or cream to help them melt smoothly. Stir continuously until the caramel is fully melted and smooth. This process usually takes about 5-7 minutes.
2. Fold in Butterfinger Pieces: Once the caramel is melted, remove it from the heat and let it cool slightly. Gently fold in the chopped Butterfinger pieces, ensuring they are evenly distributed throughout the caramel. This adds that signature crunch and flavor that makes these bars so special.
3. Layer the Caramel: Pour the caramel mixture over the cooled graham cracker crust, using a spatula to spread it evenly across the surface. Be careful not to disturb the crust below, as you want to maintain distinct layers.
4. Let it Set: Allow the caramel layer to cool and set for about 30 minutes at room temperature. If you’re short on time, you can place it in the refrigerator to speed up the cooling process.
Preparing the Chocolate Topping
1. Melt the Chocolate Chips: In a microwave-safe bowl, combine the semi-sweet chocolate chips and, if using, the coconut oil. Microwave in 30-second intervals, stirring in between, until the chocolate is fully melted and smooth.
2. Spread the Chocolate: Once melted, pour the chocolate over the caramel layer, using a spatula to spread it evenly. This final layer seals in the caramel and adds a rich chocolate flavor that elevates the bars.
3. Chill to Set: Place the dish back in the refrigerator for at least 1-2 hours to allow the chocolate topping to set completely. This chilling time is essential for achieving clean cuts when slicing the bars.
With these initial steps complete, you’ll be well on your way to creating a batch of irresistible Butterfinger Caramel Crunch Bars. The combination of flavors and textures makes this dessert a true crowd-pleaser, perfect for any occasion. Stay tuned for the next part, where we’ll discuss tips for best results and answer some common questions about this recipe.

Microwave Melting Technique: Timing and Stirring Tips
One of the most convenient methods for melting chocolate is using the microwave. Begin by placing your chocolate chips and coconut oil in a microwave-safe bowl. Microwave the mixture in short bursts, typically 30 seconds at a time, to avoid overheating the chocolate. After each interval, take the bowl out and give it a good stir. This not only helps to distribute the heat evenly but also allows you to monitor the melting process. If the chocolate is still not fully melted after the first minute, continue microwaving in 15-second increments, stirring well after each burst until the chocolate is smooth and glossy. This technique ensures that your chocolate maintains the perfect consistency for coating the bars, avoiding the risk of burning or seizing.
The Purpose of Using Coconut Oil in Chocolate
Coconut oil serves a dual purpose in this recipe. Firstly, it acts as a thinning agent, making the melted chocolate easier to dip and coat the bars without clumping. This is particularly beneficial for achieving a smooth, even coating that will harden beautifully. Secondly, coconut oil contributes a subtle richness and flavor that complements the chocolate while giving it a glossy finish. This added sheen not only enhances the visual appeal of your Butterfinger Caramel Crunch Bars but also improves the overall texture, ensuring each bite is decadent and satisfying.
Adding the Finishing Touch
Once your chocolate is melted and ready, it’s time to coat your layered bars. Carefully dip each bar into the chocolate mixture, using a fork to help lift it out and allow any excess chocolate to drip off. Make sure each bar is fully coated for the best flavor and presentation. After coating, place the bars on a parchment-lined baking sheet for easy transfer to the refrigerator. To elevate your bars even further, sprinkle a generous amount of crushed Butterfinger on top of the chocolate while it is still wet. This not only adds a delightful crunch but also enhances the overall flavor profile with that iconic Butterfinger taste.
Importance of Garnishing with Crushed Butterfinger for Texture
Garnishing your Butterfinger Caramel Crunch Bars with crushed Butterfinger pieces is an essential step that enhances both flavor and texture. The crispy, crunchy pieces provide a delightful contrast to the smooth chocolate coating and the chewy caramel layer beneath. This textural diversity is what makes each bite so enjoyable; it keeps your palate engaged with the interplay of soft, crunchy, and creamy elements. Additionally, the visual appeal of the vibrant yellow-orange candy pieces against the dark chocolate creates an inviting look that makes these bars irresistible.
Chilling and Serving
After garnishing, it’s time to chill your bars. Place them in the refrigerator for about 30 to 60 minutes, or until the chocolate has fully set. This chilling period is crucial as it allows the chocolate to harden properly, ensuring that your bars hold their shape when cut.
Optimal Chilling Time for Setting the Bars
For optimal results, aim for a chilling time of at least 45 minutes. This will ensure that the chocolate coating is firm and that the layers below are well-integrated without becoming overly soft. If you’re in a hurry, a shorter chilling time of 30 minutes may suffice, but the bars will be much easier to cut and serve if given the full hour.
Proper Way to Cut and Serve for Presentation
When it comes time to cut your Butterfinger Caramel Crunch Bars, make sure to use a sharp knife to achieve clean edges. You can cut the bars into squares or rectangles, depending on your preference. For a more polished presentation, consider warming the knife slightly under hot water before cutting. This will help you slice through the chocolate without cracking it. Arrange the bars on a decorative platter, and for an added touch, sprinkle a few more crushed Butterfinger pieces over the top for visual appeal.
Flavor Profile and Texture
The flavor experience of Butterfinger Caramel Crunch Bars is a delightful journey from the very first bite. The base, made from graham cracker crumbs mixed with butter, provides a sweet and slightly salty foundation that perfectly complements the other elements. The middle layer consists of a rich, creamy caramel that adds depth and indulgence to the bars.
Discussing the Contrast Between Textures: Crunchy, Creamy, and Chewy
The contrast in textures is one of the standout features of this dessert. The graham cracker base is crunchy, giving way to the soft, chewy caramel layer that follows. Finally, the smooth melted chocolate coating provides a luxurious finish. The addition of the crushed Butterfinger on top introduces a final crunch that ties all these textures together beautifully.
How the Butterfinger Adds a Unique Flavor Twist
Butterfinger bars bring a distinctive peanut butter flavor and a honey-like sweetness that enhances the overall taste profile of the dessert. This flavor twist is what sets these bars apart from other chocolate caramel treats. The richness of the chocolate, the sweetness of the caramel, and the nutty undertones of the Butterfinger create a complex yet harmonious flavor that is both satisfying and indulgent.
Nutritional Information
Understanding the nutritional content of your Butterfinger Caramel Crunch Bars can help you enjoy them in moderation. Each serving typically contains around 200-250 calories, depending on the size of the bars and the amount of chocolate used. It’s important to take note of the sugar content, which can be significant, owing to the caramel and chocolate components.
Highlighting Potential Dietary Considerations (e.g., Calories, Sugar Content)
For those keeping an eye on their sugar intake, be aware that each bar contains approximately 15-20 grams of sugar. Consider enjoying these bars as an occasional treat rather than a daily indulgence.
Discussing Ingredient Substitutions for Dietary Restrictions (Gluten-Free Options, Vegan Alternatives)
If you have specific dietary restrictions, there are several substitutions you can make. For a gluten-free version, simply use gluten-free graham crackers or a gluten-free cookie alternative. To make these bars vegan, opt for dairy-free chocolate and a plant-based caramel alternative. These substitutions allow everyone to enjoy the delightful flavors of Butterfinger Caramel Crunch Bars while accommodating various dietary needs.
Storing and Serving Suggestions
Proper storage of your Butterfinger Caramel Crunch Bars is essential for maintaining their freshness. Store them in an airtight container at room temperature for up to a week. If you prefer them chilled, you can keep them in the refrigerator, where they will last for up to two weeks. Just be sure to separate layers with parchment paper to prevent sticking.
Offering Ideas for Serving, Pairing, and Presentation
These bars are perfect for a variety of occasions. Serve them at birthday parties, bake sales, or family gatherings, and watch them disappear quickly. For an elegant presentation, consider serving the bars on a tiered platter, garnished with fresh fruit or a drizzle of caramel sauce. They pair beautifully with a scoop of vanilla ice cream or a dollop of whipped cream for an extra indulgent treat.
Discussing Occasions to Share These Bars (e.g., Bake Sales, Family Gatherings)
Whether you’re making them for a casual family gathering or a more formal event, Butterfinger Caramel Crunch Bars are sure to impress. Their delightful combination of flavors and textures makes them a crowd favorite. Consider packaging them in decorative boxes for gifts or party favors, making them an even more thoughtful treat.
Conclusion
In summary, Butterfinger Caramel Crunch Bars are a delightful treat that combines rich flavors and contrasting textures for an unforgettable dessert experience. The ease of preparation makes these bars a go-to recipe for any occasion, whether you’re entertaining guests or simply satisfying a sweet craving. We encourage you to try this recipe and enjoy the satisfaction that comes from creating a delicious homemade treat. With their unique combination of flavors and textures, these bars are destined to become a beloved favorite in your dessert repertoire. Indulge in the joy of making and sharing Butterfinger Caramel Crunch Bars, and discover just how simple and rewarding it is to bring this delectable dessert to life.

