Introduction
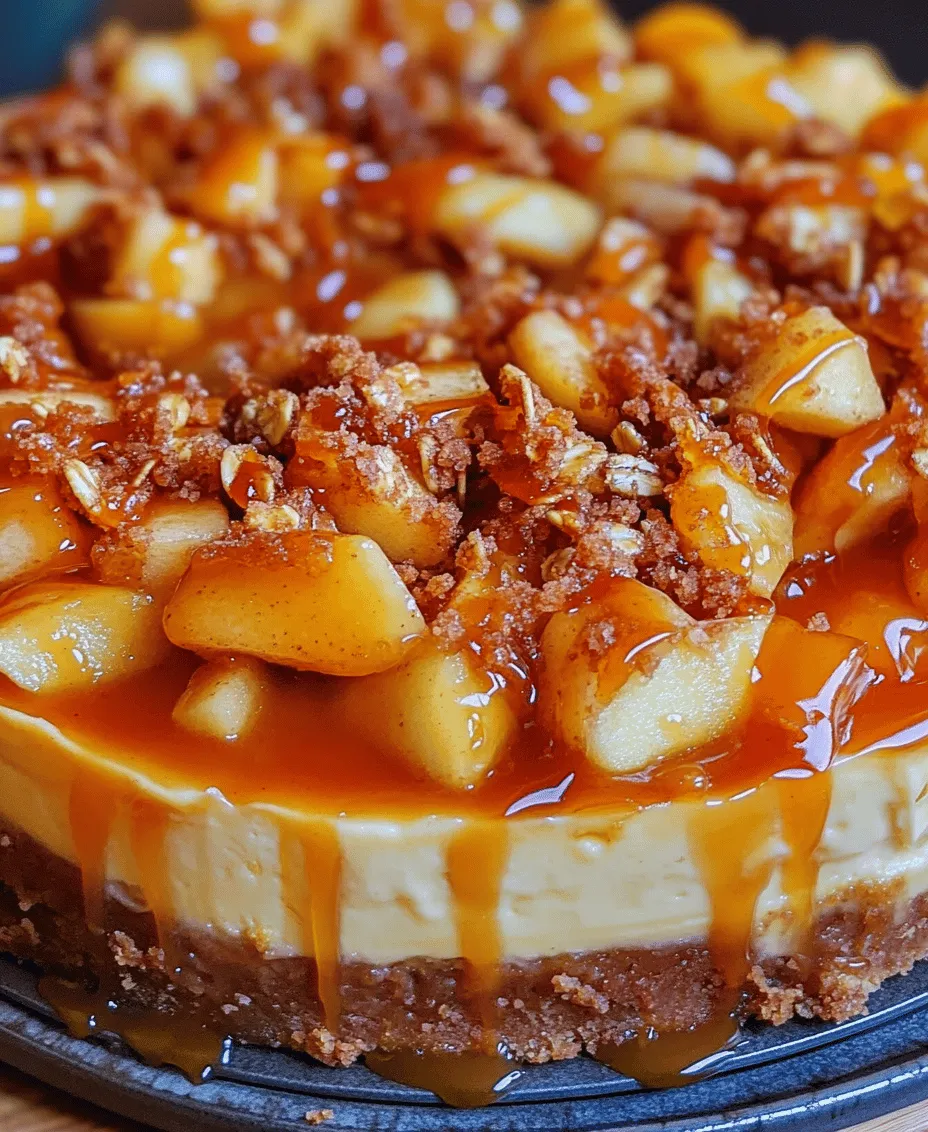
Desserts are often the highlight of any meal, and when it comes to indulgence, few can rival the enchanting combination of cheesecake and apple crisp. Welcome to the world of Apple Crisp Cheesecake—a delightful fusion that marries the creamy richness of classic cheesecake with the warm, comforting flavors of baked apples and a crunchy oat topping. This dessert is not just a treat for the taste buds; it’s a visual masterpiece that brings a touch of elegance to any table.
Using seasonal ingredients elevates the appeal of this dessert, allowing fresh apples to shine in their prime. The warm spices, such as cinnamon and nutmeg, paired with the creamy filling create a luscious experience that resonates with the essence of autumn. Whether you’re hosting a family gathering, celebrating a special occasion, or simply satisfying a sweet craving, this Apple Crisp Cheesecake promises to impress your guests and leave them wanting more.
In this recipe, you can expect a comprehensive guide that walks you through the preparation of each layer—starting from the buttery crust to the velvety cheesecake filling, culminating in the delectable apple topping and crisp finish. Let’s dive deeper into the allure of this extraordinary dessert.
The Allure of Apple Crisp Cheesecake
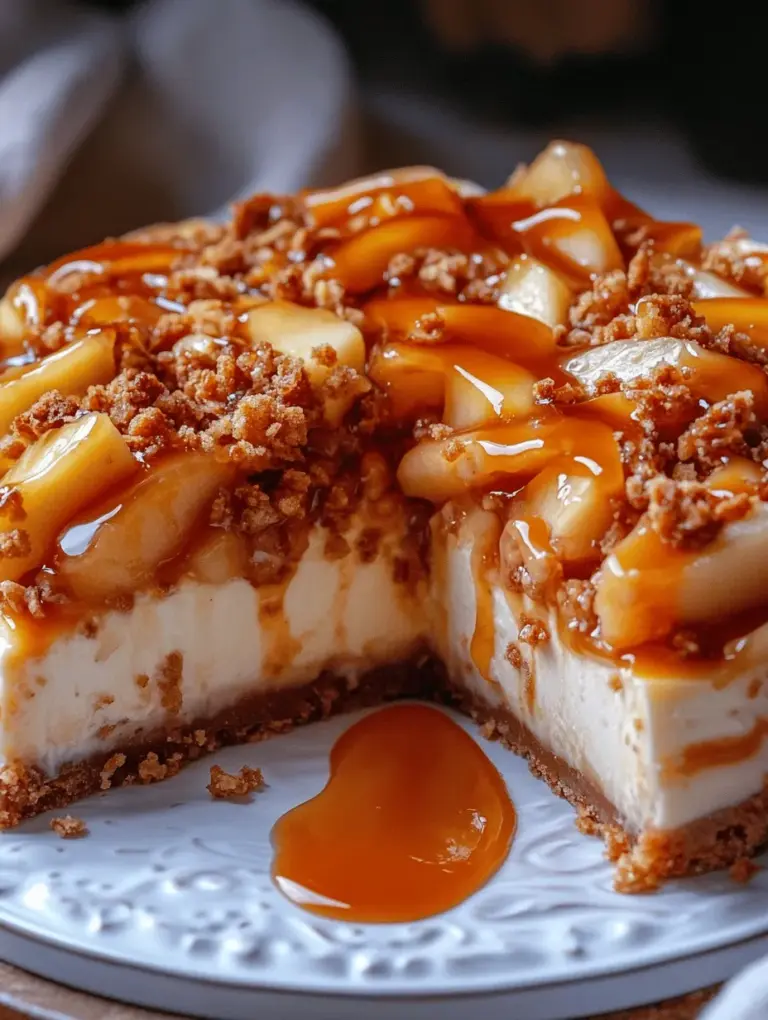
What makes Apple Crisp Cheesecake so irresistible? It’s the perfect blend of textures and flavors. The smooth, rich cheesecake filling is complemented by the tender and spiced apple filling, while the crisp topping adds a satisfying crunch. Each bite offers a delightful contrast, making every forkful an experience to savor.
This dessert is particularly perfect for gatherings and special occasions. Its unique combination of flavors appeals to a wide range of palates, making it a crowd-pleaser at birthdays, holiday dinners, and potlucks. The aesthetic appeal of the cheesecake topped with glistening caramelized apples and a sprinkle of crisp topping makes it a stunning centerpiece that guests will admire before enjoying.
Historically, cheesecake has roots that stretch back to ancient Greece, where it was served to athletes during the first Olympic Games. Meanwhile, apple crisp, with its comforting baked apples and crumbly topping, has become a staple in American dessert culture. The fusion of these two classics in the Apple Crisp Cheesecake is a celebration of culinary traditions that have stood the test of time.
Ingredients Breakdown
Before we embark on the step-by-step preparation of the Apple Crisp Cheesecake, let’s take a closer look at the essential ingredients that contribute to its delightful taste and texture.
Crust Ingredients
The crust is the foundation of any cheesecake, and in this recipe, it is made primarily from graham cracker crumbs, butter, and sugar.
– Graham Cracker Crumbs: These provide a sweet, slightly nutty flavor and a crumbly texture. Their natural sweetness complements the rich cheesecake filling, forming a perfect base.
– Butter: Melted butter binds the crumbs together while adding richness. It also enhances the flavor profile, creating a buttery finish that balances the sweetness of the cheesecake.
– Sugar: A small amount of sugar is added to the crust mixture to enhance sweetness and flavor, ensuring that it pairs well with the creaminess of the filling.
Cheesecake Filling Ingredients
The filling is where the magic happens, and the choice of ingredients is crucial for achieving that classic cheesecake consistency.
– Cream Cheese: The star of the cheesecake, cream cheese provides a rich and creamy texture. It’s essential to use full-fat cream cheese for the best results.
– Sugar: Granulated sugar sweetens the filling, balancing the tartness of the other ingredients. It’s crucial to mix it well with the cream cheese to achieve a smooth texture.
– Eggs: Eggs act as a binding agent, giving the cheesecake its structure. They also contribute to the creamy texture, making each bite melt in your mouth.
– Sour Cream: This ingredient adds a tangy flavor that cuts through the richness of the cream cheese, enhancing the overall taste of the cheesecake.
– Lemon Juice: A splash of lemon juice brightens the flavor profile, adding a refreshing note that complements the sweetness of the filling.
Apple Filling
The apple filling is the heart of this dessert, providing warmth and a burst of flavor.
– Types of Apples: Choosing the right apples is key. Varieties such as Granny Smith, Honeycrisp, or Fuji are excellent choices. Granny Smith apples add a tartness that balances the sweetness of the cheesecake, while Honeycrisp and Fuji apples provide a sweet, crisp texture that holds up beautifully when baked.
Crisp Topping
The final touch of the Apple Crisp Cheesecake is the crisp topping, which adds a delightful crunch.
– Oats: Rolled oats form the base of the crisp topping, providing a chewy texture that contrasts beautifully with the smooth cheesecake.
– Flour and Brown Sugar: These ingredients help to bind the topping together while adding sweetness and depth of flavor. Brown sugar, in particular, enhances the caramel notes of the dessert.
– Spices: A sprinkle of cinnamon and nutmeg in the topping adds warmth and complements the flavors of the apples, making each bite feel like a cozy hug.
Step-by-Step Preparation Guide
Now that we’ve explored the essential ingredients that make up the Apple Crisp Cheesecake, it’s time to dive into the step-by-step preparation guide. This process will take you through each stage, ensuring a delicious outcome.
Preparing the Crust
1. Mixing the Crust Ingredients: In a mixing bowl, combine 1 ½ cups of graham cracker crumbs, ¼ cup of melted butter, and 2 tablespoons of granulated sugar. Gently mix until the crumbs are fully coated in butter and the mixture resembles wet sand.
2. Pressing Into the Springform Pan: Preheat your oven to 325°F (163°C). Take a 9-inch springform pan and press the crust mixture evenly into the bottom of the pan, using the back of a measuring cup or your fingers to create an even layer. Make sure to press it firmly to establish a sturdy base.
3. Baking the Crust: Place the pan in the preheated oven and bake for 10-12 minutes until the crust is lightly golden. This step helps to set the crust and prevents it from becoming soggy later. Once baked, remove the crust from the oven and let it cool while you prepare the cheesecake filling.
Creating the Cheesecake Filling
1. Beating Cream Cheese and Sugar: In a large mixing bowl, beat 24 ounces of softened cream cheese with 1 cup of granulated sugar using an electric mixer. Beat on medium speed until the mixture is smooth and creamy, ensuring there are no lumps.
2. Incorporating the Eggs: Add 3 large eggs, one at a time, mixing well after each addition. This step is crucial to achieving a smooth and even texture. Ensure the eggs are at room temperature for the best results.
3. Adding Flavor Enhancers: Incorporate ½ cup of sour cream and 2 tablespoons of freshly squeezed lemon juice into the mixture. These ingredients will enhance the flavor and create a luscious creaminess that elevates the cheesecake. Mix until fully combined.
4. Pouring the Filling: Once the filling is smooth and well-mixed, pour it over the cooled crust in the springform pan. Use a spatula to spread it evenly, ensuring an even bake.
This marks the end of the first part of the Apple Crisp Cheesecake preparation. The next steps will involve preparing the apple filling and the crisp topping, which will complete this decadent dessert. Stay tuned for the continuation of this delicious journey.

Making the Apple Filling
Creating the apple filling for your Apple Crisp Cheesecake is a crucial step that brings together the flavors of tart apples and warm spices. The right balance of sweetness and acidity is essential, so let’s dive into the process.
Selecting and Slicing Apples: The Best Practices
When it comes to apples, the best choices for your crisp filling are those that complement the creamy texture of the cheesecake. Varieties like Granny Smith, Honeycrisp, and Fuji are excellent options. Granny Smith apples offer a tartness that balances well with the sweetness of the cheesecake, while Honeycrisp and Fuji provide a touch of natural sweetness and crunch.
Best Practices for Slicing Apples:
1. Wash and Peel: Begin by washing the apples thoroughly. Depending on your preference, peel them for a smoother filling or leave the skin on for added texture and nutrients.
2. Core the Apples: Use an apple corer or a paring knife to remove the core. This ensures that you avoid any tough bits when biting into the cheesecake.
3. Slice Evenly: Cut the apples into thin, uniform slices. This not only ensures even cooking but also helps in layering them nicely over the cheesecake filling.
Combining Sugar, Cinnamon, Lemon Juice, and Cornstarch with Apples
In a large mixing bowl, combine your sliced apples with sugar, cinnamon, lemon juice, and cornstarch. The sugar will enhance the natural sweetness of the apples, while the cinnamon adds warmth and depth. The lemon juice is crucial; it brightens the flavors and adds a hint of acidity that balances the sweetness. Cornstarch acts as a thickening agent, ensuring your filling has the right consistency as it bakes.
Mixing Tips:
– Gently toss the apples with the dry ingredients first, ensuring every slice is coated evenly.
– Allow the mixture to sit for about 10-15 minutes. This will help the apples release their juices, allowing for a more flavorful filling.
Discussing the Balance of Sweetness and Acidity
Achieving the perfect balance between sweetness and acidity is vital for your apple filling. If your apples are particularly sweet, consider reducing the sugar slightly. Conversely, if you’re using a tart variety, you may want to increase the sugar to match your taste preferences. The lemon juice not only enhances flavor but also prevents the apples from browning, keeping them fresh for your cheesecake.
Preparing the Crisp Topping
The crisp topping adds a delightful crunch that contrasts beautifully with the creamy cheesecake. Let’s explore how to create that perfect crumble.
Combining Oats, Flour, Brown Sugar, Butter, Cinnamon, and Salt
In a medium mixing bowl, combine rolled oats, all-purpose flour, brown sugar, melted butter, ground cinnamon, and a pinch of salt. The oats provide the base for your crisp topping, while brown sugar adds a rich molasses flavor that white sugar cannot replicate. The butter binds the mixture together, giving it that coveted crumbly texture.
Mixing Technique:
– Use your fingers or a fork to combine the ingredients until they resemble coarse crumbs. This will give you the perfect texture for your crisp topping.
– Be careful not to over-mix; you want to maintain some larger chunks for added crunch.
Discussing the Texture: How to Achieve the Perfect Crumble
The ideal crisp topping should be both crunchy and crumbly. To achieve this, consider the following tips:
– Butter Temperature: Ensure your butter is slightly melted but not hot. This helps in binding the mixture without turning it into a paste.
– Oat Variety: Use old-fashioned rolled oats for the best texture. Quick oats can become mushy, while steel-cut oats may not bind properly.
– Baking Time: Keep an eye on your topping as it bakes. You want it to be golden brown, which indicates that the sugars have caramelized perfectly.
Baking the Apple Crisp Cheesecake
Now, it’s time to bring all the components together and bake your Apple Crisp Cheesecake.
Preheating the Oven: Importance of Temperature for Baking
Preheat your oven to 325°F (160°C). This consistent temperature is crucial for baking the cheesecake evenly. A properly preheated oven ensures that the crust sets without overbaking the filling, resulting in a creamy texture.
Assembly of Layers
Start by layering the cheesecake filling over the previously prepared crust. Spread it evenly to create a smooth base. Next, add the prepared apple filling, distributing it evenly over the cheesecake layer. Finally, sprinkle your crisp topping generously over the apples, ensuring it covers the filling adequately.
Baking Process: Ideal Baking Times and Temperatures
Bake the assembled cheesecake in your preheated oven for approximately 50-60 minutes. The edges should be set, while the center may still have a slight jiggle. This jiggle is a good sign that the cheesecake will maintain its creamy texture after cooling.
Signs to Look for When the Cheesecake is Done
To check for doneness, look for the following signs:
– The edges of the cheesecake should be firm and slightly puffed.
– The center should appear set but still slightly wobbly.
– The crisp topping should be golden brown and fragrant.
Cooling and Serving Suggestions
Once your cheesecake is baked to perfection, it’s time to cool and serve.
Importance of Cooling the Cheesecake Gradually
Cooling your cheesecake gradually is essential for preventing cracks. Once you remove it from the oven, allow it to cool in the pan for about an hour at room temperature. After that, transfer it to the refrigerator and chill for at least 4 hours, preferably overnight. This chilling process enhances the flavors and allows the cheesecake to set properly.
Tips for Removing from the Springform Pan Without Damaging the Layers
Carefully run a knife around the edges of the cheesecake before releasing the springform pan. This step will help separate the cheesecake from the sides and prevent any sticking. Once you release the latch, gently lift the pan away, being cautious not to disturb the delicate layers.
Serving Ideas: Garnishing, Pairing with Ice Cream or Whipped Cream
For an indulgent presentation, consider garnishing your Apple Crisp Cheesecake with a drizzle of caramel sauce or a sprinkle of crushed nuts. Serve each slice with a scoop of vanilla ice cream or a dollop of whipped cream for added richness. Fresh apple slices or a dusting of cinnamon can also enhance the visual appeal.
Storage and Reheating Tips
If you have any leftovers (which is rare with such a delicious dessert), proper storage will ensure your cheesecake stays fresh.
Best Practices for Storing Leftovers
Store any leftover Apple Crisp Cheesecake in an airtight container in the refrigerator. It’s best eaten within 3-4 days, but it can last up to a week under proper conditions. Avoid covering it tightly with plastic wrap, as this can trap moisture and affect the texture of the crisp topping.
How to Reheat Without Compromising Texture and Flavor
To reheat, preheat your oven to 325°F (160°C). Place a slice of cheesecake on a baking sheet and cover it loosely with aluminum foil to prevent the topping from burning. Bake for about 10-15 minutes, or until warmed through. This method helps retain the cheesecake’s creamy texture while keeping the crisp topping crunchy.
Shelf Life of Apple Crisp Cheesecake
When stored properly, your Apple Crisp Cheesecake can last up to a week in the refrigerator. However, for the best flavor and texture, it’s recommended to enjoy it within the first few days after baking.
Conclusion
Making an Apple Crisp Cheesecake is a delightful experience that combines the flavors of classic cheesecake with the comforting appeal of apple crisp. The process of selecting fresh apples, creating the perfect filling, and crafting a delicious crisp topping is satisfying and rewarding.
As you savor each bite, consider experimenting with variations, such as adding nuts to the crisp topping or incorporating spices like nutmeg or ginger into the filling. Baking is not only about following a recipe; it’s about exploring your creativity and sharing the joy of homemade desserts with family and friends. Enjoy the journey of baking and the pleasure of sharing your culinary creations!

