Introduction
When it comes to indulgent desserts, Turtle Cheesecake stands out as a truly irresistible option. This delightful dessert combines the rich, creamy texture of cheesecake with the sweet, decadent flavors of chocolate, caramel, and nuts. Turtle Cheesecake is not just a treat for the taste buds; it’s an experience that brings together several layers of flavor and texture, making it a perfect choice for special occasions or family gatherings.
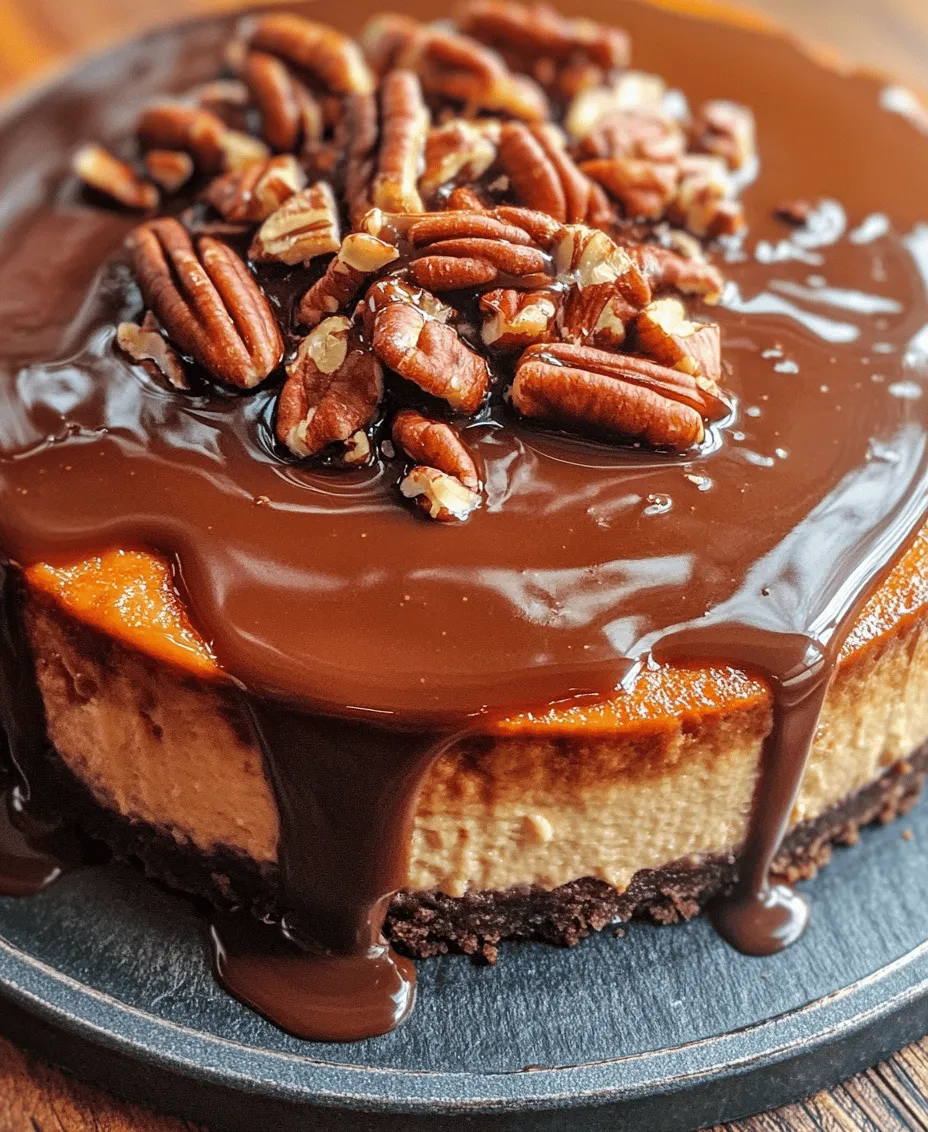
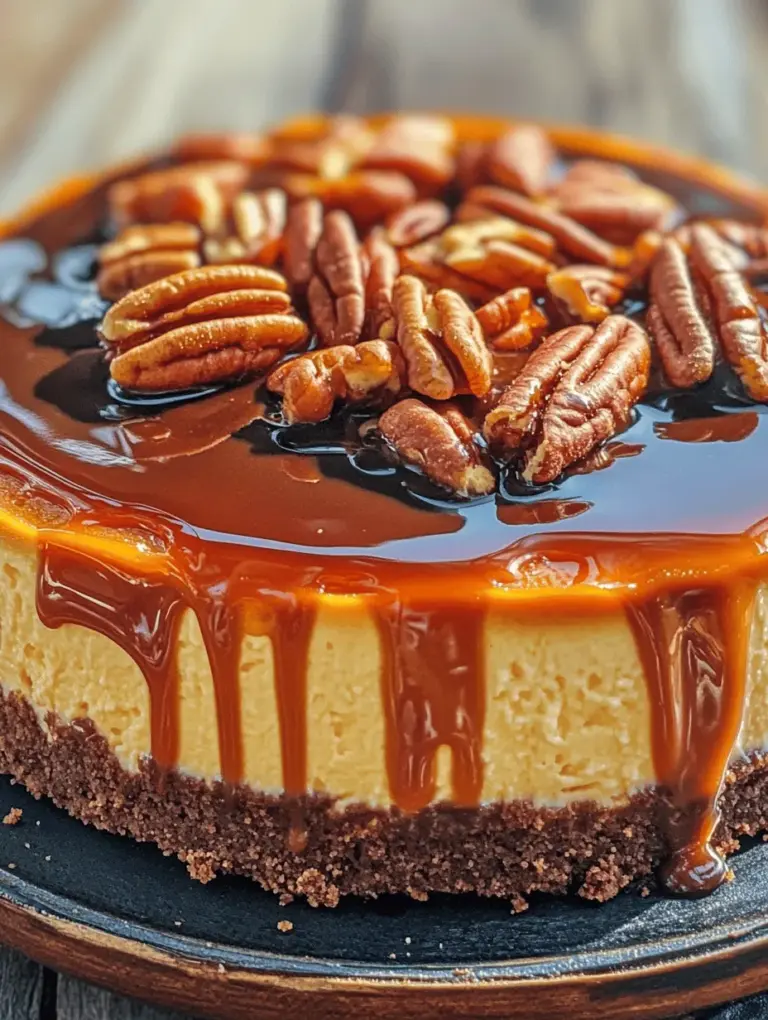
At the heart of Turtle Cheesecake lies a sumptuous cheesecake filling, which is complemented by a luscious layer of chocolate ganache, a drizzle of caramel sauce, and a sprinkle of crunchy pecans. Each forkful offers a delightful contrast between the smooth cheesecake, the silky ganache, the gooey caramel, and the crunchy nuts. This dessert exemplifies the importance of balancing flavors and textures, as each component plays a vital role in creating a harmonious and satisfying dessert.
Understanding the Turtle Cheesecake
Turtle Cheesecake has its roots in the classic Turtle candy, which combines chocolate, caramel, and pecans. The term “Turtle” likely comes from the shape of the candy, resembling a turtle with its domed chocolate shell and pecan “legs.” Over the years, this beloved combination has inspired numerous dessert creations, with cheesecake being a popular choice for many dessert enthusiasts.
The origins of Turtle Cheesecake can be traced back to the broader tradition of cheesecake, which has been enjoyed for centuries in various forms around the world. As cheesecake gained popularity, innovative bakers began experimenting with different flavors and toppings, leading to the creation of indulgent varieties like Turtle Cheesecake. Today, it is celebrated for its rich taste and elegance, making it a favorite for birthdays, holidays, and other celebrations.
Whether you are hosting a dinner party, celebrating a milestone, or simply treating yourself to something special, Turtle Cheesecake is an exceptional choice. Its beautiful presentation and decadent flavors make it a show-stopping dessert that is sure to impress your guests.
Ingredients Breakdown
Creating the perfect Turtle Cheesecake requires careful selection of ingredients, each contributing to the overall success of the dessert. Here’s a breakdown of the key components you will need:
Crust
The foundation of any cheesecake is its crust, and for Turtle Cheesecake, a sturdy base is essential. The crust is typically made from crushed graham crackers combined with melted butter and sugar. The graham cracker crust provides a slightly sweet and crunchy texture that contrasts beautifully with the creamy cheesecake filling. It’s important to press the crust mixture firmly into the bottom of the pan to ensure that it holds together during baking and serving.
Cheesecake Filling
The cheesecake filling is the star of the show, and achieving a creamy, smooth texture is key. The primary ingredients for the filling include cream cheese, sour cream, sugar, and eggs. Cream cheese serves as the base, providing richness and tanginess. Sour cream adds moisture and contributes to the creamy texture, while sugar sweetens the filling. Eggs help bind the mixture together, ensuring a firm yet creamy consistency. For best results, it’s essential to mix these ingredients thoroughly, avoiding lumps that can affect the final texture of the cheesecake.
Caramel Layer
The caramel layer adds a luxurious sweetness to the cheesecake. You can opt for store-bought caramel sauce for convenience or make your own for a more personalized touch. Homemade caramel offers a deep flavor and allows you to control the sweetness, which can be adjusted to your preference. Regardless of the choice, this layer is crucial for achieving that signature Turtle flavor.
Chocolate Ganache
The chocolate ganache is another vital component of Turtle Cheesecake. This rich and glossy topping enhances the dessert’s flavor profile while adding an elegant finish. Made from heavy cream and chocolate, ganache is easy to prepare and can be poured directly over the cheesecake once it has cooled. The smooth, velvety ganache complements the creamy cheesecake and sweet caramel, creating a luscious combination that is hard to resist.
Garnish
Presentation is essential when it comes to desserts, and Turtle Cheesecake is no exception. To elevate your cheesecake, consider garnishing it with chopped pecans and an extra drizzle of caramel sauce or chocolate ganache. The garnishes not only enhance the visual appeal but also add texture and flavor, tying all the elements of the dessert together.
Step-by-Step Instructions
Now that we have covered the ingredients, let’s dive into the step-by-step instructions for preparing this delectable Turtle Cheesecake. Follow these detailed guidelines to ensure your cheesecake turns out perfectly.
Preparing the Crust
1. Preheat the Oven: Begin by preheating your oven to 325°F (160°C). A properly preheated oven is crucial for even baking.
2. Mix the Crust Ingredients: In a mixing bowl, combine 1 and ½ cups of crushed graham crackers, ¼ cup of granulated sugar, and ½ cup of melted butter. Mix until the crumbs are evenly coated and the mixture resembles wet sand.
3. Press the Mixture: Transfer the crust mixture to a 9-inch springform pan. Use the back of a measuring cup or your fingers to press the mixture evenly across the bottom and slightly up the sides of the pan. This will create a solid base for the cheesecake.
4. Bake the Crust: Place the crust in the preheated oven and bake for 10 minutes. This step helps to set the crust and prevents it from becoming soggy once the cheesecake filling is added. After baking, remove the crust from the oven and allow it to cool while you prepare the filling.
Making the Cheesecake Filling
1. Prepare the Cream Cheese: In a large mixing bowl, add 24 ounces (three 8-ounce packages) of softened cream cheese. Using an electric mixer, beat the cream cheese on medium speed until it is smooth and creamy, about 2-3 minutes. Be sure to scrape down the sides of the bowl to incorporate all the cream cheese.
2. Add the Sugar and Sour Cream: Gradually add 1 cup of granulated sugar and 1 cup of sour cream to the beaten cream cheese. Continue mixing until well combined and smooth. The addition of sour cream will enhance the creaminess and flavor of the filling.
3. Incorporate the Eggs: Add 3 large eggs, one at a time, mixing on low speed after each addition until just combined. Avoid overmixing, as this can incorporate too much air into the batter, leading to cracks in the cheesecake during baking.
4. Pour the Filling into the Crust: Once the filling is smooth and well combined, carefully pour it over the cooled crust in the springform pan. Use a spatula to spread it evenly.
5. Bake the Cheesecake: Place the cheesecake in the oven and bake for 50-60 minutes, or until the edges are set and the center has a slight jiggle. The cheesecake will continue to firm up as it cools.
6. Cool the Cheesecake: After baking, turn off the oven and crack the door open slightly. Allow the cheesecake to cool in the oven for about an hour. This gradual cooling process helps prevent cracks from forming on the surface.
Final Steps
Once the cheesecake has cooled, you can move on to adding the caramel layer and chocolate ganache, but those details will be discussed in the next section of this article. For now, ensure you have followed these initial steps carefully and allow the cheesecake to cool completely before adding any toppings.
By mastering these first steps of preparing Turtle Cheesecake, you are on your way to creating a mouthwatering dessert that will impress everyone at your next gathering. The combination of flavors and textures in this cheesecake promises to be a memorable treat for all. Stay tuned for the next part, where we will dive deeper into the delicious toppings and garnishes that make this dessert truly special.

Baking the Cheesecake: Methods to Prevent Cracking and Ensure Even Baking
Baking a cheesecake can be a delicate process, and one of the most common issues home bakers face is cracking. To prevent this, it’s essential to follow a few key techniques. Firstly, always ensure that your cream cheese is at room temperature before mixing. This helps create a smooth batter that incorporates air more effectively, reducing the chances of cracks forming during baking.
Another important step is to bake your cheesecake using a water bath (or bain-marie). This method involves placing your cheesecake pan in a larger pan filled with hot water. The steam from the water bath creates a humid environment that helps to regulate the temperature and prevents the cheesecake from baking too quickly, which can also lead to cracks. If you choose to use a water bath, make sure to wrap your springform pan in aluminum foil to prevent water from seeping in.
Additionally, avoid overmixing the batter. While it may be tempting to whip it until perfectly smooth, overmixing can incorporate too much air, leading to cracks as the cheesecake cools. Once everything is combined, mix on low speed just until incorporated.
Cooling Process: Importance of Cooling in the Oven and Chilling in the Fridge
After baking, the cooling process is just as crucial as the baking itself. Once your cheesecake is done, turn off the oven and crack the door open, allowing the cheesecake to cool gradually inside. This gradual cooling helps prevent sudden temperature changes, which can cause the cheesecake to crack.
After about an hour, remove the cheesecake from the oven and allow it to cool at room temperature for another hour. Once it has cooled, cover it with plastic wrap or aluminum foil and place it in the refrigerator for at least four hours, but ideally overnight. Chilling the cheesecake allows the flavors to meld and the texture to set, resulting in a creamy and delicious dessert.
Preparing the Caramel Layer: How to Achieve an Even Spread
For the caramel layer, start with store-bought caramel sauce or homemade caramel, depending on your preference and time constraints. If you’re using store-bought, ensure it’s warm and pourable for easy spreading. If you opt to make homemade caramel, combine sugar and a little water in a saucepan over medium heat, swirling gently until the sugar dissolves and turns golden brown. Remove it from the heat and stir in heavy cream and butter until smooth.
Once your caramel is ready, carefully pour it over the cooled cheesecake. Use a spatula to gently spread it into an even layer. Allow the caramel to set slightly before adding the chocolate ganache, which will help keep the layers distinct and visually appealing.
Making the Chocolate Ganache: Proper Techniques for a Smooth Finish
To make the chocolate ganache, start by chopping high-quality chocolate into small pieces and placing it in a heatproof bowl. In a saucepan, heat heavy cream over medium heat until it just begins to simmer. Pour the hot cream over the chopped chocolate and let it sit for a few minutes to soften. After a few minutes, whisk the mixture until it becomes smooth and glossy.
For a richer flavor, consider adding a tablespoon of butter or a splash of vanilla extract to the ganache. This will add a beautiful sheen and extra richness to your chocolate layer. Once your ganache is ready, allow it to cool slightly before pouring it over the caramel layer. Use a spatula to spread it evenly, ensuring a smooth finish.
Assembling the Cheesecake: Presentation Tips for Visual Appeal
When it comes to assembly, presentation is key. After pouring the chocolate ganache over the caramel layer, let the cheesecake chill in the refrigerator until the ganache is set. For an elegant touch, consider garnishing the top with additional caramel drizzle, chopped pecans, or chocolate shavings.
When ready to serve, carefully remove the sides of the springform pan. Use a sharp knife dipped in hot water to slice the cheesecake, cleaning the knife between cuts for a neat finish. This attention to detail will elevate your Turtle Cheesecake from delicious to truly stunning.
Tips for Perfecting Your Turtle Cheesecake
Suggestions for Ingredient Substitutions
If you’re looking for gluten-free options, simply replace the graham cracker crust with a gluten-free cookie crust made from crushed gluten-free cookies or nuts. For a dairy-free alternative, try using vegan cream cheese and coconut cream for the ganache.
Common Pitfalls to Avoid During the Baking Process
One common pitfall is not allowing the cheesecake to cool properly. Avoid rushing the cooling process; skipping the water bath or not letting the cheesecake cool gradually can lead to cracks. Also, be cautious not to overbake. The cheesecake should be set but still slightly jiggly in the center when you remove it from the oven.
How to Achieve the Desired Texture and Flavor Balance
Achieving the right texture is about balance. Ensure that your cream cheese is fully softened before mixing, and don’t overmix once the eggs are added. For flavor, consider adding a pinch of salt to the caramel and ganache to enhance the sweetness and depth of flavor.
Serving Suggestions
Ideal Occasions for Serving Turtle Cheesecake
Turtle Cheesecake is a versatile dessert that fits perfectly into a variety of occasions. It’s an excellent choice for holidays, birthdays, or any celebration where you want to impress guests. It also works wonderfully for casual gatherings or family dinners, providing a decadent treat that is sure to please.
Pairing Recommendations
Pair your Turtle Cheesecake with a rich cup of coffee or a dessert wine such as a late harvest Riesling or a sweet port. These beverages complement the rich flavors of the cheesecake and enhance the overall dining experience.
Portioning Tips for Serving Guests
When serving, consider cutting the cheesecake into smaller portions. Given its rich flavor, smaller slices allow guests to enjoy the dessert without feeling overwhelmed. A typical cheesecake can be cut into 12 to 16 slices, making it perfect for sharing.
Storage and Shelf Life
Best Practices for Storing Leftover Turtle Cheesecake
To store leftover Turtle Cheesecake, cover it tightly with plastic wrap or aluminum foil to prevent it from drying out. Alternatively, you can place it in an airtight container.
Information on How Long It Can Be Kept in the Refrigerator or Freezer
In the refrigerator, your Turtle Cheesecake can last for about 5 to 7 days. If you want to keep it longer, consider freezing it. Wrapped tightly, it can last for up to 3 months in the freezer.
Tips for Reheating or Serving Leftovers
For serving leftovers, it’s best enjoyed chilled, so there’s no need to reheat. If you have frozen cheesecake, allow it to thaw in the refrigerator overnight before serving.
Conclusion
Making Turtle Cheesecake is a delightful experience that brings together the rich flavors of chocolate, caramel, and pecans in a creamy, decadent dessert. The joy derived from crafting this cheesecake is only surpassed by the satisfaction of serving and sharing it with friends and family.
This dessert’s popularity and versatility make it a perfect addition to any dessert table or special occasion. So, roll up your sleeves, gather your ingredients, and give this Turtle Cheesecake recipe a try at home. You’ll be rewarded with a show-stopping dessert that will leave everyone asking for seconds.

