Introduction
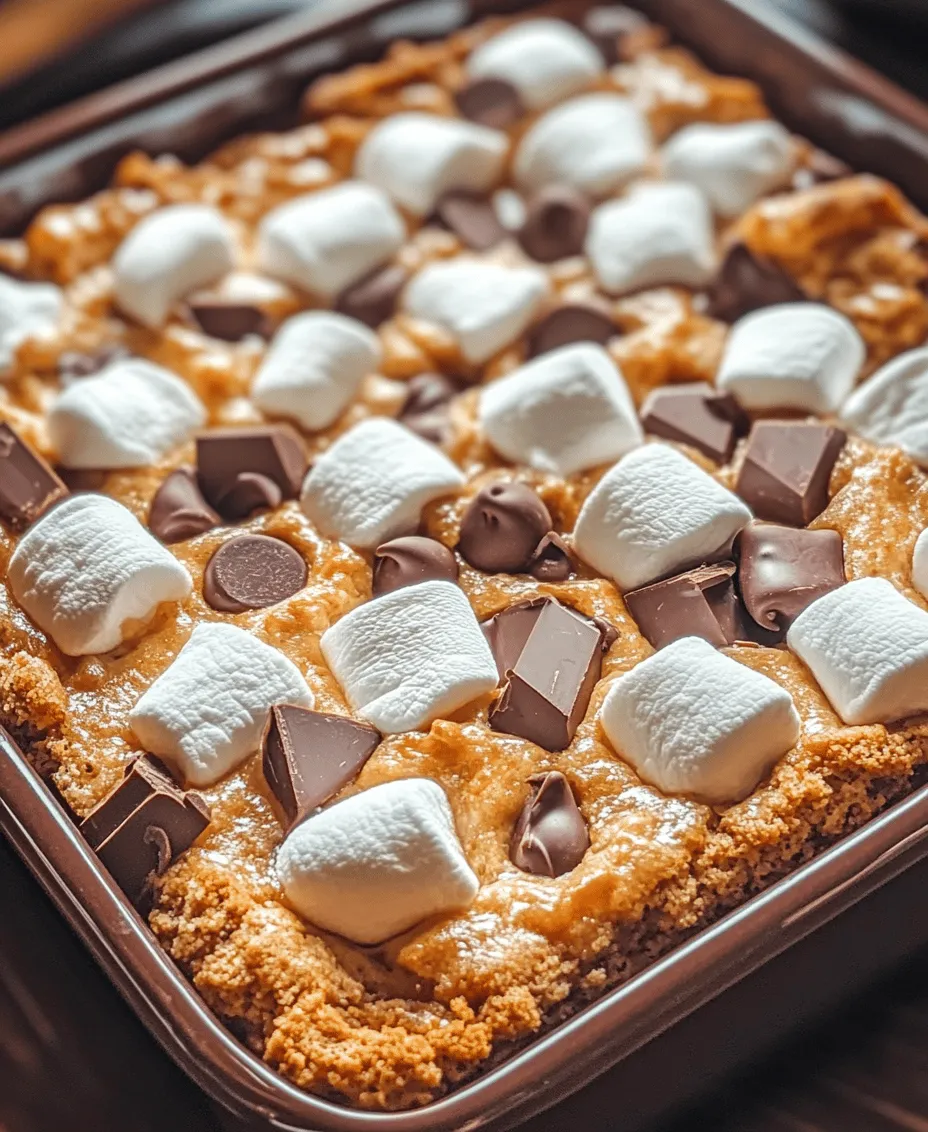
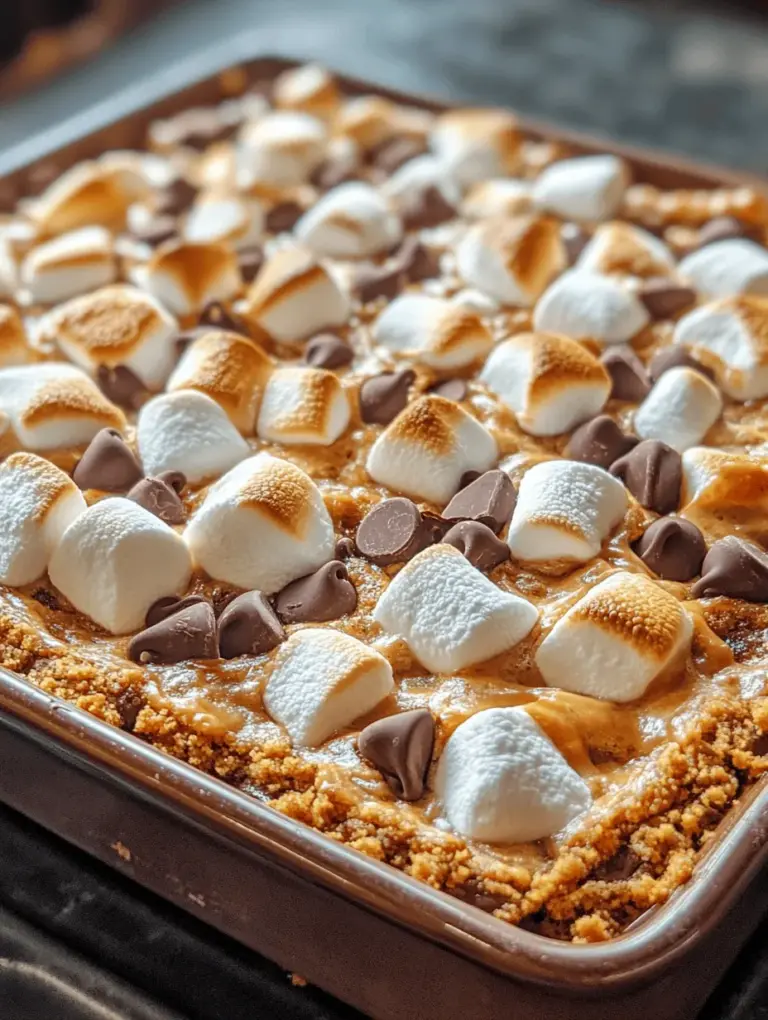
S’mores Bars Delight is a delightful dessert that encapsulates the beloved flavors of the classic campfire treat, s’mores, in an easy-to-make bar form. These bars are a perfect combination of crunchy, chewy, and gooey textures, making them a favorite among dessert lovers of all ages. While traditional s’mores evoke memories of sitting around a crackling campfire, roasting marshmallows, and sharing stories under the stars, S’mores Bars Delight brings that nostalgic experience right into your kitchen, allowing you to enjoy this classic anytime you crave it.
The process of making S’mores Bars is significantly simpler than preparing traditional s’mores. There’s no need to gather around a campfire; instead, you can whip up these scrumptious bars in your oven, making them a convenient option for parties, gatherings, or just a cozy night in. This article aims to provide you with a detailed recipe, step-by-step instructions, and valuable insights to create your own S’mores Bars Delight.
The Origin of S’mores
The story of s’mores dates back to the early 20th century, with the first recorded recipe appearing in a Girl Scouts publication in 1927. The name “s’mores” is derived from the phrase “some more,” hinting at the irresistible nature of this treat that makes you want to keep coming back for more. S’mores have become a cultural icon in North America, symbolizing summer campfires, family gatherings, and outdoor adventures.
Traditionally, s’mores consist of three simple ingredients: graham crackers, chocolate, and roasted marshmallows. As the marshmallow is toasted to perfection, it becomes gooey and melty, creating the perfect centerpiece for sandwiching between two pieces of graham cracker along with a piece of chocolate. This delightful combination has inspired various adaptations and variations around the world, from s’mores-inspired cakes to s’mores-flavored ice cream.
The modern adaptation of S’mores Bars takes the essence of this classic treat and transforms it into a convenient, baked dessert. No fire is needed, and the preparation is quick and easy. With just a few simple ingredients and a little time, you can recreate the joy of s’mores in the form of delicious bars that everyone will love.
Ingredients Breakdown
To make S’mores Bars Delight, you’ll need several key ingredients that work together to create the perfect flavor profile and texture. Here’s a detailed breakdown of each ingredient and its role in the recipe:
– Graham Cracker Crumbs: The foundation of any s’mores recipe, graham cracker crumbs provide that signature crunchy texture and a hint of sweetness. They serve as both the base and the topping for the bars. If you’re looking for an alternative, consider using gluten-free graham crackers or crushed digestive biscuits for a similar effect.
– Unsalted Butter: Butter plays a critical role in the texture and flavor of your S’mores Bars. It helps bind the crumbs together while adding richness to the overall taste. Using unsalted butter allows for greater control over the saltiness of your dessert, ensuring a balanced flavor.
– Brown Sugar: This ingredient not only sweetens the bars but also adds moisture and a hint of caramel flavor. The combination of brown sugar with graham crackers enhances the overall taste, giving your bars that classic s’mores flavor.
– Mini Marshmallows: Mini marshmallows are essential for achieving the gooeyness that is characteristic of s’mores. They melt beautifully in the oven, creating a soft, chewy layer that complements the crunch of the graham cracker base. If you wish to make the bars even more indulgent, you can use larger marshmallows, although you will need to adjust the baking time.
– Chocolate Chips: Chocolate is the heart of s’mores, and using chocolate chips allows for easy incorporation into the bars. You can choose from various types of chocolate, including semi-sweet, dark, or even milk chocolate, depending on your personal preference. Each type will add its unique flavor to the final product.
– Vanilla Extract: A splash of vanilla extract enhances the overall taste profile of your S’mores Bars, adding depth and warmth. It complements the sweetness of the marshmallows and chocolate, creating a more complex flavor.
– Salt: A pinch of salt is crucial for balancing the sweetness of the dessert. It enhances the flavors of the other ingredients, ensuring that the S’mores Bars taste well-rounded and satisfying.
– Ingredient Substitutions: If you have dietary restrictions or preferences, there are several substitutions you can make. For a gluten-free version, use gluten-free graham crackers, and for a dairy-free option, substitute the butter with coconut oil or a plant-based butter alternative. Additionally, you can use dairy-free chocolate chips to accommodate vegan diets.
Step-by-Step Instructions
Now that we’ve covered the ingredients, let’s dive into the step-by-step instructions for making S’mores Bars Delight. Follow these easy steps to create a delicious dessert that will impress your family and friends:
1. Preheat the Oven: Start by preheating your oven to 350°F (175°C). This ensures that your bars bake evenly and achieve that perfect texture.
2. Prepare the Baking Dish: Line a 9×9-inch baking dish with parchment paper, allowing some overhang on the sides. This will make it easier to lift the bars out once they are baked. Lightly grease the parchment paper with non-stick spray or a little butter to prevent sticking.
3. Make the Graham Cracker Base: In a medium-sized mixing bowl, combine the graham cracker crumbs, melted unsalted butter, and brown sugar. Stir until the mixture resembles wet sand and holds together when pressed. This crumb mixture will serve as the base for your bars.
4. Press the Mixture into the Dish: Transfer the graham cracker mixture into the prepared baking dish. Using the back of a measuring cup or your hands, firmly press the mixture into an even layer across the bottom of the dish. This creates a solid foundation for the bars.
5. Add the Chocolate Layer: Evenly sprinkle a layer of chocolate chips over the pressed graham cracker base. Use your favorite type of chocolate for this layer, as it will melt beautifully during baking and create a rich, chocolaty flavor.
6. Top with Mini Marshmallows: Next, add a generous layer of mini marshmallows on top of the chocolate chips. Be sure to distribute them evenly, covering as much of the chocolate as possible. The marshmallows will melt and puff up during baking, creating that classic s’mores texture.
7. Bake the Bars: Place the baking dish in the preheated oven and bake for approximately 15-20 minutes, or until the marshmallows are golden brown and the chocolate is melted. Keep an eye on them to prevent burning, as the marshmallows can toast quickly.
8. Cool and Slice: Once baked, remove the dish from the oven and allow the S’mores Bars to cool in the pan for about 10 minutes. Then, using the parchment paper overhang, lift the bars out of the pan and onto a cutting board. Allow them to cool completely before slicing into squares.
9. Enjoy: Serve your S’mores Bars Delight as is, or with a scoop of ice cream for an extra indulgent treat. These bars are perfect for parties, gatherings, or simply enjoying at home with loved ones.
With these simple steps, you will be well on your way to enjoying a delicious batch of S’mores Bars Delight. The combination of flavors and textures makes these bars a crowd-pleaser, and the ease of preparation ensures that you can whip them up anytime the craving strikes.

Preheating the Oven: Importance of Temperature for Baking
Before diving into the delightful process of making S’mores Bars, preheating your oven is a crucial first step. The ideal baking temperature for our S’mores Bars is 350°F (175°C). Preheating allows the oven to reach the proper temperature, ensuring even baking. This is especially important for the crust, as a well-preheated oven helps it achieve that perfect golden-brown color while maintaining the right texture. Skipping this step can result in uneven baking, leading to a crust that is either too soft or overly crisp. So, set your oven now and let it warm up while you prepare the crust!
Preparing the Crust
The crust is the foundation of your S’mores Bars, and getting it right is essential for the overall flavor and texture. To prepare the crust, you will need:
– 1 ½ cups graham cracker crumbs
– ½ cup unsweetened cocoa powder
– ½ cup granulated sugar
– ½ cup unsalted butter, melted
Start by combining the graham cracker crumbs, cocoa powder, and sugar in a large mixing bowl. Stir these dry ingredients together until they are well mixed, ensuring that the cocoa powder is evenly distributed throughout. Next, pour in the melted butter, mixing until the dry ingredients are fully moistened. The mixture should resemble wet sand, clumping together when pressed but still crumbly. If the mixture feels too dry, you can add a tablespoon of melted butter at a time until you reach the desired consistency.
Pressing the Crust
Once your crust mixture is ready, it’s time to press it into the baking pan. For this recipe, you will need an 8×8 inch baking dish. Start by lining the dish with parchment paper, allowing some overhang for easy removal later. This will also prevent the bars from sticking to the pan.
Using your fingers or a flat-bottomed measuring cup, evenly distribute the crust mixture across the bottom of the pan. Ensure that the layer is compact and even. It’s important to press down firmly to eliminate any air pockets; this helps the crust hold together once baked. Aim for a thickness of about ½ inch, allowing for a solid base that can support the layers above.
Baking the Crust
With the crust pressed into the pan, it’s time to bake! Place your pan in the preheated oven and bake for about 10 minutes. You should keep an eye on it, as the baking time may vary slightly depending on your oven. The crust is done when it looks set and begins to slightly pull away from the edges of the pan. It should have a light golden color around the edges. If you notice any bubbling, don’t worry; this is normal. Once baked, remove it from the oven and allow it to cool for a few minutes while you prepare the next layers.
Layering with Chocolate and Marshmallows
Now comes the fun part—layering the chocolate and marshmallows! For this step, you’ll need:
– 1 cup chocolate chips (semi-sweet or milk chocolate, based on your preference)
– 2 cups mini marshmallows
First, sprinkle the chocolate chips evenly over the baked crust. You can use a combination of chocolate types—dark, milk, or even white chocolate—to create a flavor profile that you love. After the chocolate chips, add the mini marshmallows, spreading them out evenly to cover the chocolate layer. Make sure to leave a little space around the edges to avoid overflowing.
Final Baking
Return the pan to the oven for an additional 5-7 minutes, or until the marshmallows puff up and turn golden brown. This step is crucial, as you want your marshmallows to be perfectly toasted, creating that iconic s’mores flavor. Keep a close eye during this process; marshmallows can go from golden to burnt very quickly.
Cooling Process
Once the marshmallows are beautifully toasted, remove the pan from the oven and place it on a wire rack to cool. Allow the S’mores Bars to cool for at least 30 minutes before attempting to slice. Cooling is essential, as it helps the layers set and makes cutting easier. If you try to slice them too early, the bars may fall apart, ruining the delightful presentation.
Slicing and Serving
After the S’mores Bars have cooled, it’s time to slice them into neat squares. Using a sharp knife, cut straight down through the layers, wiping the knife with a damp cloth after each cut. This will help keep your slices clean and prevent the marshmallows from sticking. You can cut them into 16 squares for bite-sized treats or larger pieces if you prefer.
Tips for Perfecting Your S’mores Bars
To ensure your S’mores Bars turn out perfectly, consider these tips:
– Common Mistakes: Avoid overmixing the crust ingredients, as this can lead to a tough texture. Also, be careful not to overbake the marshmallows, as they can quickly turn from toasted to burnt.
– Variations: Get creative! You can add chopped nuts for extra crunch, use flavored chocolate (like caramel or mint), or even swirl in peanut butter for a delicious twist. Experimenting with different types of chocolate can also enhance the flavor profile.
– Storage Suggestions: S’mores Bars can be stored in an airtight container at room temperature for up to a week. For longer storage, consider refrigerating them, but be aware that the texture may change slightly.
Serving Suggestions and Pairings
S’mores Bars are perfect for gatherings, parties, or cozy family nights. They evoke the nostalgic taste of campfire s’mores without the need for an open flame. Serve them alongside a glass of milk or a warm cup of hot chocolate for a comforting treat. They also pair well with coffee or a scoop of vanilla ice cream for an indulgent dessert experience.
Nutritional Information
While S’mores Bars are undoubtedly a treat, it’s essential to enjoy them in moderation. A typical serving contains approximately 250 calories, with a good balance of carbohydrates, fats, and sugars. Be mindful of portion sizes, especially if you’re indulging in a sweet tooth—consider cutting smaller squares to savor the flavors without overdoing it.
Conclusion
Creating S’mores Bars Delight is a simple yet rewarding experience that brings joy to both the maker and the eater. The combination of graham cracker crust, melted chocolate, and toasty marshmallows creates a nostalgic dessert that is perfect for all occasions. We encourage you to try your hand at making this delightful recipe and share it with family and friends. The timeless appeal of s’mores, in any form, is sure to bring smiles and sweet moments to your gatherings. Enjoy the process and the delicious results of your homemade S’mores Bars!

