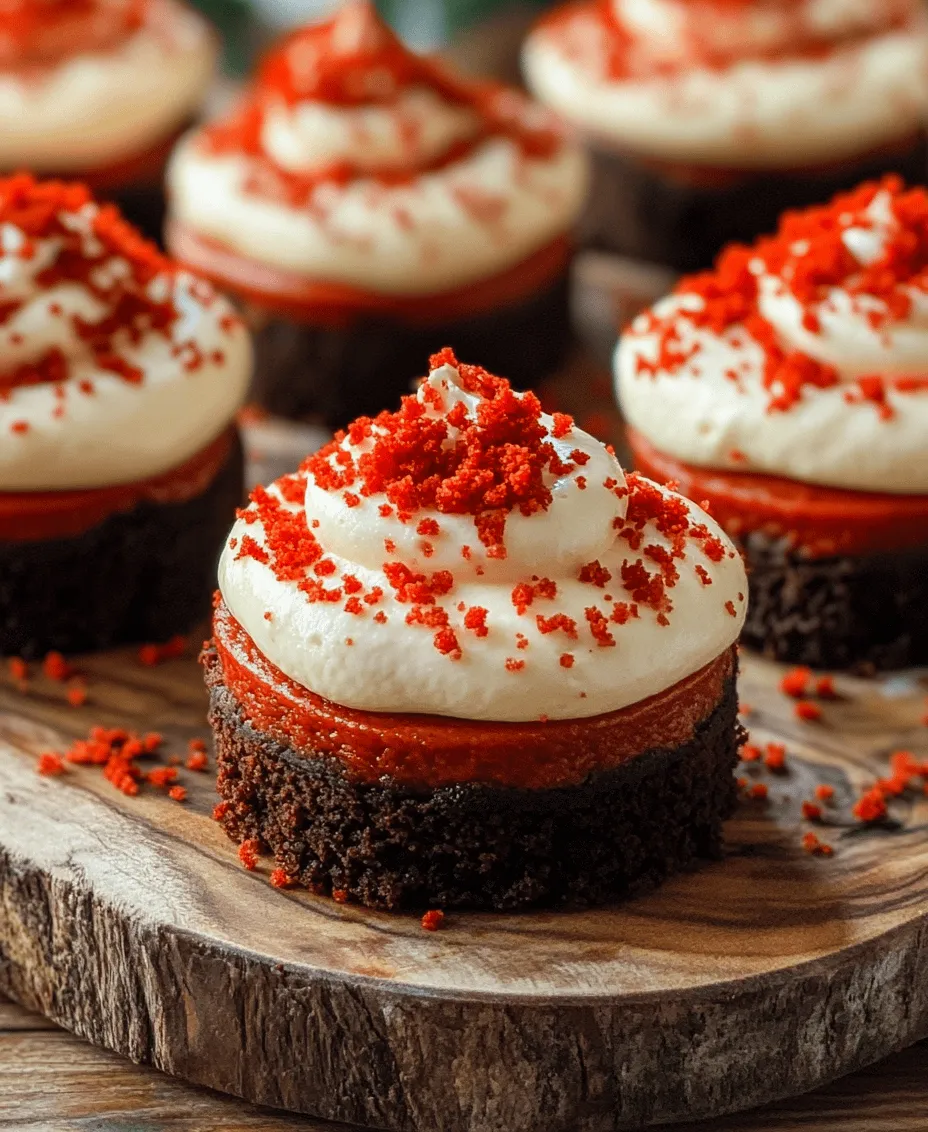
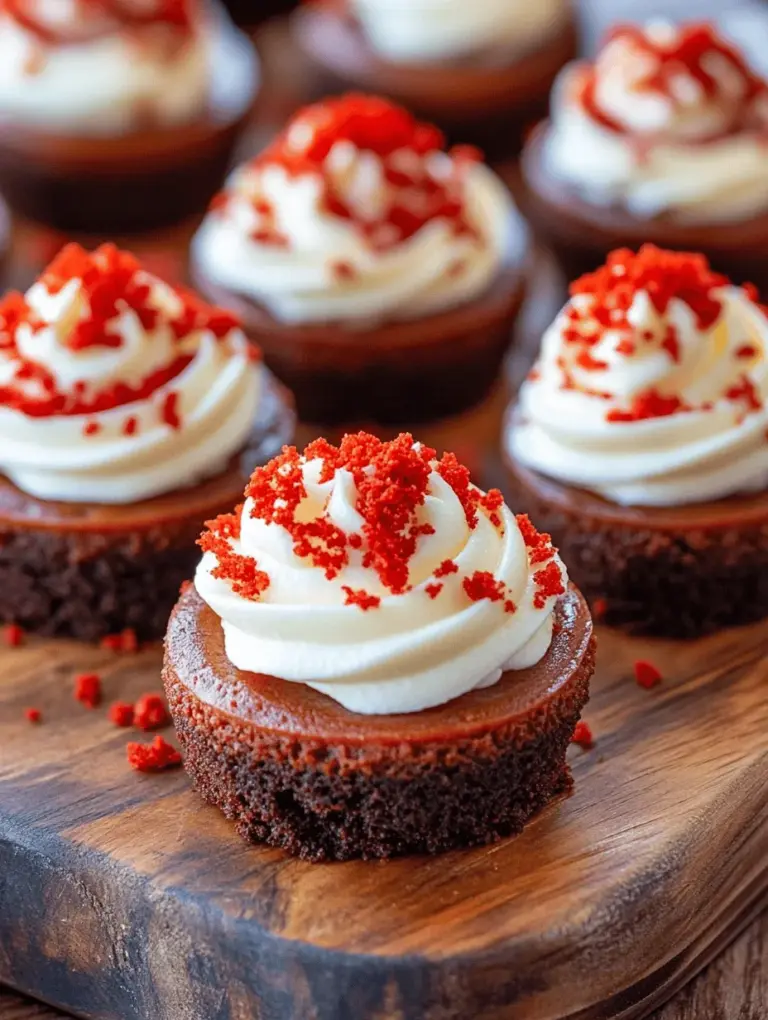
Indulging in desserts that combine rich flavors with stunning aesthetics is a delight for many. Enter Mini Red Velvet Cheesecakes—an exciting twist on the classic red velvet cake, these bite-sized treats are perfect for any occasion, from holiday gatherings to intimate celebrations. With their creamy cheesecake filling and luscious cream cheese frosting, they offer a delightful balance of sweetness and tanginess that is hard to resist. These mini cheesecakes not only satisfy your sweet tooth but also add a pop of color to your dessert table, making them a visual treat as well.
In this article, we will guide you through the step-by-step process of creating these miniature masterpieces, exploring each component in detail to ensure your baking experience is enjoyable and successful. Let’s dive into the world of Mini Red Velvet Cheesecakes and learn how to create these delectable bites.
Understanding the Components of Mini Red Velvet Cheesecakes
Before we jump into the recipe, it’s essential to understand the key components that make up these delightful cheesecakes. Each part plays a crucial role in the overall taste and texture of the final product.
The Crust: A Decadent Base for Your Cheesecakes
The crust is the foundation of any cheesecake, and in the case of Mini Red Velvet Cheesecakes, it sets the stage for the rich flavors to come.
– Overview of the Crust Ingredients and Their Roles: The primary ingredient for the crust is often chocolate cookies. These provide a rich, chocolatey flavor that complements the red velvet filling. The addition of butter helps to bind the cookie crumbs together, ensuring a firm and cohesive texture. Some recipes may also incorporate sugar to enhance sweetness.
– Choosing the Right Chocolate Cookies: When selecting chocolate cookies for the crust, consider using Oreos or similar cookies that have a rich cocoa flavor. The cream filling can be left in or removed based on your preference, as it can add extra sweetness and creaminess to the crust.
– The Importance of the Crust’s Texture and Consistency: A well-made crust should be sturdy enough to hold the cheesecake filling but not overly hard. The texture should be crumbly yet firm, achieved by properly measuring the butter and baking time.
The Cheesecake Filling: Creamy and Flavorful
Next, we focus on the star of the show—the cheesecake filling. This part of the recipe is where the magic happens, transforming simple ingredients into a creamy delight.
– Breakdown of the Filling Ingredients: The filling typically consists of cream cheese, sugar, eggs, vanilla extract, sour cream, and buttermilk. Each ingredient contributes to the overall texture and flavor of the cheesecake. Cream cheese provides the creamy base, while sour cream adds a slight tang that balances the sweetness.
– The Role of Each Ingredient in Achieving the Perfect Cheesecake Texture: The combination of cream cheese and sour cream creates a rich and smooth filling. Eggs act as a binding agent, while sugar provides sweetness. Buttermilk not only adds moisture but also enhances the flavor profile, giving it that signature red velvet taste.
– Tips for Mixing Techniques to Ensure a Smooth Filling: To achieve a smooth and creamy filling, it’s important to allow the cream cheese to come to room temperature before mixing. This minimizes lumps and ensures a velvety texture. Mixing should be done at a low speed to prevent incorporating too much air, which can lead to cracks in the cheesecake.
The Cream Cheese Frosting: A Touch of Sweetness
No cheesecake is complete without a luscious frosting to top it off, and for these Mini Red Velvet Cheesecakes, cream cheese frosting is the perfect choice.
– Ingredients for the Frosting and Their Purpose: The frosting typically consists of cream cheese, butter, powdered sugar, and vanilla extract. Cream cheese and butter create a rich base, while powdered sugar adds sweetness and helps achieve the desired consistency.
– How to Achieve the Ideal Frosting Consistency: The key to perfect frosting is to beat the cream cheese and butter until they are light and fluffy. Gradually add powdered sugar while mixing until you reach the desired sweetness and thickness. For a softer frosting, you can add a splash of milk or cream.
– Decorating Options to Enhance Presentation: Once your frosting is ready, consider different decorating techniques. A piping bag can create beautiful swirls on top of each cheesecake. For added flair, sprinkle grated chocolate, or use edible glitter to make these treats even more eye-catching.
Step-by-Step Instructions for Mini Red Velvet Cheesecakes
To successfully create these Mini Red Velvet Cheesecakes, it’s essential to prepare your kitchen and ingredients properly.
Prepping Your Kitchen and Ingredients
Before diving into the baking process, a well-organized kitchen is crucial.
– Importance of Mise en Place: This French term means “everything in its place.” Prepare all your ingredients and tools before starting. This not only makes the process smoother but also ensures you don’t forget any crucial component.
– Necessary Equipment and Tools for Preparation: For this recipe, you will need a muffin tin or mini cheesecake pan, a mixing bowl, an electric mixer, measuring cups and spoons, a spatula, and a piping bag for frosting. Having these items ready will streamline the process.
– Tips for Preheating and Setting Up Your Baking Environment: Preheat your oven to the appropriate temperature as indicated in your recipe. This step is important as it ensures even baking. Additionally, line your muffin tin with cupcake liners for easy removal later on.
Creating the Crust
Now that your kitchen is prepped, it’s time to create the crust that will hold everything together.
– Detailed Instructions for Mixing and Pressing the Crust: In a mixing bowl, combine crushed chocolate cookies and melted butter. Mix until the crumbs are evenly coated. The mixture should resemble wet sand. Press the crumbs firmly into the bottom of each muffin cup, ensuring an even layer.
– Suggested Methods for Even Crust Distribution in Mini Cheesecake Pans: To ensure the crust is evenly distributed, use the back of a measuring cup or a small glass to press down the crumbs firmly. This will create a solid base that won’t crumble during baking.
– Baking Tips for a Perfectly Firm Crust: Bake the crust in the preheated oven for about 5-7 minutes, or until it’s set. Keep an eye on it to prevent burning. Allow it to cool slightly before adding the cheesecake filling.
Crafting the Cheesecake Filling
After the crust has cooled, it’s time to prepare the filling that makes these cheesecakes so irresistible.
– Step-by-Step Mixing Instructions for the Filling: In a large mixing bowl, beat the cream cheese until smooth and creamy. Gradually add sugar, mixing until well combined. Add eggs one at a time, ensuring each is fully incorporated before adding the next. Follow with vanilla extract, sour cream, and buttermilk. Mix until everything is well blended.
– How to Incorporate Red Food Coloring for Vibrant Color: To achieve the iconic red velvet color, add red food coloring to the filling mixture. Start with a few drops and mix thoroughly, adding more until you reach your desired shade. Keep in mind that the color will deepen slightly during baking.
By following these detailed steps, you are well on your way to creating delicious Mini Red Velvet Cheesecakes that will impress anyone who tries them. With their rich flavor and stunning presentation, these treats are a perfect addition to any dessert spread. In the following sections, we will dive deeper into the finishing touches and tips to ensure your cheesecakes turn out perfectly every time.

Techniques to Avoid Overmixing and Ensure Lightness
When preparing the filling for your Mini Red Velvet Cheesecakes, it’s crucial to maintain a light and airy texture. Overmixing can lead to dense cheesecakes, which is not the desired outcome. Here are some effective techniques to avoid overmixing:
1. Room Temperature Ingredients: Start with cream cheese, eggs, and other ingredients at room temperature. This allows for easier mixing and reduces the need for excessive beating.
2. Use a Hand Mixer or Stand Mixer on Low Speed: When blending the cheesecake filling, keep your mixer on low speed. This minimizes the incorporation of too much air, which can lead to cracks during baking.
3. Mix Just Until Combined: When adding ingredients such as sugar and eggs, mix until just combined. You should still see some small lumps of cream cheese. This is perfectly acceptable, as these will smooth out during baking.
4. Fold in the Dry Ingredients: If your recipe includes any dry ingredients (like cocoa powder or flour), use a spatula to gently fold them in rather than mixing vigorously. This helps maintain the lightness of the batter.
Filling the Crusts and Baking
Best Practices for Filling the Crusts Evenly
Once you have prepared your crust and filling, it’s time to fill the crusts. Here are some best practices to ensure even filling:
– Use a Measuring Cup or Ice Cream Scoop: To maintain consistency, use a measuring cup or an ice cream scoop to portion out your filling. This helps you achieve uniform sizes across your mini cheesecakes.
– Leave Space at the Top: Avoid overfilling the crusts. Leave about 1/4 inch from the top to allow for any expansion during baking.
– Tap the Pan: After filling, gently tap the pan on the counter. This will help release any air bubbles trapped in the filling and settle it evenly.
Baking Guidelines Including Timing and Visual Cues for Doneness
Baking your Mini Red Velvet Cheesecakes to perfection requires careful attention to time and visual cues:
– Preheat the Oven: Ensure your oven is preheated to 325°F (160°C) before placing your cheesecakes inside. This ensures even cooking from the start.
– Baking Time: Typically, mini cheesecakes will need about 18-22 minutes to bake. Start checking at the 18-minute mark. The edges should look set, while the center will still be slightly jiggly.
– Visual Cues for Doneness: The tops should have a smooth surface and a slight puff. If you notice cracks forming, it’s a sign that they might be overbaked.
Techniques to Prevent Cracking During Baking
Cracking can be an unfortunate reality when baking cheesecakes, but you can take steps to minimize this:
– Water Bath Method: Place your muffin tin inside a larger baking dish filled with hot water. This steamy environment helps regulate the temperature and prevents the tops from cracking.
– Avoid Sudden Temperature Changes: Resist the temptation to open the oven door frequently. Sudden changes in temperature can cause the cheesecakes to crack.
– Cool Gradually: Once baking is complete, turn off the oven and leave the cheesecakes inside for an additional 10 minutes with the door slightly ajar. This gradual cooling helps prevent cracks.
Cooling and Chilling for Optimal Texture
Importance of Cooling Gradually to Maintain Texture
Once your cheesecakes are done baking, it’s essential to cool them properly to achieve the desired creamy texture:
– Removing from the Oven: After the additional cooling time in the oven, carefully remove the mini cheesecakes and place them on a wire rack. This prevents them from continuing to cook in the residual heat.
– Avoid Rapid Cooling: Do not place them directly into the refrigerator as this could lead to a drastic temperature change. Allow them to cool at room temperature for about 30 minutes.
Recommended Chilling Times and Conditions for the Best Results
For optimal texture and flavor development, chilling your cheesecakes is crucial:
– Chilling Duration: Cover the cooled mini cheesecakes with plastic wrap and refrigerate for at least 4 hours, but overnight is best. This allows the flavors to meld and the filling to set completely.
– Chilling Conditions: Ensure your refrigerator is at the right temperature (around 40°F or 4°C) for safe chilling without compromising texture.
Understanding the Chilling Process in Relation to Flavor Development
Chilling is not just about cooling; it’s also about enhancing flavors:
– Flavor Maturation: As the cheesecakes chill, the flavors will deepen and develop, resulting in a richer taste. The tanginess of the cream cheese will mellow, while the sweetness balances beautifully.
– Texture Improvement: Chilling helps firm up the filling, making it easier to slice and serve without losing shape.
Making the Cream Cheese Frosting
Detailed Instructions for Preparing the Frosting
Now that your mini cheesecakes are chilled and ready, it’s time to prepare the frosting:
1. Ingredients: Gather 8 oz (225g) of cream cheese (softened), 1/2 cup (60g) of powdered sugar, 1/2 teaspoon of vanilla extract, and 1/4 cup (60ml) of heavy cream.
2. Mixing the Base: In a mixing bowl, combine the softened cream cheese, powdered sugar, and vanilla extract. Beat on medium speed until smooth and creamy.
3. Incorporate Heavy Cream: Gradually add the heavy cream while mixing. Continue until the mixture is fluffy and holds soft peaks.
Mixing Tips to Achieve a Fluffy Texture
– Use the Right Temperature: Make sure your cream cheese is at room temperature for the best mixing results. Cold cream cheese can lead to lumps.
– Gradual Addition of Sugar: Adding powdered sugar in increments helps prevent clumping and ensures a smoother frosting.
– Avoid Overbeating: Once the frosting reaches fluffy consistency, stop mixing. Overbeating can lead to a grainy texture.
Adjusting Sweetness Levels Based on Personal Preference
Not everyone likes their frosting the same sweetness:
– Taste Test: After mixing, taste the frosting and adjust sweetness by adding more powdered sugar if desired. This is a great way to cater to personal preferences.
– Balance Flavors: If you find the frosting too sweet, consider adding a pinch of salt to balance the flavors.
Frosting and Garnishing Your Mini Cheesecakes
Techniques for Piping or Spreading Frosting Evenly
Now it’s time to frost your mini cheesecakes for that delightful finishing touch:
– Piping Bag Method: Use a piping bag fitted with a star tip for an elegant look. Start in the center of each cheesecake and spiral outward.
– Spreading with a Knife: If you prefer a more rustic look, use a small offset spatula to spread frosting smoothly across the top.
– Even Application: Aim for even coverage to ensure each bite has a consistent flavor.
Creative Garnish Ideas to Elevate Presentation
Garnishing can take your mini cheesecakes from pretty to stunning:
– Chocolate Shavings: Add a sprinkle of chocolate shavings on top for a decadent touch.
– Fresh Berries: Top with raspberries, strawberries, or blueberries for a fresh contrast against the rich cream cheese frosting.
– Mint Leaves: A sprig of mint adds a pop of color and a refreshing aroma.
The Significance of Visual Appeal in Dessert Enjoyment
Aesthetics play a huge role in the enjoyment of desserts:
– First Impressions Matter: An appealing presentation makes the dessert more inviting and can enhance the overall experience.
– Color Contrasts: The vibrant red of the cake against the white frosting and colorful garnishes can create a visually striking dessert that excites the palate.
Serving Suggestions for Mini Red Velvet Cheesecakes
Perfect Pairings for Your Desserts
The right pairing can elevate your mini cheesecakes to a whole new level:
– Beverage Pairings: Consider serving your mini cheesecakes with a glass of sweet dessert wine, coffee, or a rich hot chocolate. These beverages complement the flavors of red velvet beautifully.
– Occasion Serving: These cheesecakes are perfect for birthdays, weddings, or holiday gatherings. Their small size makes them ideal for parties where guests can enjoy a little indulgence without guilt.
– Presentation Styles: Serve on a beautiful cake stand or individual dessert plates for an elegant presentation. Adding a dusting of cocoa powder or powdered sugar can enhance the visual appeal.
Storage and Serving Tips
To ensure your cheesecakes maintain their flavor and texture, consider the following:
– Best Practices for Storing: Store any leftovers in an airtight container in the refrigerator. They can last for up to 5 days when stored properly.
– Transporting Cheesecakes: If you need to take them somewhere, consider using a muffin carrier to prevent them from shifting and getting damaged.
– Serving Temperature Considerations: For the best flavor experience, allow the mini cheesecakes to sit at room temperature for about 15 minutes before serving. This enhances their creaminess and flavor.
Conclusion: The Joy of Mini Red Velvet Cheesecakes
Mini Red Velvet Cheesecakes are not only a feast for the eyes but also a delightful treat for the palate. With their creamy filling, rich chocolate crust, and sweet frosting, they bring together the best elements of both cheesecake and red velvet cake. By following this detailed guide, you can create these delicious desserts that will impress your family and friends. Whether for a special event or a simple indulgence, these mini cheesecakes are sure to be a hit. Embrace the joy of baking and enjoy the sweet rewards of your efforts with each delightful bite.

