Introduction
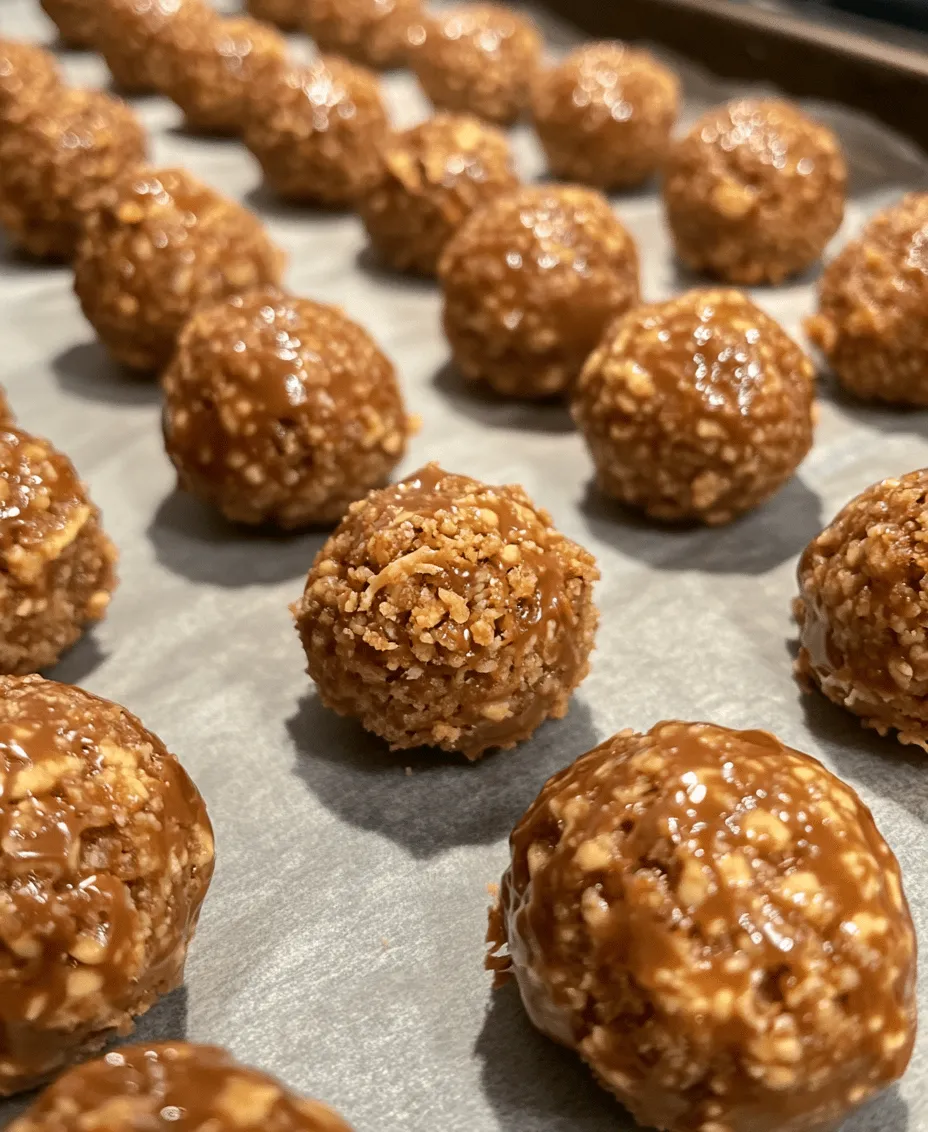
Welcome to the delightful world of no-bake desserts, where deliciousness meets convenience! Among the myriad of treats you can whip up without turning on the oven, Butterfinger Balls stand out as a favorite, especially for peanut butter enthusiasts. These delectable bites combine the richness of creamy peanut butter with the sweet crunch of graham crackers, all enveloped in a luscious chocolate coating. Whether you’re hosting a party, celebrating a holiday, or simply indulging a sweet tooth, Butterfinger Balls are the perfect solution. Their simplicity, combined with their irresistible flavor, makes them a must-try for both novice cooks and seasoned bakers alike.
In this article, we’ll explore the origins of Butterfinger Balls, their appeal as a nostalgic treat, and guide you through the essential steps and ingredients needed to create these heavenly bites. The balance of flavors—from the creamy peanut butter to the smooth chocolate—creates a mouthwatering experience that is hard to resist. Let’s take a deeper dive into this sweet sensation!
Understanding the Appeal of Butterfinger Balls
Butterfinger Balls evoke a sense of nostalgia for many. For those who grew up enjoying peanut butter and chocolate desserts, these little treats may remind them of childhood favorites, family gatherings, or that special dessert served at every holiday celebration. The combination of familiar flavors wrapped in a fun, bite-sized ball makes them appealing to both kids and adults alike.
The texture and flavor profile of Butterfinger Balls are truly what set them apart. Each bite offers a delightful blend of creamy peanut butter, which is rich and satisfying, alongside the crunchiness of crushed graham crackers that adds a delightful texture. The smooth chocolate coating envelops the filling, creating a balance of flavors that is both comforting and indulgent.
Moreover, Butterfinger Balls are incredibly versatile. While the classic recipe calls for milk chocolate, you can easily customize them by using dark chocolate, white chocolate, or even flavored chocolate melts. This flexibility allows you to cater to different dietary preferences or simply experiment with new taste combinations. Whether you prefer a richer chocolate flavor or a sweeter alternative, Butterfinger Balls can adapt to your palate.
Ingredients Breakdown
To create these scrumptious Butterfinger Balls, it’s essential to understand the role each ingredient plays in achieving the perfect texture and flavor. Here’s a detailed breakdown of the key ingredients used in this recipe:
Creamy Peanut Butter
The star of the show is, of course, creamy peanut butter. When selecting peanut butter for your Butterfinger Balls, you have a few options: natural, conventional, or even flavored varieties. Natural peanut butter, made from just peanuts and salt, offers a wholesome flavor but can be a bit oilier. Conventional peanut butter often contains added sugars and stabilizers, resulting in a sweeter and creamier product. Both types work well in this recipe; the choice ultimately depends on your personal preference. The creamy texture of peanut butter is crucial for binding the other ingredients together while imparting that beloved peanut flavor.
Powdered Sugar
Powdered sugar is a key ingredient that not only sweetens the Butterfinger Balls but also contributes to their texture. It dissolves easily and blends smoothly with peanut butter, creating a cohesive mixture. Unlike granulated sugar, powdered sugar provides a soft, melt-in-the-mouth quality that enhances the dessert’s overall mouthfeel. Be mindful of the amount you use; too little will result in a less sweet treat, while too much can make the mixture overly sweet.
Crushed Graham Crackers
Crushed graham crackers are what give Butterfinger Balls their signature crunch. They provide structure and stability to the mixture, allowing you to form the balls without them falling apart. The subtle sweetness and flavor of the graham crackers complement the peanut butter beautifully, creating a layered taste experience. For a twist, you can experiment with different types of cracker crumbs, such as digestive biscuits or even gluten-free options, to suit your dietary needs.
Vanilla Extract
Vanilla extract is a simple yet impactful addition that enhances the overall flavor of the Butterfinger Balls. Just a splash adds depth and warmth, rounding out the sweetness from the peanut butter and powdered sugar. Opt for pure vanilla extract when possible, as it provides a richer and more authentic flavor compared to imitation vanilla.
Milk Chocolate Chips
The chocolate coating is what elevates Butterfinger Balls from delicious to divine. Milk chocolate chips are typically used for their creamy sweetness, which pairs perfectly with the salty peanut butter. However, feel free to experiment with different types of chocolate. Dark chocolate can provide a more intense flavor, while white chocolate adds a sweeter and creamier touch.
Coconut Oil
Coconut oil is an optional ingredient that can be added when melting the chocolate. It helps create a smoother consistency, making the chocolate easier to work with and coat the balls evenly. Additionally, coconut oil adds a subtle coconut flavor that can enhance the overall taste experience. If you prefer to avoid it, you can melt the chocolate without it; just keep an eye on the melting process to ensure it doesn’t seize.
Step-by-Step Instructions for Making Butterfinger Balls
Now that you have a solid understanding of the ingredients and their roles, let’s dive into the step-by-step instructions for making your very own Butterfinger Balls. Follow these easy directions to create a batch that will impress your friends and family.
Step 1: Gather Your Ingredients
Before you begin, make sure you have all the necessary ingredients on hand. Measure out your creamy peanut butter, powdered sugar, crushed graham crackers, vanilla extract, milk chocolate chips, and coconut oil (if using). Having everything ready will streamline the process and make it more enjoyable.
Step 2: Prepare the Peanut Butter Mixture
In a large mixing bowl, combine the creamy peanut butter, powdered sugar, crushed graham crackers, and vanilla extract. Use a spatula or a wooden spoon to mix everything together until well combined. The mixture should be thick and pliable, making it easy to form into balls. If the mixture is too crumbly, add a little more peanut butter until it holds together.
Step 3: Form the Balls
Once the peanut butter mixture is well combined, it’s time to shape the balls. Take a small scoop of the mixture (about 1 tablespoon) and roll it into a ball between your palms. Place the formed balls on a baking sheet lined with parchment paper. Repeat this process until all the mixture has been shaped into balls. Depending on the size, you should yield around 20 to 25 balls.
Step 4: Chill the Balls
To ensure that the balls hold their shape when coated in chocolate, it’s essential to chill them. Place the baking sheet with the formed balls in the refrigerator for at least 30 minutes or until they are firm. This step is crucial; it helps the peanut butter mixture set, making it easier to dip into the chocolate later.
Step 5: Melt the Chocolate
While the balls are chilling, you can melt the chocolate. In a microwave-safe bowl, combine the milk chocolate chips and coconut oil (if using). Microwave in 30-second intervals, stirring in between, until the chocolate is completely melted and smooth. Be careful not to overheat it, as this can cause the chocolate to seize.
Step 6: Coat the Balls
Once the balls are firm and the chocolate is melted, it’s time to coat them. Using a fork or a toothpick, dip each ball into the melted chocolate, ensuring it is fully covered. Allow any excess chocolate to drip off before placing the coated ball back onto the parchment-lined baking sheet. Repeat this process for all the balls until they are all coated in chocolate.
Step 7: Chill Again
After coating the balls in chocolate, return the baking sheet to the refrigerator for another 30 minutes to set. This will allow the chocolate to harden, creating a delightful shell around the creamy peanut butter filling.
Step 8: Serve and Enjoy
Once the chocolate has set, your Butterfinger Balls are ready to enjoy! Serve them at parties, share them with friends and family, or simply indulge in a sweet treat whenever the craving strikes. They are sure to be a hit with everyone who tries them.
Stay tuned for the next part of this article, where we will explore tips for the best results, variations of the recipe, and answers to some common questions about Butterfinger Balls.

Mix Base Ingredients
To create the perfect Butterfinger Balls, start by mixing the base ingredients. In a large mixing bowl, combine 1 cup of creamy peanut butter, 1 cup of powdered sugar, and 1 ½ cups of crushed Butterfinger candy bars. The key here is to thoroughly combine these ingredients until you achieve a smooth and cohesive mixture. The consistency should be thick enough to hold its shape when rolled into balls but not so dry that it crumbles apart. If your mixture feels too sticky, consider adding a little more powdered sugar, one tablespoon at a time, until you reach the desired texture.
Shape the Balls
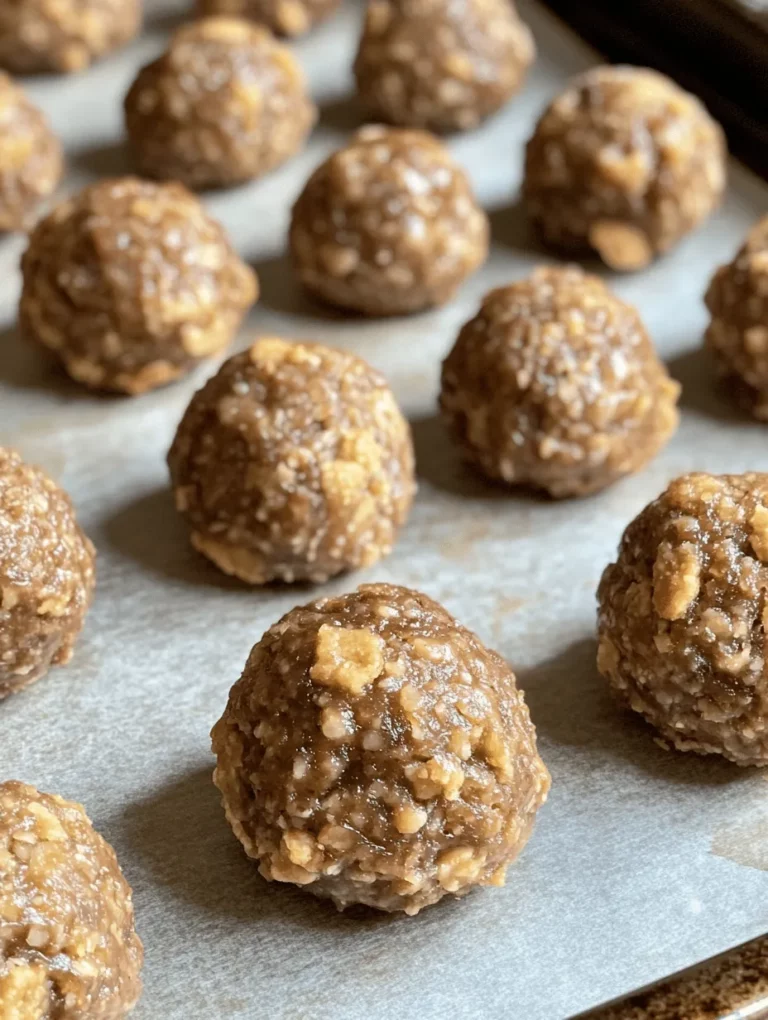
Once your mixture is well-combined, it’s time to shape the Butterfinger Balls. Using a tablespoon or a cookie scoop, portion out the mixture into small balls, about 1 inch in diameter. This size is perfect for a bite-sized treat that’s easy to handle. When rolling the balls, make sure to use your palms to create a smooth surface; this not only gives them an appealing look but also helps them hold together better. If you find that the mixture is sticking to your hands, lightly dust your palms with a bit of powdered sugar to help with the rolling process.
Chill Balls
After shaping your Butterfinger Balls, place them on a baking sheet lined with parchment paper. Cover them with plastic wrap or foil and refrigerate for at least 30 minutes. Chilling is crucial because it helps firm up the balls, making them easier to dip in chocolate later. If you skip this step, the balls may become too soft and lose their shape during the dipping process.
Melt Chocolate
While the balls are chilling, it’s time to prepare the chocolate coating. You can use either milk chocolate or dark chocolate, depending on your preference. Place your chocolate chips (about 1 ½ cups) in a microwave-safe bowl. Microwave the chocolate in 30-second intervals, stirring in between to ensure even melting. Be cautious not to overheat the chocolate; doing so may cause it to seize up and become grainy. When the chocolate is almost fully melted, remove it from the microwave and continue stirring until smooth. This residual heat will help melt any remaining chips without further cooking them.
Dip the Balls
Now comes the fun part: dipping the chilled Butterfinger Balls in chocolate! Using a fork or a dipping tool, carefully lower each ball into the melted chocolate, ensuring it is completely coated. Tap the fork against the edge of the bowl to remove any excess chocolate. This step is essential to avoid creating a thick layer of chocolate, which can overpower the flavor of the peanut butter and Butterfinger filling. Place the dipped balls back onto the parchment-lined baking sheet. If desired, you can sprinkle additional crushed Butterfinger pieces or chopped nuts on top while the chocolate is still wet for an attractive finish.
Chill Again
Once all the Butterfinger Balls are coated in chocolate, return them to the refrigerator for another 30 minutes or until the chocolate has set completely. This final chill is important for ensuring that the chocolate coating hardens properly, giving you a delectable treat that is both visually appealing and easy to bite into.
Serve and Enjoy
Your Butterfinger Balls are now ready to be served! These treats are perfect for various occasions, from birthday parties to holiday celebrations or simply as a sweet indulgence for yourself. Arrange them on a decorative plate or in a fun candy jar for an inviting presentation. If you’re looking to store them, keep the Butterfinger Balls in an airtight container in the refrigerator for up to two weeks. For longer storage, you can freeze them for up to three months—just make sure to separate layers with parchment paper to prevent sticking.
Nutritional Information
When indulging in Butterfinger Balls, it’s essential to consider their nutritional profile. Each ball contains approximately 150 calories, which can vary based on the specific ingredients used. Here’s a rough breakdown of the macronutrients per ball:
– Calories: 150
– Protein: 3g
– Fat: 9g
– Carbohydrates: 17g
– Sugar: 10g
While these treats are undeniably delicious, it’s important to enjoy them in moderation. The high sugar and fat content is typical for desserts, so savoring them occasionally as a treat is a great way to balance indulgence with healthy eating habits.
Creative Variations and Customizations
One of the great joys of making Butterfinger Balls is the ability to customize them to suit various tastes and dietary preferences. Here are some creative variations and modifications to inspire your next batch:
Flavor Variations
– Nutty Twist: Incorporate chopped nuts such as almonds, walnuts, or pecans into the mixture for added crunch and flavor.
– Coconut Delight: Add shredded coconut to the base for a tropical flair that pairs beautifully with the chocolate and peanut butter.
– Spiced Up: Mix in a dash of cinnamon or cayenne pepper to give your Butterfinger Balls an unexpected kick that will surprise your taste buds.
Chocolate Alternatives
– Dark Chocolate: Opt for dark chocolate for a richer flavor and potentially lower sugar content. Dark chocolate also adds a hint of sophistication to your treats.
– White Chocolate: For a sweeter, creamier option, try using white chocolate. This variation can appeal to those who prefer a more delicate chocolate flavor.
– Dairy-Free Chocolate: If you’re looking for a vegan alternative, consider using dairy-free chocolate chips. Many brands offer delicious options that maintain the same indulgent taste.
Health-Conscious Modifications
For those looking to enjoy Butterfinger Balls with a healthier twist, consider the following modifications:
– Natural Sweeteners: Substitute powdered sugar with natural sweeteners like coconut sugar or maple syrup. Just keep in mind that this may alter the texture slightly, so you might need to experiment with the quantities.
– Alternative Bases: Use almond flour or oat flour instead of powdered sugar for a grain-free option. This not only adds different flavors but also increases the nutritional value.
– Protein Boost: Incorporate protein powder into the mixture for an extra protein kick. This can make your treat a bit more filling and satisfying.
Conclusion
Creating Butterfinger Balls is not just about indulging in a no-bake dessert; it’s about the joy of making something delicious to share with friends and family. The simple process of mixing, shaping, and dipping transforms basic ingredients into an irresistible treat that brings smiles to everyone who tastes them. Whether you stick to the classic recipe or venture into creative variations, these treats are sure to be a hit.
Encourage your family and friends to experiment with the recipe, adding their unique twists and flavors. The versatility and delightful taste of Butterfinger Balls make them an excellent choice for any occasion. So, roll up your sleeves and dive into the fun of making these treats at home—you’ll be rewarded with delicious snacks that everyone will love!

