Introduction
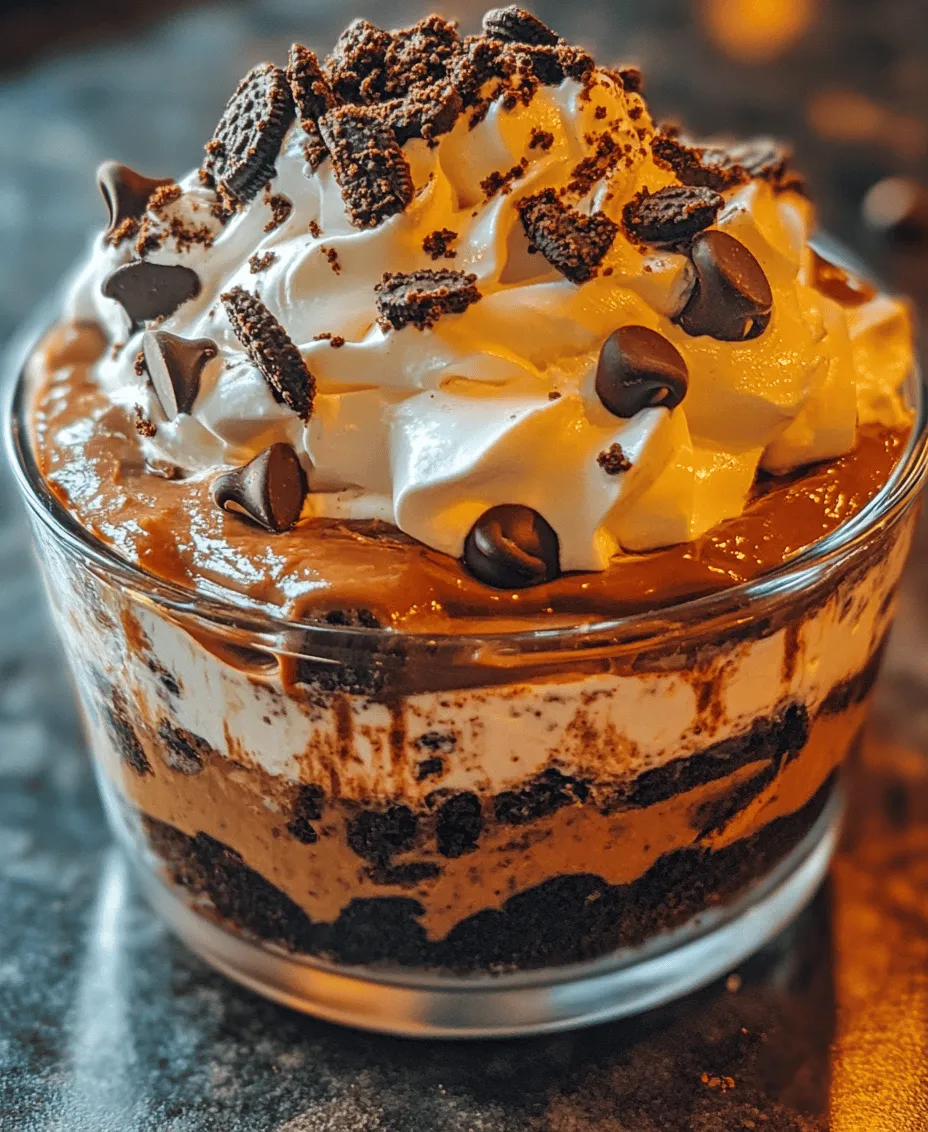
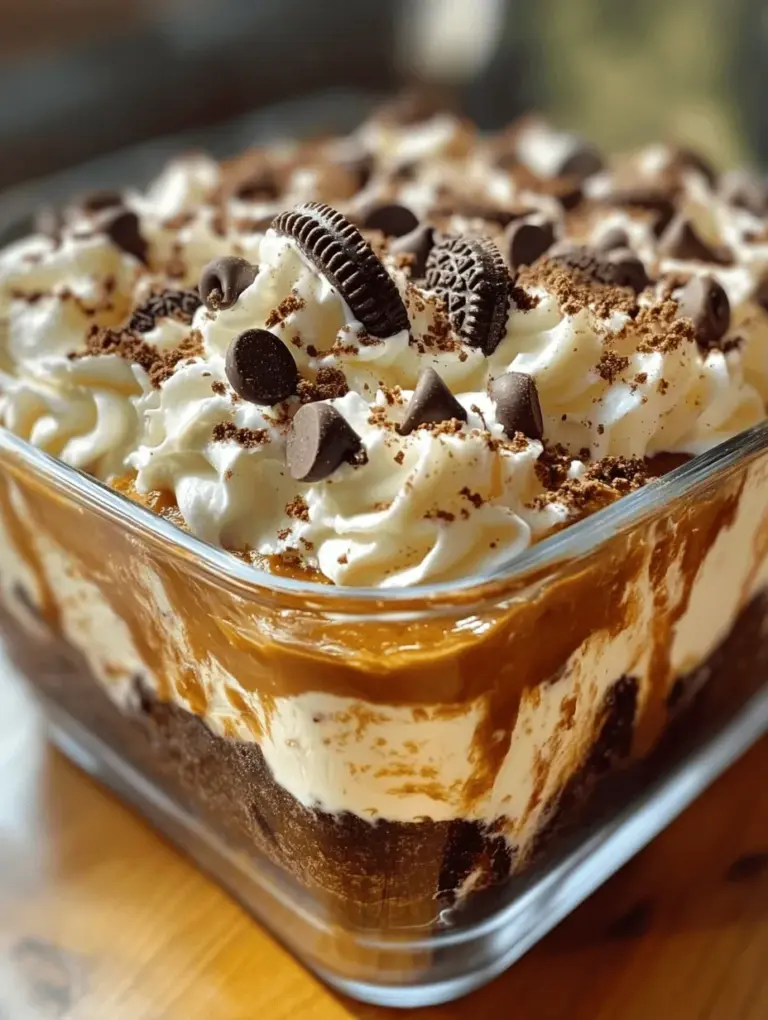
If you’re in search of a dessert that combines the rich flavors of chocolate and the creamy goodness of cream cheese, look no further than the Heavenly Oreo Dessert. This indulgent treat not only satisfies your sweet tooth but also delights your senses with its layered textures and harmonious flavors. With every bite, you’ll experience the crunch of Oreo cookies complemented by the smoothness of cream cheese and the richness of chocolate pudding—truly a match made in dessert heaven.
The appeal of this no-bake dessert lies not only in its delicious taste but also in its simplicity. Whether you’re hosting a dinner party, celebrating a birthday, or simply craving something sweet, the Heavenly Oreo Dessert is the perfect choice. It requires minimal effort and time, allowing you to whip up a stunning dessert without the hassle of baking. Perfect for gatherings, this recipe is sure to impress your guests and become a staple in your dessert repertoire.
Understanding the Ingredients
To create the ultimate Heavenly Oreo Dessert, it’s essential to understand the role of each key ingredient. This dessert features a variety of components that come together to create a delightful experience for your taste buds. Let’s take a closer look at the ingredients that make this dessert truly heavenly.
Oreo Cookies
Oreo cookies are the star of this dessert, providing both flavor and texture. Originally introduced in 1912, these iconic chocolate sandwich cookies have become a beloved treat worldwide. With their rich chocolate flavor and creamy filling, Oreos are not just a snack; they are versatile ingredients that can elevate a variety of desserts. In this recipe, they form the base of the crust and add layers to the creamy filling, making them indispensable.
Unsalted Butter
Unsalted butter is a crucial ingredient in many dessert recipes, and for good reason. It contributes to the richness and flavor of the dessert while also helping to bind the dry ingredients together. In the Heavenly Oreo Dessert, melted unsalted butter is combined with crushed Oreos to create a solid crust that holds up beautifully. Using unsalted butter allows you to control the overall salt content of the dessert, ensuring a perfect balance of flavors.
Cream Cheese
Cream cheese plays a vital role in the Heavenly Oreo Dessert, adding a luscious creaminess that complements the chocolatey flavors. Its smooth texture creates a delightful mouthfeel while its slight tang balances the sweetness of the other ingredients. When mixed with powdered sugar and whipped topping, cream cheese transforms into a fluffy layer that brings depth and richness to the dessert.
Powdered Sugar
Powdered sugar, also known as confectioners’ sugar, is key for sweetening the cream cheese layer. Its fine texture allows it to blend seamlessly, creating a smooth and creamy filling without any graininess. Additionally, powdered sugar helps to thicken the mixture, ensuring that the cream cheese layer holds its shape and provides a perfect contrast to the other layers.
Whipped Topping
Whipped topping adds a light and airy quality to the Heavenly Oreo Dessert. It provides a creamy texture without being overly heavy, which is essential for balancing the denser layers of chocolate pudding and cream cheese. By folding in whipped topping into the cream cheese mixture, you achieve a delightful lightness that enhances the dessert’s overall appeal.
Chocolate Pudding
Chocolate pudding is another essential component that brings an intense chocolate flavor to the dessert. This layer adds richness and depth, making it a perfect counterpart to the creamy filling. You can use instant chocolate pudding mix for convenience, allowing the dessert to come together quickly and easily. The pudding layer also adds a luscious texture that contrasts beautifully with the crunchy Oreo crust and the fluffy cream cheese filling.
Mini Chocolate Chips and Extra Oreos
To finish off your Heavenly Oreo Dessert, mini chocolate chips and extra crushed Oreos are used as garnishes. These toppings not only enhance the presentation of the dessert but also add an extra layer of texture and flavor. The mini chocolate chips provide delightful bursts of chocolate, while the additional Oreos offer that familiar crunch, making each bite even more enjoyable.
Step-by-Step Preparation
Now that you’re familiar with the key ingredients, let’s dive into the step-by-step preparation of this Heavenly Oreo Dessert. The process is straightforward and requires just a few simple steps to create this decadent treat.
Preparing the Oreo Crust
The first step in making the Heavenly Oreo Dessert is preparing the Oreo crust. A solid crust is essential for supporting the layers above it, and using fine crumbs is crucial for achieving the right texture.
1. Crush the Oreos: Start by placing the Oreo cookies in a food processor. Pulse until they become fine crumbs. If you don’t have a food processor, you can place the cookies in a resealable plastic bag and crush them using a rolling pin.
2. Mix with Butter: In a mixing bowl, combine the crushed Oreos with melted unsalted butter. Stir until the crumbs are evenly coated and resemble wet sand.
3. Press the Crust: Pour the mixture into a 9×13-inch baking dish. Using the back of a measuring cup or your hands, press the mixture firmly into the bottom of the dish to create an even layer. Make sure to press down hard enough to form a solid crust that won’t crumble when it’s time to serve.
Creating the Cream Cheese Layer
Once your crust is prepared, it’s time to create the creamy filling. This layer is essential for adding richness and flavor to the dessert.
1. Mix the Cream Cheese: In a large mixing bowl, beat the softened cream cheese using an electric mixer until it’s smooth and free of lumps. This step is crucial; properly mixing the cream cheese will ensure a velvety texture.
2. Add Powdered Sugar: Gradually add the powdered sugar to the cream cheese, mixing until fully incorporated. Taste the mixture and adjust the sweetness if needed.
3. Fold in Whipped Topping: Carefully fold the whipped topping into the cream cheese mixture. Use a spatula to gently combine the two, being cautious not to deflate the whipped topping. The goal is to maintain the light and airy texture that whipped topping provides.
Assembling the Chocolate Pudding Layer
With the crust and cream cheese layer ready, you can now assemble the chocolate pudding layer, which ties everything together.
1. Prepare the Pudding: In a separate mixing bowl, prepare the instant chocolate pudding according to the package instructions. Usually, this involves whisking the pudding mix with milk until it thickens.
2. Layer the Pudding: Once the pudding is ready, pour it over the cream cheese layer in the baking dish. Use a spatula to spread it evenly, ensuring that it covers the entire surface.
Now that you’ve laid the foundation for your Heavenly Oreo Dessert, the next steps will involve adding the finishing touches and allowing the dessert to set. Stay tuned for more detailed instructions on garnishing and serving this delightful no-bake treat!

Tips for Achieving the Right Consistency with Chocolate Pudding
When preparing the chocolate pudding layer for your Heavenly Oreo Dessert, achieving the right consistency is crucial for both the taste and overall presentation. Here are some tips to help you succeed:
1. Use Whole Milk or Cream: For a richer flavor and creamier texture, opt for whole milk or heavy cream instead of low-fat alternatives. This will enhance the pudding’s consistency and mouthfeel.
2. Whisk Constantly: While cooking the pudding, whisk continuously to prevent lumps from forming. This will ensure a smooth and velvety texture.
3. Bring to a Gentle Boil: Allow the pudding mixture to come to a gentle boil while stirring. This process activates the thickening agents, helping the pudding set properly.
4. Cool Gradually: After cooking, let the pudding cool slightly at room temperature before using it. This prevents it from being too runny when you layer it over the crushed Oreo base.
How to Evenly Distribute the Pudding Layer
Even distribution of the pudding layer is essential for a visually appealing dessert. Follow these steps to ensure your pudding is spread evenly:
1. Use a Spoon or Offset Spatula: After pouring the pudding over the Oreo crust, use the back of a spoon or an offset spatula to gently spread the pudding to the edges of the dish.
2. Tap to Settle: Once the pudding is spread, gently tap the dish on the counter. This will help the pudding settle evenly and eliminate any air bubbles.
3. Layer with Care: If you are adding multiple layers of pudding, allow the first layer to set slightly in the refrigerator before adding the next layer. This will help maintain distinct layers and prevent mixing.
Finishing Touch with Whipped Topping
Whipped topping is the crowning glory of your Heavenly Oreo Dessert. It adds a light and airy texture that balances the richness of the pudding and crust.
1. Choose the Right Topping: You can use store-bought whipped topping or make your own using heavy cream and powdered sugar. Homemade whipped cream tends to be more flavorful and can be sweetened to your preference.
2. Smooth Spreading: To achieve a smooth finish, dollop the whipped topping in the center of the pudding layer and gently spread it towards the edges. Use a clean offset spatula or a large spoon for this process.
3. Presentation: For a polished look, create swirls or peaks in the whipped topping using the spatula or a piping bag fitted with a decorative tip.
Garnishing for Visual Appeal
Garnishing your Heavenly Oreo Dessert not only enhances its visual appeal but also adds an extra layer of flavor.
1. Crushed Oreos: A simple yet effective garnish is to sprinkle crushed Oreos on top of the whipped topping. This adds texture and reinforces the Oreo theme.
2. Chocolate Shavings or Drizzle: For a touch of elegance, use a vegetable peeler to create chocolate shavings or drizzle melted chocolate over the whipped topping. This adds a luxurious finish.
3. Fresh Berries: Adding fresh raspberries or strawberries can introduce a pop of color and a tangy flavor that contrasts beautifully with the sweetness of the dessert.
4. Mint Leaves: A few mint leaves can add a refreshing touch and vibrant color, making your dessert visually stunning.
The Science Behind the Layers
Understanding the role of each layer in your Heavenly Oreo Dessert is essential to appreciate its flavor and texture.
1. The Oreo Crust: The crushed Oreos mixed with butter create a crunchy base that provides a sturdy foundation and a rich, chocolaty flavor. This layer contrasts beautifully with the creamy pudding and whipped topping.
2. Chocolate Pudding: The pudding layer is rich and creamy, offering a smooth texture that melts in your mouth. The chocolate flavor is intensified by the chilling process, which allows the ingredients to meld together.
3. Whipped Topping: The airy whipped topping lightens the overall dessert, providing a soft texture that balances the denser layers below. This contrast is key to the dessert’s appeal.
4. Chilling: Chilling the dessert is not just about setting the layers; it also enhances the flavors. As the dessert cools, the flavors meld together, making each bite a harmonious blend of chocolatey goodness.
5. Creamy and Crunchy Textures: The combination of creamy pudding, fluffy whipped topping, and crunchy Oreo crust creates a delightful textural experience. This interplay keeps each bite exciting and satisfying.
Serving Suggestions
Heavenly Oreo Dessert is versatile and can be served on various occasions. Here are some ideal serving suggestions:
1. Ideal Occasions: This dessert is perfect for family gatherings, potlucks, birthday parties, or any celebration where you want to impress guests with a crowd-pleaser.
2. Pairing Recommendations: Pair your dessert with a glass of cold milk for a classic combination. Alternatively, a rich coffee or a dessert wine can complement the chocolate flavors beautifully.
3. Presentation Ideas: For parties, consider serving the dessert in individual cups or jars for a personal touch. Top each serving with a sprig of mint or a single berry for an elegant look.
Storage and Shelf Life
To enjoy your Heavenly Oreo Dessert for days to come, proper storage is essential.
1. Best Practices for Storing Leftovers: Cover the dessert with plastic wrap or aluminum foil to prevent it from absorbing odors from the refrigerator. Alternatively, transfer it to an airtight container for optimal freshness.
2. Recommended Duration for Keeping the Dessert in the Refrigerator: The dessert can be stored in the refrigerator for up to 3-4 days. The flavors will continue to deepen, making it even more delicious.
3. Tips on Freezing and Thawing: While it’s best consumed fresh, you can freeze the dessert if needed. Cover it tightly and freeze for up to 2 months. To thaw, move it to the refrigerator overnight before serving.
Conclusion
Heavenly Oreo Dessert is a delightful treat that embodies deliciousness, ease of preparation, and stunning visual appeal. With its layers of creamy pudding, crunchy Oreo crust, and fluffy whipped topping, this dessert is sure to impress your family and friends.
We encourage you to try making this recipe at home for a satisfying and indulgent dessert experience. The joy of sharing a homemade dessert with loved ones cannot be overstated, and this Heavenly Oreo Dessert is a perfect way to create sweet memories. So gather your ingredients, follow the steps, and enjoy every bite of this scrumptious creation.

