Introduction
There’s something undeniably magical about homemade cookies. The aroma of warm dough wafting through the kitchen, the anticipation of indulging in a sweet treat, and the nostalgia of baking with loved ones create a sensory experience that few things can rival. Among the myriad of cookie varieties, Samoas cookies hold a special place in the hearts of many. Known for their rich flavors and delightful textures, these cookies are a cherished favorite, particularly during the Girl Scout cookie season.
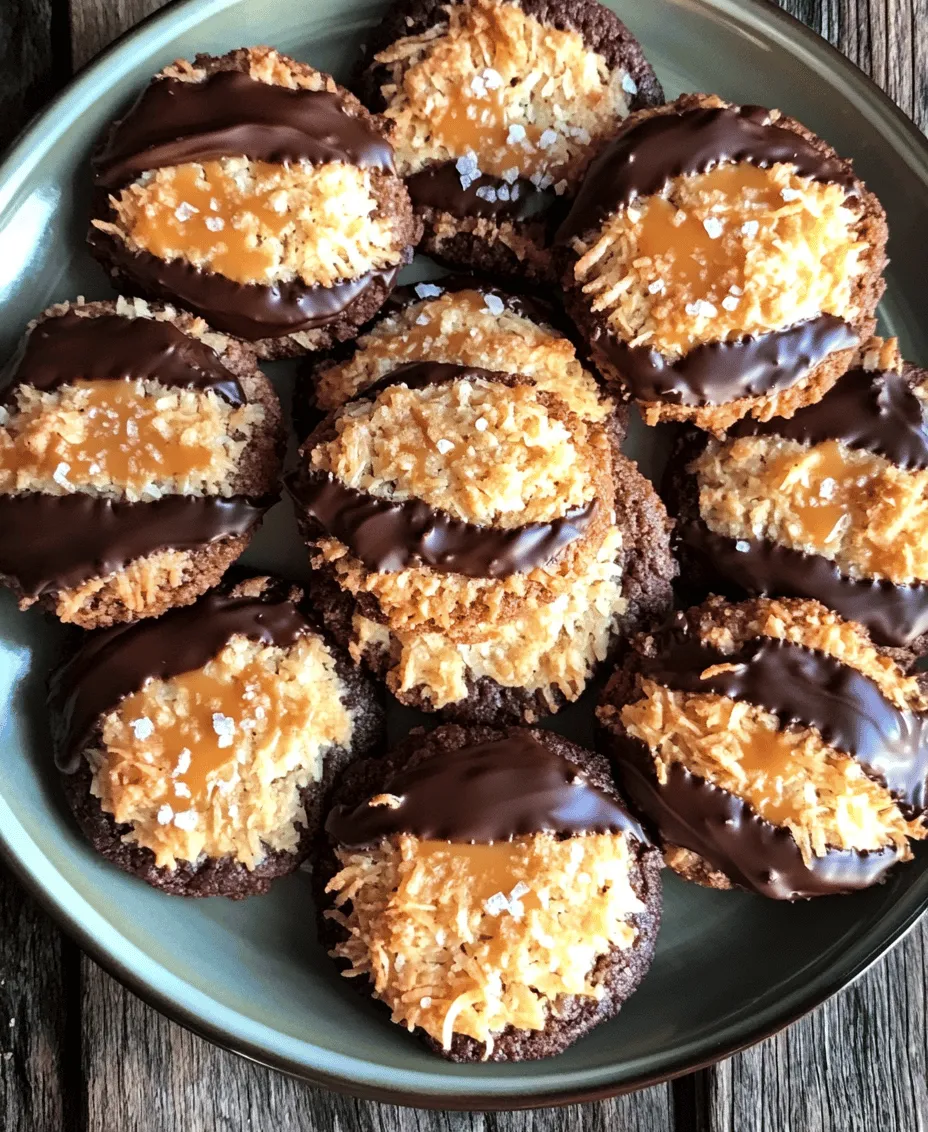
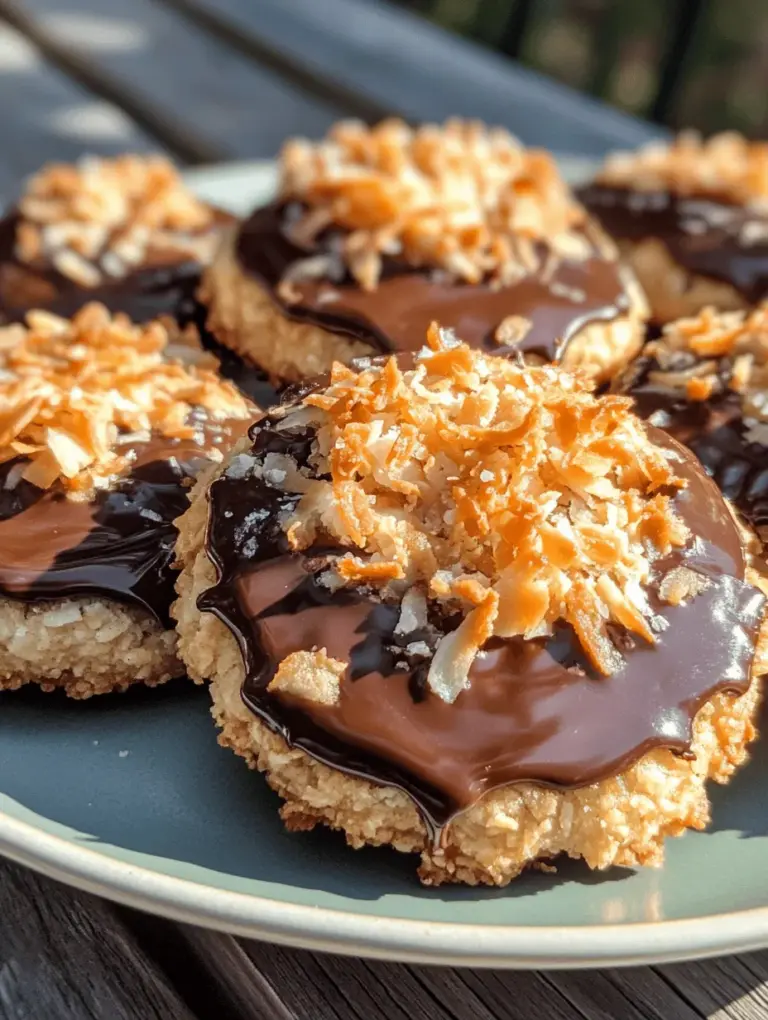
Imagine biting into a perfectly baked Samoas cookie; the exterior is crisp, giving way to a chewy, caramel-infused center adorned with a generous sprinkle of toasted coconut, all enveloped in a luscious layer of semi-sweet chocolate. The balance of textures and flavors is simply irresistible. But why wait for the annual cookie sale when you can create this indulgent treat right in your kitchen?
Making Samoas cookies from scratch not only allows you to enjoy these delicious treats whenever the craving strikes, but it also provides the opportunity to customize the ingredients to your liking. Whether you prefer a bit more coconut or a deeper chocolate flavor, the ability to adjust the recipe to suit your taste is just one of the many benefits of baking at home.
In this article, we will guide you through a step-by-step process to create your own batch of decadent homemade Samoas cookies. From understanding their rich history to breaking down the essential ingredients and providing detailed instructions, you’ll be equipped with everything you need to bring this delightful recipe to life.
Understanding Samoas Cookies
Samoas cookies, also known as Caramel deLites, are a popular Girl Scout cookie that has won the hearts of cookie lovers across the United States. These treats have become synonymous with the annual Girl Scout cookie campaign, where young entrepreneurs take to the streets to sell these beloved snacks. The unique combination of flavors—caramel, coconut, and chocolate—makes Samoas a standout choice among the selection of cookies available.
The origin of Samoas can be traced back to the 1970s, when the Girl Scouts of the USA began collaborating with bakers to create a variety of delicious cookies sold by members. The name “Samoas” is believed to have been inspired by the tropical flavors that characterize the cookie, evoking images of sun-soaked islands. The cookies are a true testament to the art of baking, capturing the essence of indulgence and celebration.
Beyond their delightful taste, Samoas cookies hold a cultural significance for many. They represent not just a delicious treat but also a childhood memory for countless individuals who eagerly awaited their local Girl Scouts to arrive with boxes in hand. Today, recreating these cookies at home allows us to relive those cherished moments and share them with new generations.
Ingredients Breakdown
To achieve the perfect homemade Samoas cookies, it’s essential to understand each ingredient’s role in the recipe. Below, we will break down the key components that come together to create this delectable treat:
– Unsalted Butter: This is the foundation for a rich and creamy dough. Using unsalted butter allows for better control over the salt content in the final product, ensuring the flavors are perfectly balanced.
– Granulated Sugar: This ingredient adds sweetness to the cookies and contributes to their texture. It helps create a tender cookie that melts in your mouth.
– Vanilla Extract: A staple in many baking recipes, vanilla extract enhances the overall flavor profile of the cookies with its warm, aromatic essence, making each bite a little more special.
– All-Purpose Flour: Flour provides the structure for the cookies, helping them hold their shape as they bake. The right amount of flour is crucial to achieving the desired consistency.
– Salt: While it may seem counterintuitive, a pinch of salt is essential in cookie recipes. It balances the sweetness and enhances the other flavors, making the cookies taste even more delicious.
– Sweetened Shredded Coconut: This ingredient is the signature element that defines Samoas. The coconut adds texture and a tropical flavor that complements the caramel and chocolate beautifully.
– Caramel Candies: These create a gooey filling that ties the flavors together. Melting the caramel ensures it spreads evenly throughout the cookie, providing that signature chewy bite.
– Milk: A small amount of milk is used to help melt the caramel, resulting in a smooth consistency that is easy to work with.
– Semi-Sweet Chocolate: This luscious coating adds a rich layer of chocolate to the cookies, enhancing their decadence and providing a delightful contrast to the sweet coconut and caramel.
– Sea Salt: While optional, a sprinkle of sea salt on top of the chocolate-covered cookies elevates the overall taste with a touch of savory contrast, making each bite an even more enjoyable experience.
Step-by-Step Instructions
Now that we have a clear understanding of the ingredients, let’s dive into the step-by-step instructions for preparing your homemade Samoas cookies. Follow these detailed guidelines to ensure your cookies turn out perfectly every time.
Preparation of the Dough
1. Creaming the Butter and Sugar: The first step in creating the dough is to cream together the unsalted butter and granulated sugar. In a large mixing bowl, use an electric mixer on medium speed to beat the butter until it is light and fluffy, which usually takes about 2-3 minutes. Gradually add the sugar, continuing to mix until the mixture is well-combined and has a pale color. This process is crucial, as it incorporates air into the dough, resulting in a lighter cookie.
2. Adding the Vanilla and Dry Ingredients: Once the butter and sugar are creamed, it’s time to add the vanilla extract. Mix it in until evenly distributed. In a separate bowl, whisk together the all-purpose flour and salt. Gradually add this dry mixture to the wet ingredients, mixing on low speed until just combined. Be careful not to overmix, as this can lead to tough cookies. The dough should come together nicely, forming a soft ball that holds its shape.
Shaping the Cookies
3. Chilling the Dough: After the dough is prepared, wrap it in plastic wrap and refrigerate for about 30 minutes. Chilling the dough helps it firm up, making it easier to handle when shaping the cookies.
4. Forming the Cookies: Once the dough has chilled, preheat your oven to 350°F (175°C). Line a baking sheet with parchment paper. Take small portions of the dough—about a tablespoon each—and roll them into balls. Place the balls on the prepared baking sheet, spacing them about 2 inches apart.
5. Creating the Cookie Shape: To achieve the signature look of Samoas cookies, use your thumb or the back of a spoon to create a small indentation in the center of each cookie. This will hold the caramel filling later on. If you prefer, you can also use a cookie cutter to create a more uniform shape, such as a ring or a round cookie.
6. Baking the Cookies: Bake the cookies in the preheated oven for about 10-12 minutes, or until the edges are lightly golden. Keep a close eye on them, as baking times can vary based on your oven. Once baked, remove the cookies from the oven and allow them to cool on the baking sheet for a few minutes before transferring them to a wire rack to cool completely.
With these initial steps complete, you’re well on your way to creating a batch of decadent homemade Samoas cookies that will delight your family and friends. In the next part of this article, we will explore how to prepare the luscious caramel coconut topping and coat the cookies in rich chocolate, further enhancing their irresistible appeal. Stay tuned for an exciting continuation of this delightful baking journey!

Chilling the Dough for Perfect Samoas Cookies
Chilling the dough is a crucial step in making homemade Samoas cookies. When you chill the dough, it allows the fats in the butter to solidify, which helps the cookies hold their shape during baking. This is particularly important for cookies that are meant to be cut into specific shapes or that require a delicate topping, as it prevents them from spreading too much in the oven. A well-chilled dough not only enhances the texture but also leads to a firmer, more structured cookie that can support the rich coconut and caramel toppings without becoming soggy.
To achieve the best results, wrap your prepared dough in plastic wrap and refrigerate it for at least 30 minutes. This brief chilling period will make handling the dough easier and will significantly improve the final shape of your cookies.
Tips for Achieving Uniform Cookie Sizes
For consistent baking and an appealing presentation, it’s essential to ensure that your cookies are uniform in size. Here are a few tips to help you achieve that:
1. Use a Cookie Scoop: A cookie scoop can help you portion out the dough evenly. This tool allows you to measure consistent amounts, ensuring uniform cookies every time.
2. Weigh the Dough: If you want to be precise, consider weighing the dough for each cookie. Aim for a specific weight that achieves your desired size.
3. Roll the Dough: If you’re rolling the dough into balls, try to make them all the same size by using your hands to gauge the amount you’re taking. Using a ruler or a template can also help you create uniform shapes before cutting.
Baking Process
Preheating the Oven and Using Parchment Paper
Preheating the oven is a vital step that should never be overlooked. Setting your oven to the appropriate temperature before placing your cookies inside ensures that they bake evenly and develop the perfect texture. For this Samoas recipe, preheat your oven to 350°F (175°C).
Using parchment paper on your baking sheets is another essential tip. Parchment paper not only prevents the cookies from sticking but also makes for easier cleanup. It creates a non-stick surface that allows the cookies to slide off effortlessly once baked, maintaining their shape and preventing any potential mess.
Recognizing Perfectly Baked Cookies
Knowing when your cookies are perfectly baked can be tricky. For Samoas cookies, look for the following signs:
– Color: The edges should be lightly golden brown, while the centers may appear slightly softer. If the entire cookie is golden, it may be overbaked.
– Texture: Press gently on the center of a cookie; it should spring back slightly without leaving an indentation.
– Time: Generally, the baking time for these cookies is about 10-12 minutes. Keep a close eye on them, especially towards the end of the baking time.
Creating the Coconut Topping
Toasting the coconut is a critical step in enhancing the flavor of your Samoas cookies. Here’s how to do it perfectly:
1. Spread the Coconut: Evenly spread shredded coconut on a baking sheet.
2. Toast: Place it in the preheated oven for about 5-7 minutes, stirring every couple of minutes to ensure even browning. Keep a close watch, as coconut can quickly go from perfectly toasted to burnt.
3. Safety Tips: Use a timer and stay nearby while toasting. If you notice any pieces starting to darken too much, remove them immediately to prevent burning.
Making the Caramel Filling
For the caramel filling, patience is key. Follow these steps to melt your caramel candies:
1. Low Heat: Place your unwrapped caramel candies in a saucepan over low heat. This will allow them to melt slowly and evenly, reducing the risk of scorching.
2. Stir Constantly: As the caramels begin to soften, stir constantly with a wooden spoon or a silicone spatula. This will help incorporate any added ingredients, like a splash of cream for smoothness, and prevent the caramel from sticking to the bottom of the pan.
3. Consistency Check: Once the caramel is fully melted and smooth, remove it from the heat immediately. It should be pourable but thick enough to hold its shape when spooned onto the cookies.
Assembling the Cookies
Assembling your Samoas cookies is where the fun begins! Follow these detailed instructions for even coverage with the coconut-caramel mixture:
1. Base Layer: Place each cookie base on a cooling rack or a parchment-lined baking sheet.
2. Spoon the Mixture: Using a small spoon or a spatula, carefully spoon the melted caramel onto each cookie. Aim for a generous layer that covers the entire surface.
3. Add the Coconut: After placing the caramel, sprinkle the toasted coconut evenly over the top, pressing down gently to ensure it adheres well. This will create a deliciously chewy topping that complements the cookie base perfectly.
Chocolate Drizzle Technique
The chocolate drizzle not only adds an aesthetic appeal but also enhances the flavor. Here’s how to do it right:
1. Melting the Chocolate: Use a double boiler or microwave to melt your chocolate. If using a microwave, heat in 30-second intervals, stirring in between, until completely melted and smooth.
2. Dipping: Once melted, dip the bottom half of each cookie into the chocolate, allowing the excess to drip off. Use a fork to help lift the cookies out and place them back on parchment paper.
3. Creating the Drizzle: For a beautiful drizzle effect, place the melted chocolate in a piping bag or a plastic sandwich bag with a small corner snipped off. Drizzle the chocolate over the topped cookies in a zigzag pattern for a stunning finish.
Cooling and Setting the Cookies
After assembling your cookies, it’s essential to let the chocolate set properly. Here’s how to ensure the best texture:
1. Cool Completely: Allow the cookies to cool at room temperature for about 30 minutes to an hour. This will give the chocolate time to harden without becoming too brittle.
2. Refrigerate for Quick Setting: If you’re in a hurry, place the cookies in the refrigerator for about 15 minutes to speed up the setting process. Just be cautious not to store them there for too long, as the chocolate can become overly firm and difficult to bite into.
Storage Tips
To maintain the freshness and quality of your homemade Samoas cookies, follow these storage tips:
1. Airtight Container: Store the cookies in an airtight container at room temperature for up to a week. This will keep them soft and chewy.
2. Refrigeration: If you prefer, you can refrigerate them for up to two weeks. Just remember that the chocolate may become firmer in the fridge.
3. Freezing: For longer storage, freeze the cookies! Place them in a single layer in a freezer-safe container, separating layers with parchment paper. They can last up to three months in the freezer. When ready to enjoy, simply thaw them at room temperature.
Nutritional Information
Understanding the nutritional aspects of your homemade Samoas cookies can help you enjoy them in moderation. Here’s a brief overview:
– Calories: Each cookie contains approximately 150-200 calories, depending on the size and the amount of chocolate used.
– Portion Control: It’s important to enjoy these treats in moderation. Pair them with a glass of milk or a cup of tea to enhance the experience without overindulging.
– Homemade vs. Store-Bought: One of the benefits of making your own cookies is that you control the ingredients. You can choose high-quality chocolate and natural ingredients, offering a more wholesome option compared to many store-bought varieties that may contain preservatives and artificial flavors.
Conclusion
Baking homemade Samoas cookies is a rewarding experience that combines simple ingredients with the joy of creating something delicious from scratch. From preparing the dough to the final drizzle of chocolate, each step is an opportunity to engage with the process and create a treat that is not only delightful to eat but also fun to share with family and friends.
As you enjoy your homemade Samoas, remember the satisfaction of knowing you crafted these cookies with care. Whether you’re celebrating a special occasion or simply indulging in a weekend treat, these cookies will surely bring smiles to those around you. Embrace the art of baking; it’s not just about the end product but the cherished memories you create along the way. So roll up your sleeves, gather your ingredients, and let the baking adventure begin!

